5 Ways to Fix Windows 10 Can’t Connect to This Network
Jun. 24, 2022 / Updated by Bessie Shaw to Windows 10
It's frustrating to receive the "Windows 10 can't connect to this network" error message. If you are also one of them, here are a couple of methods to solve the Windows 10 can't connect to this network problem, also applied to Windows 10 Creators Update, Fall Creators Update 1709 and Spring Creators Update 1803.

Method 1. Uninstall Your Network Adapter to Fix Windows 10 Can't Connect to This Network
Once you find that your Windows 10 can’t connect to the network, you could try to uninstall your network adapter. Follow these steps:
Step 1. Press Windows key + X and select Device Manager from the pop-up menu
Step 2. In the Device Manager dialog box, right-click on your network adapter and click Uninstall
Step 3. Check the Delete the driver software for this device optionand then click OK.
Step 4. Reboot your computer and Windows will automatically install the proper driver software.
Method 2. Update Network Adapter Driver
In most situations, the Windows 10 can’t connect to this network problem lies in the outdated network adapter driver. To solve it, you shall update your network adapter driver. If you are a computer novice, you’d better use a free professional driver download and update utility tool, such as Driver Talent, which could help you find out your problematic network adapter driver within a few seconds and then automatically download and install the most compatible version in two minutes.
Click the button below to free download Driver Talent.
Follow the step-by-step guide to use Driver Talent to download and update your wireless network adapter driver to solve the Windows 10 can’t connect to this network problem.
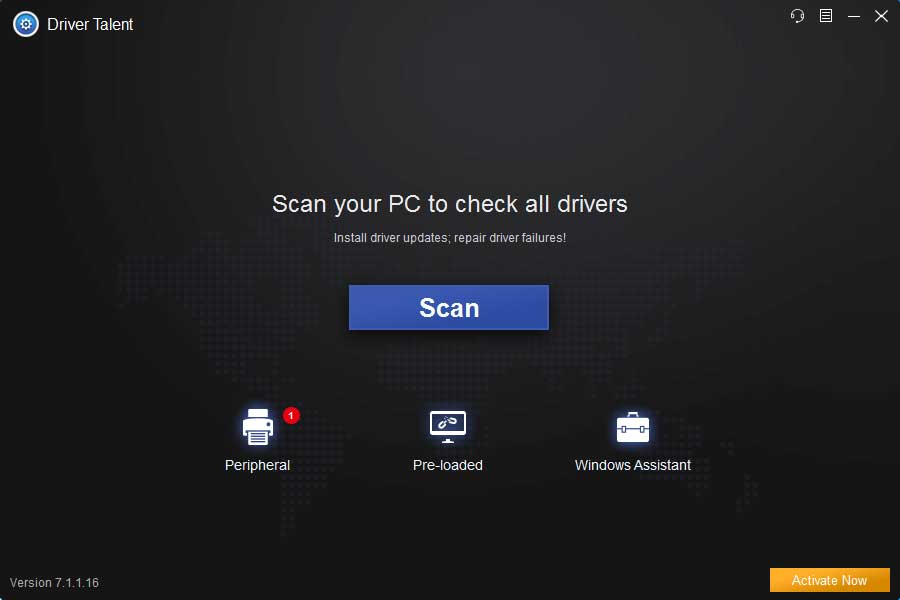
1. Scan Your PC
Open up Driver Talent. Click "Scan" to start a safe scan of your computer. Once the scan is complete, your outdated, corrupted, broken or missing network adapter driver in seconds.
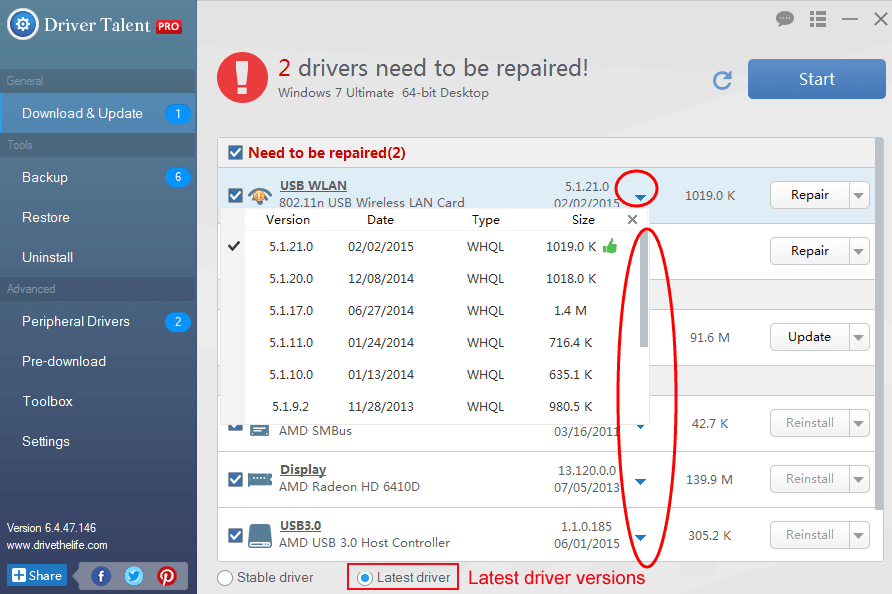
2. Update Your Adapter Driver to Fix Windows 10 Can't Connect to This Network
Your erroneous network adapter driver could be fixed by one-clicking "Repair". Driver Talent will download and install the best-matched network driver for Windows 10 behind the scene. You also have the option to update all your drivers to the latest version by click "Update". But don't update what ain't broken for stability reason.
3. Restart Your PC
Don't forget to restart your computer to make the network adapter driver update come into effect.
Note: Be sure to use Driver Talent to back up you drivers before installing any new drivers in case of driver crashes or other unexpected problems.
See Also: How to Free Download, Update Wireless Network Driver -- Fix Wireless Network Driver Problems
Aside from drivers download and update, Driver Talent involves other premium features, such as drivers restore, drivers uninstall, drivers pre-download for another PC, PC Repair (no sound, no video, no Wi-Fi, etc.), hardware detection, VR support check and PC speed up, etc.
Method 3. Disable IPv6
You could also try to disable IPv6 to resolve the Windows 10 can't connect to this network problem issue. Just do the following steps:
Step1. Hold down Windows key + R altogether to open the Run command
Step 2. Type ncpa.cpl and hit Enter
Step 3. Right-click on your network adapter and click Properties
Step 4. Uncheck the Internet Protocol Version 6 (TCP/IPv6) check box and then click OK
Method 4. Use Network Troubleshooting Commands
If the Windows 10 can't connect to this network issue still persists, you could run the network troubleshooting commands. To do it, take the following steps:
Step 1. Press Windows key + X simultaneously, and select Command Prompt (Admin) from the list of results
Step 2. In the command prompt window, run the following commands in the listed order and then hit Enter
netsh winsock reset
netsh int ip reset
ipconfig /release
ipconfig /renew
ipconfig /flushdns
Note: There is a space between ipconfig and the slash.
Step 3. Close the Command Prompt window once the commands have been successfully executed
Step 4. Reboot your computer
Method 5. Run Windows Network Troubleshooter
You could also try to run the Network troubleshooter to diagnose the connection problems and then fix the Windows 10 can't connect to this network bug. You need to do the following:
Step 1. Go to Search, type network troubleshooter in the search box and then select Identify and repair network problems from the listed results
Step 2. Follow the steps in the troubleshooter and let the process finish and see if it can fix the Windows 10 can't connect to this network problem
These network-related posts may also interest you:
5 Ways to Fix WiFi “No Internet, Secured” Issue on Windows 10
Fix LAN (Local Area Network) Not Working on Windows 10 Creators Update
If you have some questions about the fixes for the Windows 10 can’t connect to this network error, please feel free to drop a line or two in the comments section below.

|
ExplorerMax |

|
Driver Talent for Network Card | |
| Smart and advanced file explorer tool for Windows platforms | Download & Install Network Drivers without Internet Connection | |||
| 30-day Free Trial | Free Download |