How to Set Up a Printer in Windows 10
Jun. 23, 2022 / Updated by Bessie Shaw to Windows 10
Want to quickly print something with your new printer? You need to set up your printer to your computer. It’s not complicated. This post will introduce how to set up a printer in Windows 10.
Connect a Printer in Windows 10
The most common way to connect a printer to your Windows 10 computer is through a USB cable, which makes it a local printer. Below are steps for connecting a printer in Windows 10.
Step 1. Plug the USB cable to connect the printer to your computer, and then turn on this printer
Step 2. Head to the Start menu and select Settings
Step 3. Select Devices
Step 4. Select Printers & scanners
Step 4. Select Add a printer or scanner in the Printers & scanners menu
Step 5. Once Windows detects your printer, click on the name of this printer and follow the on-screen instructions to complete the printer installation process
Add a Wireless Printer in Windows 10
You can also add a wireless printer in Windows 10 or install a network printer connected to another Windows 10 computer on your network. Follow these steps:
Step 1. Press Windows key + Q to bring up Cortana
Step 2. Type in Printer
Step 3. Select Printers & scanners
Step 4. Turn on your printer and. Click Setup and then select Wireless LAN Settings through your printer's LCD panel
Step 5. Select your Wi-Fi network and enter password to connect your printer to the Wi-Fi network
Step 6. Select Add a printer or scanner
Step 7. Select your printer name and click Add device
Note: Windows will ask for printer drivers during the install if there’s no printer drivers installed on your Windows 10 computer, please refer to: Top 3 Methods to Download and Update Printer Drivers on Windows 10, 8.1, 8, 7, Vista, XP
Update Windows 10 Wireless Network Printer Driver
To keep your printer working properly constantly, you’d better update your printer driver from time to time. You could head to your printer manufacturer's official website to manually download the Windows 10 printer drivers for your printer, but this method is quite tedious and time-consuming. It’s recommended to use a reliable driver update utility tool, such as Driver Talent, reviewed as the safest and fastest way to update drivers, which could identify your outdated, broken or missing printer driver in seconds and then automatically download and install the most updated version within a few minutes.
Click the button below to free download Driver Talent directly.
Here’re 3 easy steps to download and update the appropriate Windows 10 printer driver with Driver Talent.
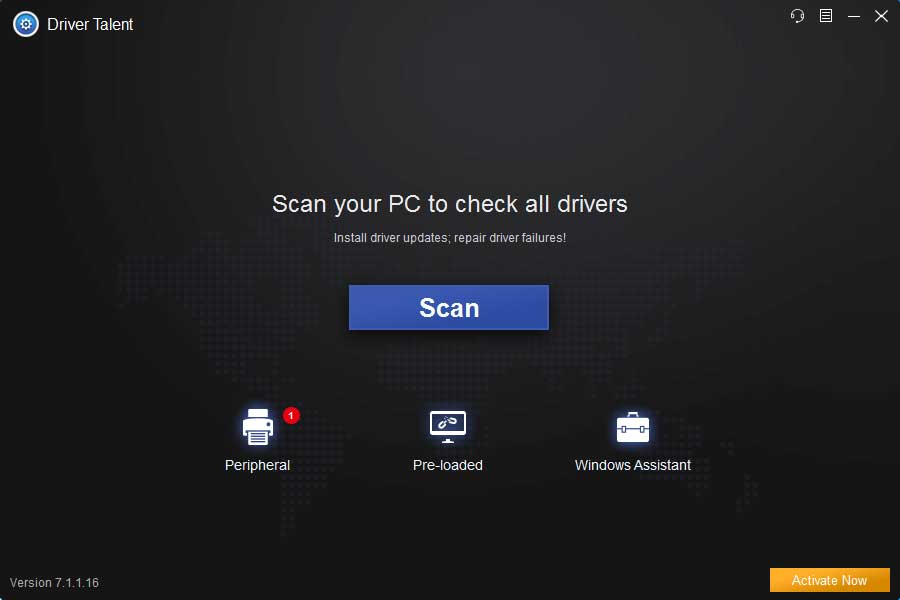
1. Scan Your PC
Click “Scan” to perform the scanning process of your computer. Driver Talent will list all your outdated, corrupt, broken or missing drivers.
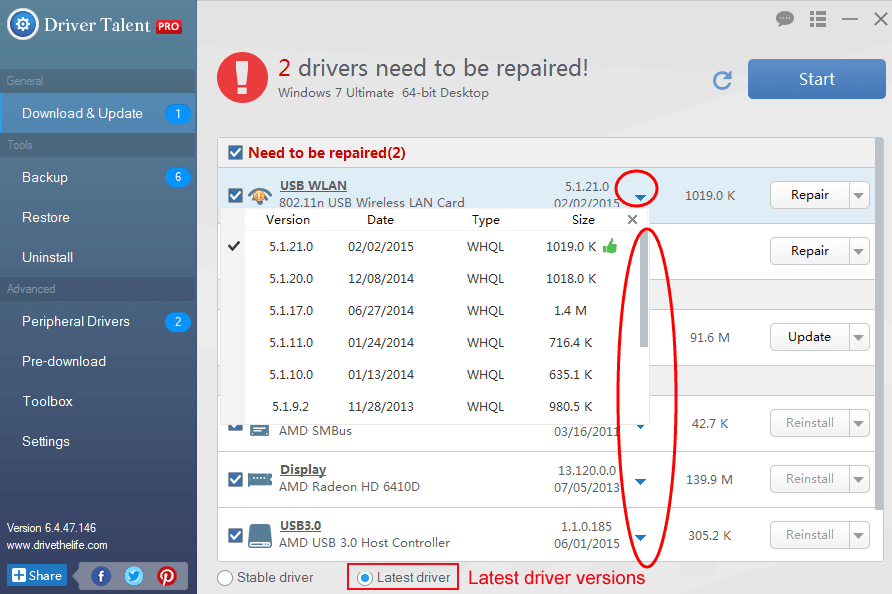
2. Download and Update Wireless Printer Driver
Click “Repair” to fix the faulty printer driver. Driver Talent will automatically download and install the best-matched printer driver behind the scenes. You’re also allowed to click “Update” to update all your drivers to the latest version. But it’s suggested that don’t update what ain’t broken for stability performance.
3. Reboot Your PC
Reboot your PC to allow changes to take effect.
You may also like to check out:
Only 3 Steps to Download & Install Network Printer Driver on Windows PC
2 Methods to Download and Update HP Printer Drivers on Windows 10, 8.1, 8, 7, Vista, XP
Brother Printer Drivers Free Download & Update for Windows 10/8/7/XP/Vista
HP Deskjet 2050 Driver Download and Update for Windows 10/8.1/8/7Vista/XP
Note: It’s vital that back up you drivers with Driver Talent before installing any new printer driver in case of driver crashes.
Aside from being a driver download and update software program, Driver Talent packs other premium features, such as drivers restore, drivers uninstall, system restore, drivers pre-download for another PC, PC Repair (no sound, no video, no Wi-Fi etc.), hardware detection, VR support check and PC speed up, etc.
If you run into any problems during the process of setting up a printer in Windows 10, please make comments below for further assistance.

|
ExplorerMax |

|
Driver Talent for Network Card | |
| Smart and advanced file explorer tool for Windows platforms | Download & Install Network Drivers without Internet Connection | |||
| 30-day Free Trial | Free Download |