5 ways to fix android emulator BlueStacks not working problem on Windows 10
Jul. 03, 2025 / Updated by Renata to Windows 10
BlueStacks App Player is an Android emulator on PC, which allows you to run Android software, games, etc. using Android programs directly on computer. It is a software that allows Android applications to run on Windows systems, launched by BlueStacks. The new version of BlueStacks App Player uses a technology called Layercake, which allows Android applications developed for ARM processors to run on PCs or tablets based on x86 processors, and can call the graphics card of the computer, providing a smoother experience than the Alpha version.
In order to resolve BlueStacks crashing or freezing problem, you can try these solutions:
Solution2. Update Graphics Driver
Solution3. Remove Antivirus software
Solution4. Rollback Windows Update
Solution5. Turn Off Hyper V Service
Solution1. Update BlueStacks
One of the reason triggered BlueStacks not working is the version of BlueStacks too old to run. If you haven’t updated the BlueStacks for a long time, then it’s very likely that launch BlueStacks and come up with crashing. You can re-install it at least once. Before you reinstall BlueStacks, you should delete all documents and files to avoid program conflict. Nevertheless, these are the steps you need to follow to reinstall BlueStacks with the latest version of Windows 11.
To uninstall BlueStacks:
1. Press the WIN+S to open search bar
2. In the search bar, type Control Panel and press enter
3. Click on “Uninstall a Program”
4. Right-click on BlueStacks and select uninstall
After uninstalling, check the file folders and make sure you have cleared all documents.
Go to e BlueStacks official website and download the latest version of e BlueStacks.
Solution2. Update Graphics Driver
An outdated graphics driver can cause many problem, for example:
1. The Windows system is obviously stuck, but it will not crash
2. For some software, the outdated graphics card driver will cause the software not to work normally
3. I feel stuck and not smooth when playing games, and I can't even enter the game
4. When running PS or video processing software, it will run super slow or crash
5. A blue screen appears
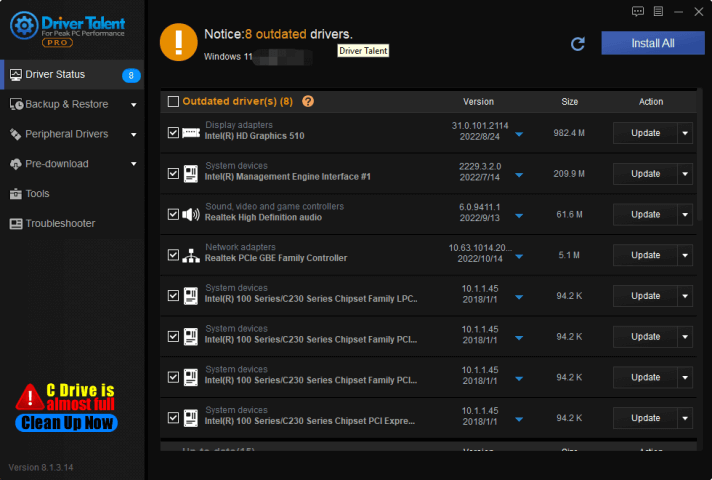
If you are not familiar with computer application settings or modifications. It is highly recommended to download a driver updater software, Driver Talent, so as not to make your computer worse.
Driver Talent is a free software for those who affected by outdated driver, driver missing files and driver corrupted issues. Thousands of drivers are configured in the software, suitable for Windows 11, Windows 10, Windows 8, is also suitable for desktop and laptop. Check which drivers need to be updated and which drivers can be backed up and reinstalled for free.

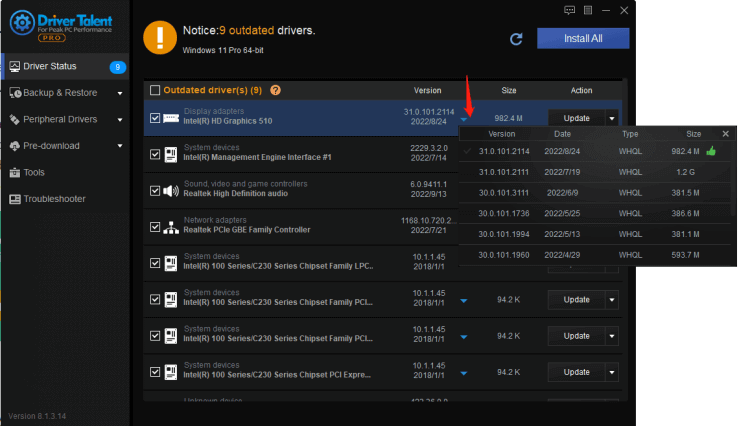
Sometimes the driver automatically downloaded by the computer does not solve the problem. For this stubborn driver problem, Driver Talent provides various driver versions for download, unlike other driver updater providing the latest version for choose.

Solution3. Remove Antivirus software
Most issues originating from BlueStacks are caused by third-party antivirus software. The disadvantages of third party antivirus software:
1. Antivirus software will delay the startup speed obviously
2. Antivirus software occupies computer memory. Generally, the Antivirus software is also started after booting, so that it takes up memory.
3. Some anti-virus software consumes CPU a lot when running on background
Anti-virus software has a high rate of stopping regular software, which means an antivirus software could stop BlueStacks to launch.
Therefore, if you want to fix BlueStack’s crashing problem you can try to uninstall these anti-virus programs.
Solution4. Rollback Windows Update
Does the BlueStacks not working happen after the Windows update? The new Windows update might not compatible with BlueStacks and result to BlueStacks not workig.
If the BlueStacks not working happen after the Windows update, you can wait for the next updating of Microsoft. However, you can recovery Windows to a former version.
1. Press WIN+I together and open Settings
For Windows 11:
2. Choose Windows update-advanced options
3. Scroll down and click Recovery
4. Get start to recovery
For Windows 10:
2. Choose Update and Security
3. Click Recovery
4. Get started
Solution5. Turn Off Hyper V Service
BlueStacks will crash on a Windows 11 PC if you have kept the Hyper-V option enabled.
Turning off the Hyper V service is one of the best ways to fix BlueStacks crashing on Windows 11 computer. Although closing this software affects computer performance and user experience, it is only slightly affected.
The following methods can disable Hyper V services:
1. Press WIN+S together and type CMD(command prompt will show)
2. Run the Command Prompt as administrator( click Run as administrator)
3. Type the below-mentioned code and press enter:
bcdedit /set hypervisorlaunchtype off
4. It will take a few seconds to disable the Hyper-V service.
In another method
1. Go to Control Panel > Uninstall a Program.
2. Click on “Turn Windows features on or off”.
3. Uncheck the “Windows Hyperversion Platform”, and click on OK.

|
ExplorerMax |

|
Driver Talent for Network Card | |
| Smart and advanced file explorer tool for Windows platforms | Download & Install Network Drivers without Internet Connection | |||
| 30-day Free Trial | Free Download |


