How to Fix "Failed to play test tone" on Windows 10
Jun. 23, 2022 / Updated by Bessie Shaw to Windows 10

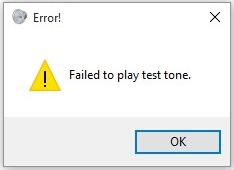
Are you blocked by the "Failed to play test tone" error message while you are testing your speaker or headphones? This error message may appear when there's a problem between the sound device you're using and the Windows OS. Most often, you would encountered it when you're struggling with the no sound problem and you want to check if your sound device is working.
The "Failed to play test tone" error could be caused by many factors such as incorrect sound configuration, corrupted Windows files, and corrupted or outdated audio driver. If you receive the "Failed to play test tone" error message, don't trouble yourself about it. Here are several possible solutions to help you get rid of the error. Read on to try them one by one until you troubleshoot it.
Method 1. Restart Windows Audio Service
The first possible solution to the "Failed to play test tone" error is to restart the Windows Audio service. It's the easiest way. You just need to:
Step 1. Press the Windows and R keys simultaneously to open the Run dialog box.
Step 2. Type "services.msc" into the box and hit Enter to run it.
Step 3. Scroll down to locate the Windows Audio service. Right click on it and select Restart from the pop-up menu.
Then the operating system will restart the Windows Audio service. And you can check if the "Failed to play test tone" error message is gone.
Method 2. Disable All Audio Enhancements
If method 1 doesn't work, the next method you can try is to disable all audio enhancements. Do as follows.
Step 1. Right click on the sound icon in the notification area on the taskbar and select Playback devices.
Step 2. In the "Playback" tab, select Speakers and click on Properties.
Step 3. Get to the Enhancements tab. Check "Disable all enhancements", and then click on Apply and OK to save the change.
Method 3. Change the Audio Format
As we mentioned above, incorrect sound configuration would cause the "Failed to play test tone" error. In this case, you might be able to resolve the issue by changing the audio format. Take these steps:
Step 1. Right click on the sound icon in the notification area on the taskbar and select Playback devices.
Step 2. In the "Playback" tab, select your sound device and click on Properties.
Step 3. Get to the Advanced tab. Select a different sample rate and bit depth in the Default Format section, and click on Apply and OK to save the change. Then check if your sound is working properly.
You may have to test several times to find the proper audio format that works for you. If this method doesn't work, you'd better click the Restore Defaults button to restore your audio settings.
Method 4. Add the Local Service in Local Users and Groups
This method doesn't seem to be relevant to the issue, but some users reported that it worked. Just give it a try.
Step 1. Right click on This PC and select Manage.
Step 2. Double click on Local Users and Groups under the System Tools section in the left pane.
Step 3. Click on Groups under Local Users and Groups, then right click on Administrators in the right pane and select Add to Group... from the pop-up menu.
Step 4. Click on Add..., then Advanced..., and then Find Now.
Step 5. Click on LOCAL SERVICE in the search results, and then click on OK.
Step 6. You should see LOCAL SERVICE in the box. Click OK and close the window.
Step 7. Restart your PC and check if the "Failed to play test tone" error is resolved.
Method 5. Reinstall Your Audio Driver
Corrupted or outdated audio driver can also result in the presence of the "Failed to play test tone" error. Therefore, if you want to get rid of this error, you can also try to reinstall your audio driver. To do this, you need to uninstall your audio driver in Device Manager first. Then restart your PC, and Windows will automatically reinstall the audio driver for you. Or you can use the professional driver update utility - Driver Talent to help you update your audio driver. The steps are quite simple. Click on the download button below to try it right now.
Step 1. Start Driver Talent and click on the Scan button to perform a full scan on your PC.
Step 2. If your audio driver is detected as outdated after scanning, click on the Update button on the right to update it.
Step 3. Restart your PC once the update is completed.
Method 6. Perform an SFC Scan to Detect Corrupted Windows Files
The "Failed to play test tone" error may occur if there are corrupted Windows files on your computer. To detect and repair corrupted Windows files, the SFC tool can be helpful to you. For more details, please refer to this post: How to Fix Corrupted System Files with SFC /scannow in Windows.
If the "Failed to play test tone" error still exists after you try all the methods listed above, leave comments below to let us know. For more solutions to other Windows 10 errors, you can visit the Windows 10 section on this site.

|
ExplorerMax |

|
Driver Talent for Network Card | |
| Smart and advanced file explorer tool for Windows platforms | Download & Install Network Drivers without Internet Connection | |||
| 30-day Free Trial | Free Download |


