How to Uninstall Windows 10 Quality Updates via Advanced Start-up
Jun. 16, 2022 / Updated by Bessie Shaw to Windows 10
Microsoft releases quality updates (also known as cumulative updates) to the Windows 10 series every month. These updates may come with various bugs. Although these bugs are not serious in most cases, sometimes they may also lead to system crashes, Blue Screen of Death (BSoD), and other issues that seriously affect the normal use of computers. For example, the recently-released Windows 10 update KB4541335, which was rolled out for Windows 10 version 1909 and 1903, was reported to cause a blue screen error “whea_uncorrectable_error”.
It may take the better part of a month for Microsoft to fix these bugs. In our experience, the easiest and most straightforward solution is to remove the newly-installed Windows 10 quality update that caused issues. In System Updates, Microsoft instructs users to uninstall updates by going to Control Panel > Programs and Features > View installed updates. However, many cumulative updates can't be found in Control Panel because it only provides regular definition updates such as system component updates, .NET updates, and Adobe Flash Player updates. So it’s almost impossible to directly uninstall the Windows 10 quality updates released every month through Control Panel. What shall we do then?
Don’t worry. Most versions of Windows 10 now support uninstalling newly-installed updates via the Advanced start-up environment. With the help of this feature, we can easily remove the problematic updates directly and have the system back to normal. Here’s the guide for you.
How to Remove Windows 10 Quality Updates via Advanced Start-up?
To uninstall a problematic Windows 10 quality update via Advanced start-up, you can follow the steps below.
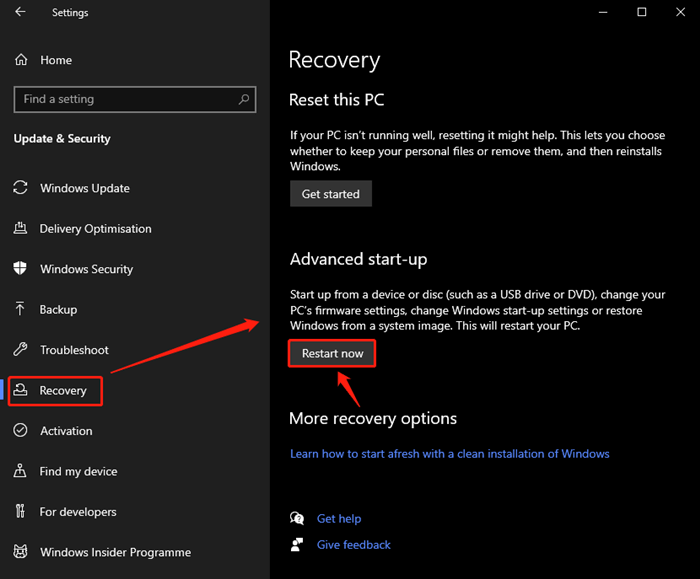
Step 1. Navigate to Settings > Update & Security > Recovery > Advanced start-up, and click on the “Restart now” button.
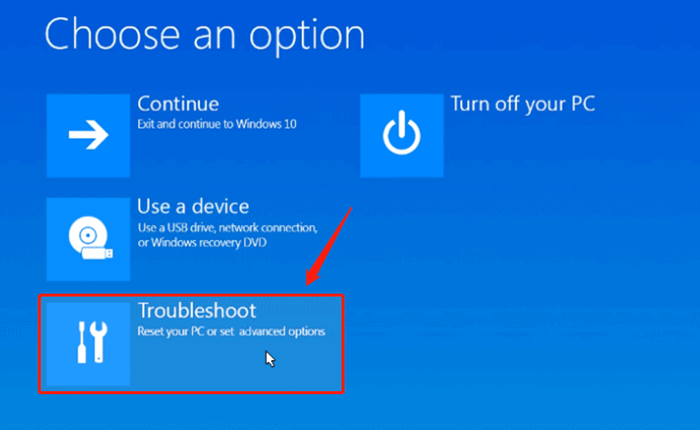
Step 2. Select Troubleshoot after entering the Advanced start-up screen.
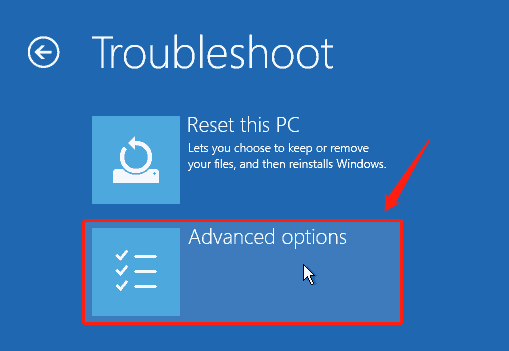
Step 3. Select Advanced options.
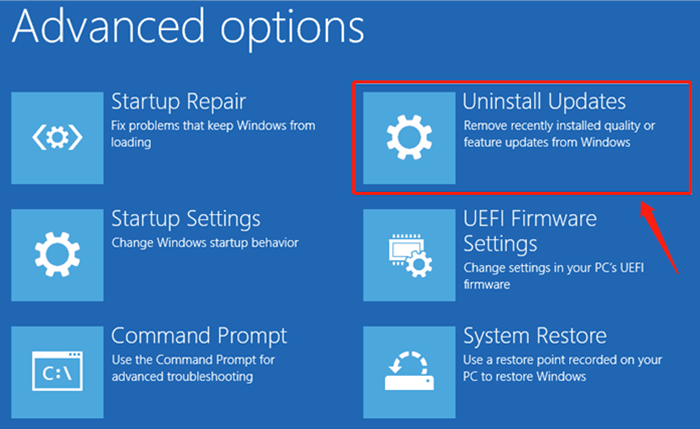
Step 4. Select Uninstall Updates.
Step 5. Select Uninstall latest quality update.
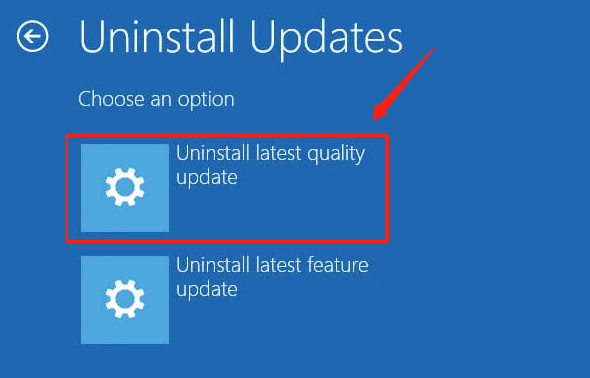
Step 6. Click on the Uninstall quality update button. Then the system will remove the latest installed cumulative update from your computer.
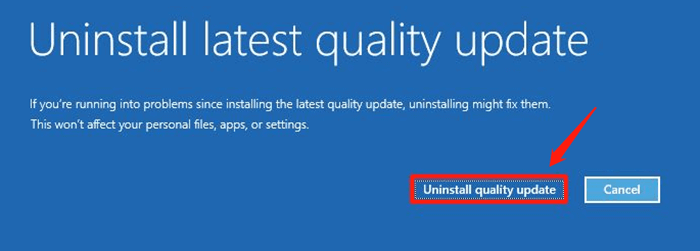
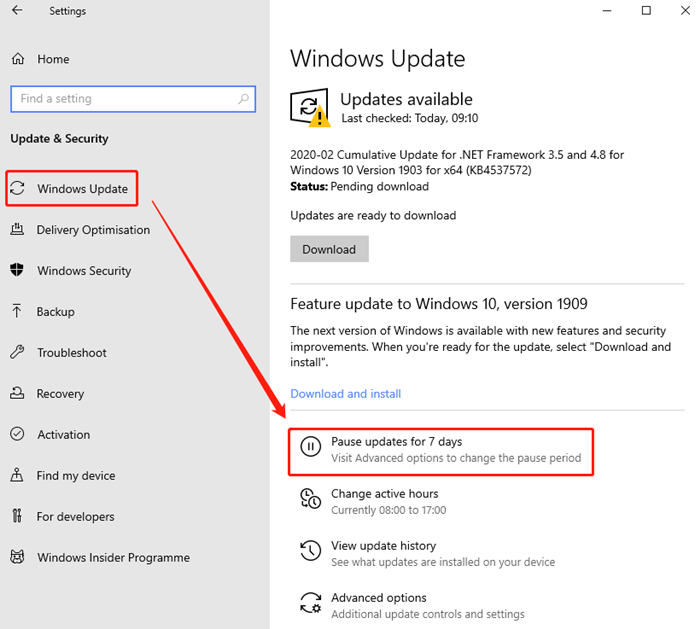
The Windows 10 system will automatically restart when all operations are done. Then you computer shall return to the normal state. After the uninstallation is completed, you’d better pause updates in Windows Update to prevent problematic quality updates from being automatically installed again.
That’s it. If you have any questions about uninstalling Windows 10 quality updates, you can drop us a line or leave your comments below. We’ll try our best to help you out.

|
ExplorerMax |

|
Driver Talent for Network Card | |
| Smart and advanced file explorer tool for Windows platforms | Download & Install Network Drivers without Internet Connection | |||
| 30-day Free Trial | Free Download |


