Can't hear any sound on your computer? It can be very frustrating both at play and at work. Don't worry, we are here to help you.
In this article, we'll cover 7 quick and easy ways to fix sound issue on Windows. Though our tips are focused on Windows 10, most of them apply to Windows 11 as well. Now scroll down to find more details.
Contents:
1. Using the Right Audio Output
2. Try the Windows Audio Troubleshooter
3. Uninstall Device or Update Driver
4. Check All Audio Cables and Wireless Connections
5. Disable Windows Audio Enhancements
6. Restart Windows Audio Services
1. Using the Right Audio Output
Don't take this as nonsense. If you have multiple audio output devices connected to your computer at the same time, Windows is probably not using the right output to play sound.
You can click the Volume icon to change the device being used for playback. You can see the name of the current device above the volume slider. Then click it to open a menu of all available devices, choose the one you want to apply.
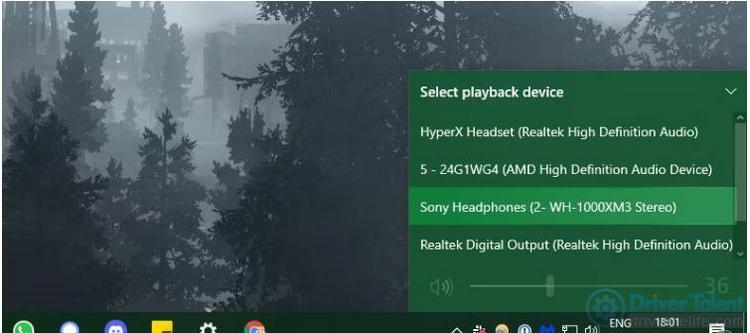
You can also right-click the Volume icon and choose Open Sound settings to see the whole list of audio devices connected to your PC.
Under the Choose your output device, click Manage sound devices to see everything that's connected to your computer. Remember to check the volume level after changing the output device. Check the Disabled section to make sure you haven't turned off the device you want to use.
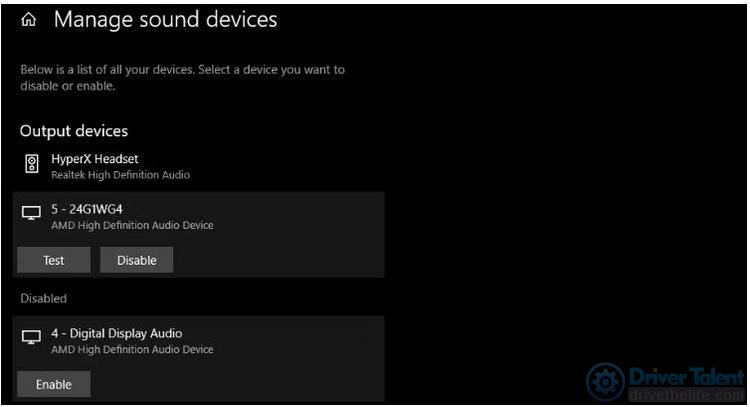
Then to check if it’s working now.
2. Try the Windows Audio Troubleshooter
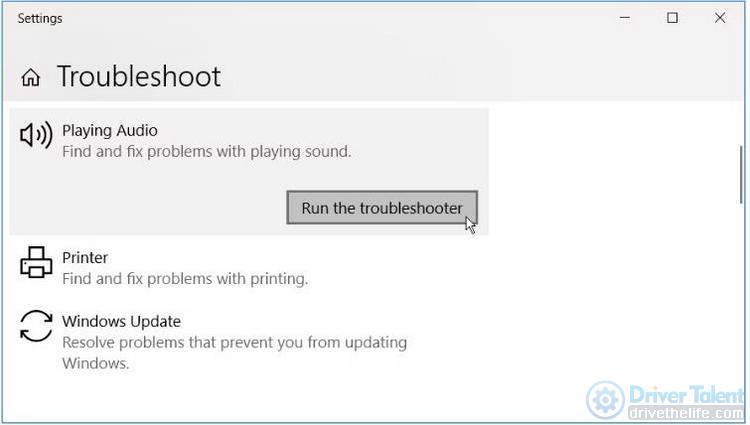
Before going any further, it is also a wise way to run the built-in audio troubleshooter first. This enables windows 10 to pinpoint the issues and fix it for you. It did work sometimes.
Head to Settings > Update & Security > Troubleshoot > Additional troubleshooters and select Playing Audio. Follow the on-screen instructions, the Windows might resolve the problem automatically. You'll see what fixes the troubleshooter applied when it's done.
3. Uninstall Device or Update Driver
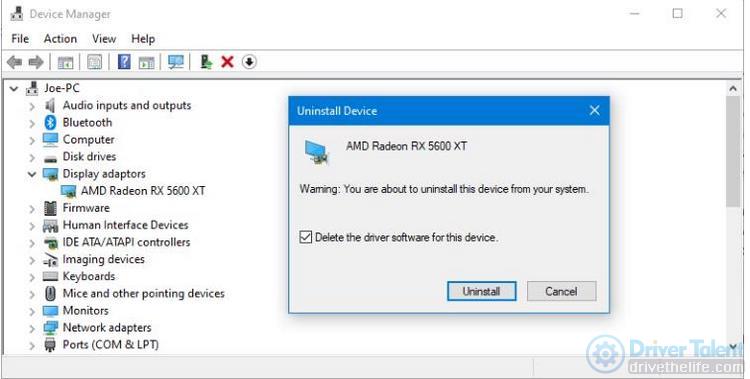
Firstly, let’s assume there's no need to update any driver. Then you should choose Uninstall Device. This will remove the offending driver to help you reinstall a fresh copy.
Before proceeding with the uninstall, remember to find and download the latest version of the driver on the official website, if there is available.
Then follow the steps:
01. Click Uninstall Device in the Properties window to open the Confirm Device Uninstall box;
02. If the window contains an option to Delete the driver software for this device, click it;
03. Once you've wiped the drivers, restart the system and download a new one.
If you don’t want to go through so much trouble, you can always find an easier way to do this--DriverTalent. As a high-efficiency driver update helper, it can update and install the most up-to-date driver for your computer. And it can completely scan your computer for old, damaged, and missing drivers to find where their problem is, then to fix it. If you are interested now, click here to try it:
Now, since you have downloaded it, follow me on this:
01. Scan the drivers;
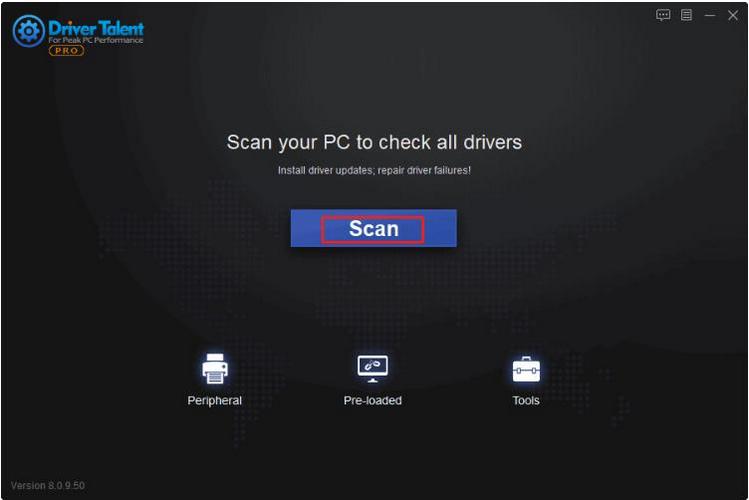
02. Choose the outdated audio driver and update it.
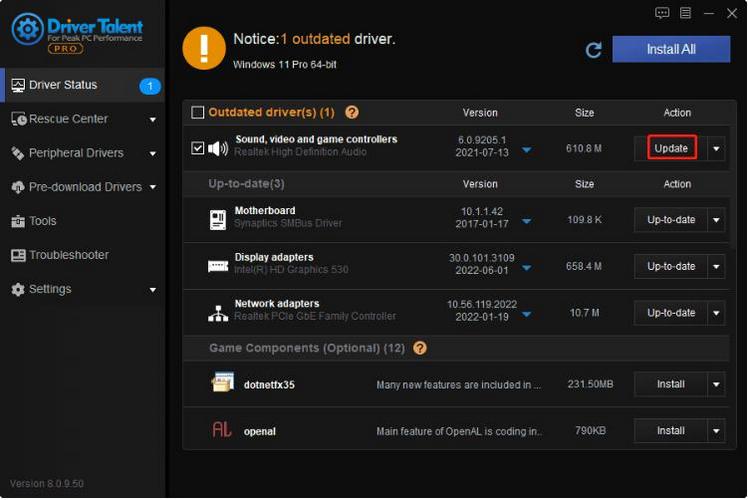
03. Restart the computer to see if the problem persists.
You can even save more energy with it-- you can update the outdated drivers with just one simple click, which requires the Pro version. If you bought Pro version, you can enjoy the full features of the DT. And a 30-day money back guarantee makes your trial experience has nothing to worry about. What’s more, Pro version comes with full technique support, their powerful technique team can solve your problems online whenever you are in need. Surprisingly, the DriverTalent can do more than mentioned above, other issues involved Motherboard, Network card, Display card, Audio card, USB WLAN card and so on, can also be taken care of.
4. Check All Audio Cables and Wireless Connections
If your desired output didn’t show up on the device menu, then maybe you need to check the physical connections of all your audio devices.
Ensure all audio (and power) cables are firmly plugged into the computer, as well as into the device. It's also suggested to unplug and reconnect everything, just to double check there are no loose connections. Generally, audio output devices should go into the green port, which sometimes pop out a headphone icon.
For wireless audio devices like headphones, visit Settings > Devices > Bluetooth & other devices and make sure you've paired your device to your computer properly.
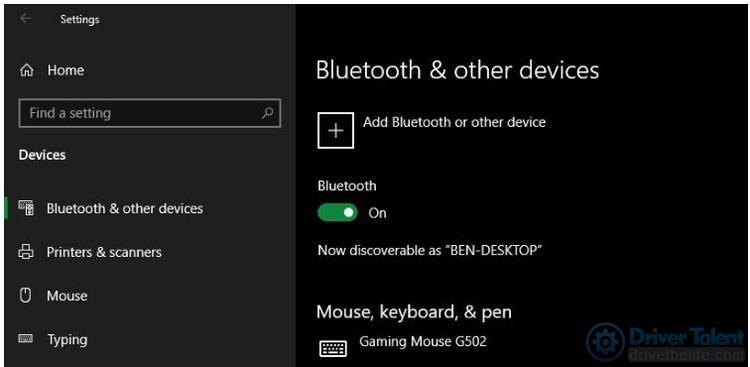
If any other wireless devices are being used to connect with your phone, tablet, TV, or similar, disconnect them first, then try connecting them to your Windows PC again.
If this didn’t help, don’t be upset, just try another way.
5. Disable Windows Audio Enhancements
Audio Enhancement is Microsoft's built-in package designed to enhance the user's sound experience in a variety of ways. However, these "enhancements" may be the cause of your Windows 10 audio problems. Fortunately, they are easy to shut down.
Just try these steps:
01. Right-click on the speaker icon in the System Tray and select Sounds to open the Control Panel's Sound window;
02. Switch to the Playback tab and double-click on the audio device you're using;
03. In the next window, click the Enhancements tab;
04. Check the box labeled Disable all enhancements if it isn't already, then hit Apply;
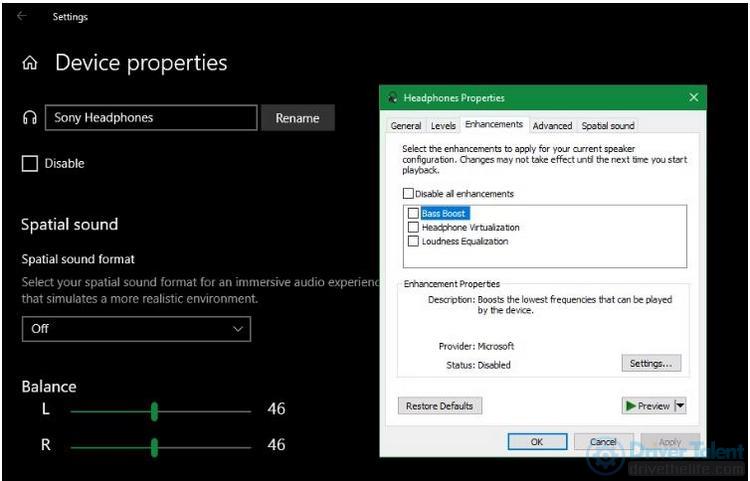
05. Right-click it and choose Set as Default Device.
Finally, to check your audio sound status.
6. Restart Windows Audio Services
If the problem remains, then you should consider the reason may falls on a behind-the-scenes Windows problem with services. Type Services into the Start menu to find and open the services manager. Scroll down to Windows Audio. Your system audio won’t function correctly if the service isn’t running. Double-click and select Start to enable it.
While you're here, double-check the service's Startup type. Audio services should be set to Automatic by default. If it is anything different, you should change it back.
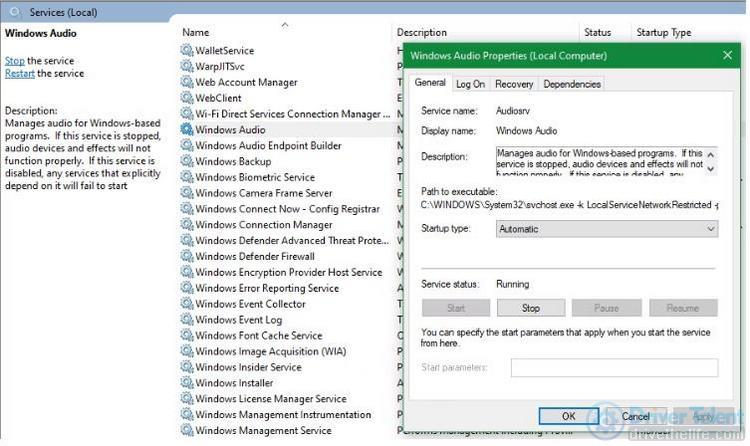
Also don’t forget to check Windows Audio Endpoint Builder in the same way, if the problem lies in here, the audio still cannot work.
So far we have covered all the methods. Hope you found this helpful. If you have any questions or new ideas to share, feel free to leave your comments in the comments section.


