
A non-functional keyboard on your Dell laptop is a major interruption to your work. This common issue is rarely a sign of permanent hardware failure; it is most frequently caused by software conflicts, outdated drivers, or simple setting errors.
To get your Dell laptop keyboard back to full functionality, this guide provides a systematic set of solutions, starting with the most efficient way to resolve driver-related conflicts.
Part I: Driver and Software Integrity
Keyboard failures, especially those occurring after a recent Windows update, are typically rooted in corrupted or incompatible drivers.
Method 1: Automated Driver Update with Driver Talent X
Manually updating keyboard, chipset, and Human Interface Device (HID) drivers can be tedious and prone to error. A specialized driver utility automates this process, ensuring that the necessary input and system drivers are perfectly compatible with your Dell hardware and Windows version.
Preparation: Use an external working mouse or the on-screen keyboard (search for "On-Screen Keyboard" in the Start Menu) to navigate. Download and install the Driver Talent X application.
Run Scan:
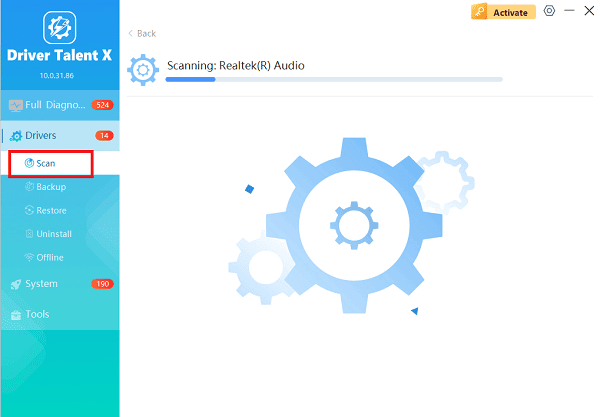
Launch the application and go to "Drivers" > "Scan", click "Scan".
The software will perform a deep analysis of your system, focusing on peripheral and controller drivers.
Install the Update:
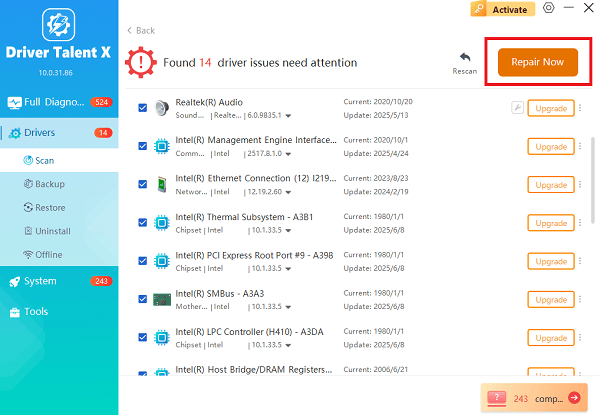
After the scan is complete, the software will display a list of all drivers that need attention.
Select the necessary drivers and click the "Upgrade" or "Repair Now" button. Driver Talent X will download the latest, certified versions specific to your Dell model.
Restart Your PC:
Once the installation is complete, restart your computer.
The new drivers should load correctly, resolving the keyboard conflict.
Method 2: Reinstall Keyboard Driver via Device Manager
This method forces Windows to forget the old driver installation and load a fresh copy upon scanning.
Press Windows Key + X and select "Device Manager".
Expand the "Keyboards" category.
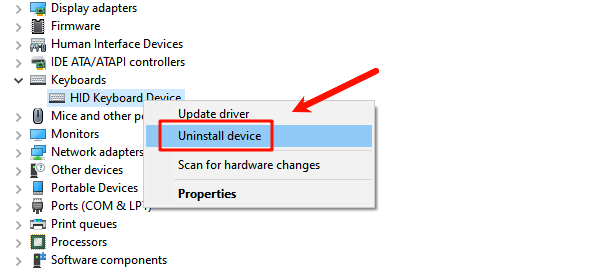
Right-click on your keyboard entry (often labeled as "HID Keyboard Device" or "Standard PS/2 Keyboard").
Select "Uninstall device". Do NOT check the box that says "Delete the driver software for this device".
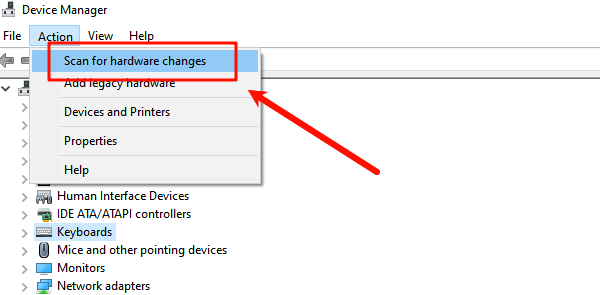
In the Device Manager menu, click "Action" > "Scan for hardware changes". Windows will automatically detect the uninstalled device and load a fresh default driver.
Restart the laptop to confirm the fix.
Part II: Hardware and Settings Checks
If driver fixes fail, the issue may be due to an accidental physical lock or system settings interference.
Method 1: Check Accessibility Settings
Windows accessibility features, if enabled unintentionally, can make your keyboard appear unresponsive.
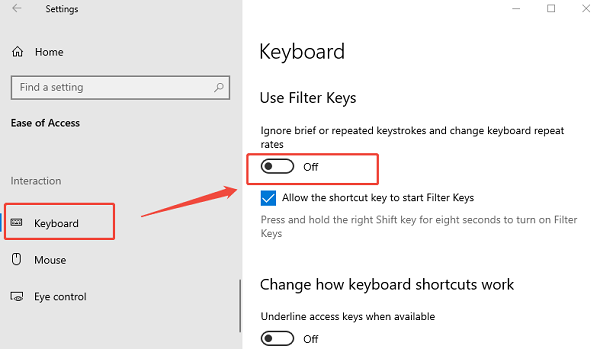
Press Windows Key + I to open Settings.
Navigate to "Ease of Access" > "Keyboard".
Ensure the "Filter Keys" toggle switch is set to "Off". Filter Keys is designed to ignore brief or repeated key presses, which is often mistaken for a faulty keyboard.
Method 2: Perform a Hard Reset
A hard reset clears residual static electricity (flea power) that can interfere with the Embedded Controller (EC) and keyboard circuits.
Disconnect Everything: Turn off the laptop, unplug the AC adapter, and disconnect all peripherals.
Hold Power Button: Press and hold the power button for 30 seconds. This drains all residual charge from the system.
Test: Reconnect the AC adapter and turn the laptop back on.
Method 3: Check BIOS Settings
In rare cases, the keyboard or specific functions may be disabled at the BIOS level.
Access BIOS: Restart your laptop and press the F2 key repeatedly when the Dell logo appears.
Find Keyboard Settings: Navigate through the menus (often under System Configuration or Advanced) to find settings for the "Internal Keyboard" or "Internal Pointing Device".
Verify Status: Ensure the status is set to "Enabled".
Save and Exit: Press F10 to Save Changes and Exit.
Conclusion
A non-working keyboard on your Dell laptop is usually a temporary software issue. The most efficient way to achieve a permanent fix is by using Driver Talent X to update the crucial system and input drivers. By combining this with a Hard Reset and verifying the Filter Keys setting is disabled, you can reliably restore full typing capability to your Dell machine.
See also:
Qualcomm Atheros QCA61x4A Driver Download and Installation Guide
Network Adapter Not Working on Windows? Try These Fixes


