Whether the driver is installed correctly directly affects whether your printer can function properly. If the driver is missing, incompatible, or installed incorrectly, it may lead to printing failures or the device not being recognized.
This article will guide you through the steps to download and install Toshiba printer drivers on a Windows system, helping you quickly restore printing functionality.
1. Preparations
Before installing the driver, make sure you have the following information:
Printer model (e.g., Toshiba eS282, e-Studio 2523A, etc.).
Your Windows OS version (e.g., Windows 10 64-bit, Windows 11, etc.).
Ensure the printer is connected to your computer via USB or network.
2. Download the Printer Driver from the Official Website
Open a browser and go to the Toshiba Business official website.
Click on "Support & Drivers".

Enter your printer model (e.g., "eS282") in the search bar and hit search.
On the results page, find the correct driver and select your Windows version (32-bit or 64-bit).
Click the "Download" button and save the driver file locally to your computer.
3. Use Driver Talent for Automatic Updates
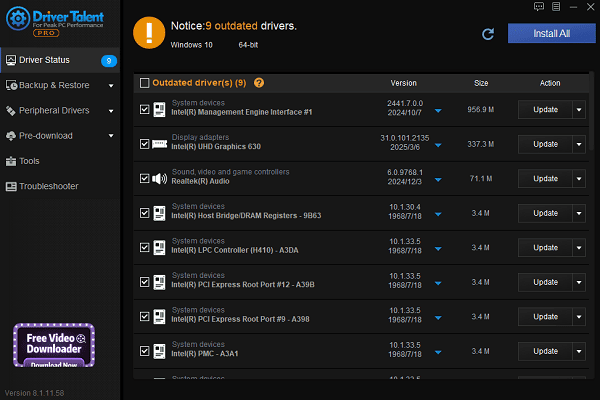
If you're unfamiliar with manual driver installation, using a driver management tool can simplify the process. Driver Talent is recommended, which automatically detects and installs the correct Toshiba printer drivers. It saves time and effort while reducing the risk of incorrect downloads or failed installations.
Click the download button to get the latest version of Driver Talent. After installation, open the program and click "Scan".
After scanning, a list of missing or outdated drivers will appear. Locate your printer driver and click "Update".

Once updated, it's recommended to restart your computer to ensure the new driver takes effect.
4. Install the Printer Driver
Method 1: Automatic Installation
Double-click the downloaded driver installer (.exe file).
Follow the installation wizard and click "Next".
Choose your connection type (USB or network), and the system will auto-detect the printer.
After the installation completes, click "Finish" and restart your computer.
Method 2: Manual Installation
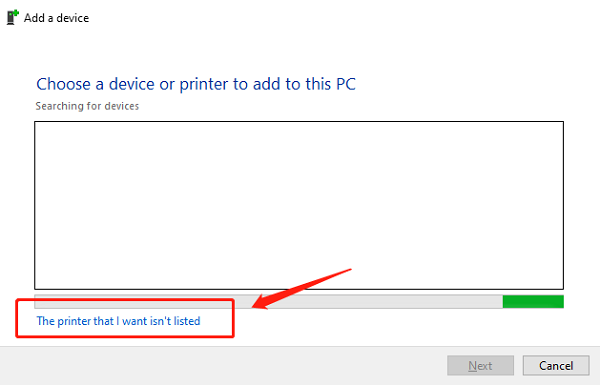
Open Control Panel > Devices and Printers > Add a printer.
Select "The printer that I want isn't listed".

Choose "Use an existing driver", then browse to the driver folder you downloaded.
Manually install the driver by selecting the correct model from the list.
5. Verify Driver Installation
Open Devices and Printers to see if your Toshiba printer appears.
Right-click the printer icon > "Print test page" to ensure it's functioning correctly.
If an error occurs, restart your computer and reconnect the printer before trying again.
By following the steps above, you can easily download and install the Toshiba printer driver on your Windows PC. Once the correct driver is installed, most printer issues can be resolved. For complex problems, consider contacting Toshiba customer support or an authorized service center for further assistance.
See also:
Canon CanoScan LiDE 100 Not Recognized? Try These Fixes
How to Fix Knup Keyboard Connection Issues – Working Driver Solutions
Canon IR2520 UFRII LT Driver Not Recognized? Try These Fixes
Can't Print with HP LaserJet M1120 MFP? Complete Troubleshooting Guide


