The Epson L565 and Epson L566 printers are popular among users for their efficiency and reliability. However, many people encounter issues such as difficulties downloading drivers or driver incompatibility when installing or updating the driver.
This article will guide you through the download methods and update steps for Epson drivers, helping you easily complete installation and upgrades to ensure smooth printer operation.
1. Why Should Update L565/L566 Drivers
Improve printing stability:
Updating the driver can fix known bugs and reduce issues like print lag or missing pages.
Enhance compatibility:
New drivers support the latest Windows operating systems, preventing driver failures caused by system upgrades.
Unlock more features:
Some driver updates provide new advanced printer settings or improve wireless printing performance.
2. Automatic Download and Update
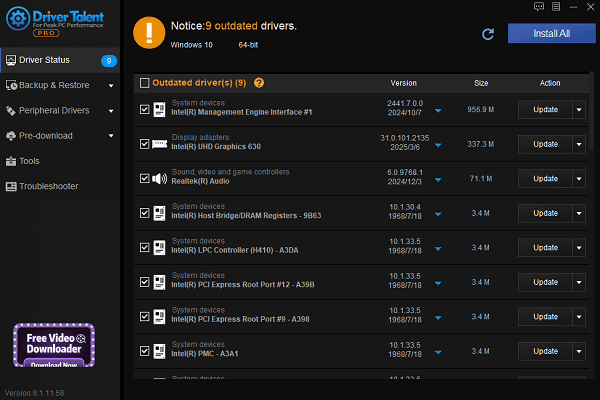
For users unfamiliar with manual driver installation, third-party driver management tools can greatly improve convenience and efficiency. It's recommend to use Driver Talent, a professional driver management tool that automatically detects driver issues and fixes them with one click.
Click the download button to get the latest version of Driver Talent. After installation, open the software and click "Scan".
Once the scan is complete, it will list missing or outdated drivers. Find the Epson printer driver in the list and click "Update".

After updating, it is recommended to restart your computer to ensure the updated driver works properly.
3. Steps to Download Epson Drivers from the Official Website
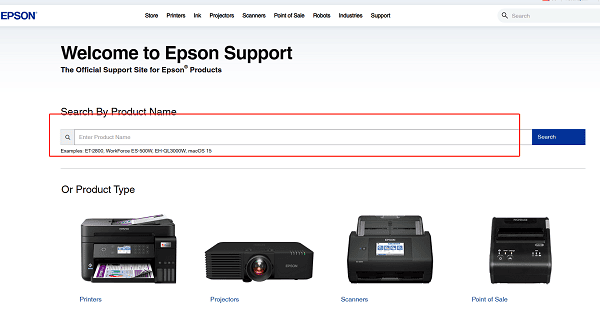
Open your browser and go to the Epson Support website.
Enter "Epson L565" or "Epson L566" in the search box and select your model.

On the driver download page, choose the correct driver version based on your operating system.
Click the "Download" button and save the driver installer to your hard drive.
4. Printer Driver Installation Steps
Locate the downloaded driver installer, right-click, and select "Run as administrator".
Follow the installation wizard to complete the installation.
Connect the printer to your computer (via USB or wireless network).
After installation, print a test page to confirm the driver is working correctly.
5. Update Drivers via Device Manager
Press Win + X and select "Device Manager".
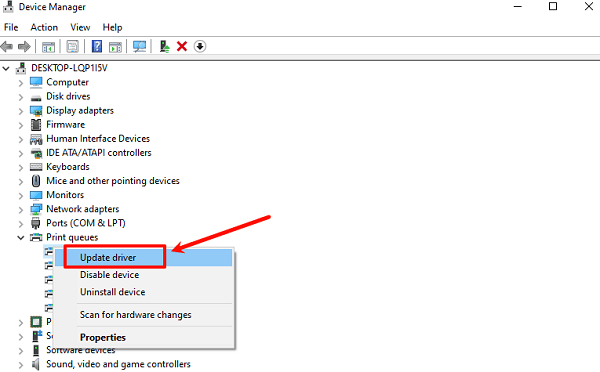
Expand "Print queues" or "Universal Serial Bus controllers".
Find the Epson printer device, right-click, and choose "Update driver".

Select "Search automatically for updated driver software" and wait for the system to complete the installation.
After updating, restart your computer to apply the changes.
6. What to Do if Driver Update Fails
If you encounter installation failure or the device isn't recognized during driver installation or update for the Epson L565 / L566, try these solutions:
Uninstall old drivers and reinstall.
Temporarily disable antivirus software and firewalls.
Ensure a stable USB connection or wireless network.
Try downloading a different driver version that matches your operating system.
Whether you're installing or updating the Epson L565 or Epson L566 printer driver, choosing the right method is crucial. Updating your driver not only improves printing performance but also ensures stable operation on new systems.
Hope the methods provided in this article help you successfully download and update your driver to enhance your printing efficiency!
See also:
How to Resolve Samsung Printer Driver Conflicts and Errors
HP LaserJet 1015 Printer Driver Missing? Try These Fixes
[Fixed] HP Standard PS/2 Keyboard Driver Not Working on Windows
Monitor Not Detected on Your PC? Fix Generic PnP Monitor Driver Issues


