When using headphones, encountering the issue of no sound despite them being plugged in is common and can be frustrating. This article provides several effective methods to help you resolve this problem.
Method 1: Check Headphone Connection
First, ensure that the headphone jack is fully inserted into the device. Sometimes, a loose connection can lead to no sound.
If there are multiple audio jacks, try plugging the headphones into different ones to see if that works.
Inspect the headphone cable for visible damage or wear; if found, consider replacing the headphones.
Method 2: Update Drivers
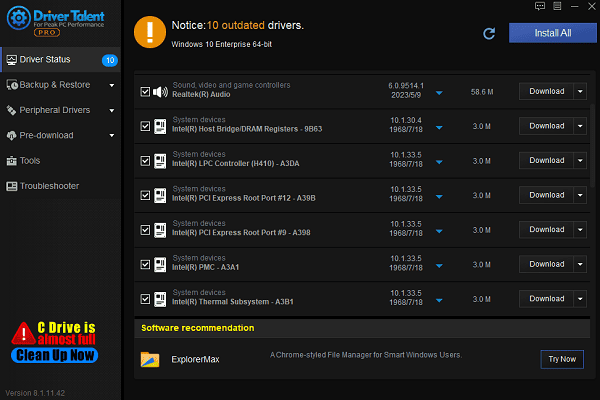
Outdated or corrupted audio drivers may cause headphones to produce no sound. It's recommended to update or reinstall drivers to restore normal audio output. Using Driver Talent can help automatically detect and update drivers, saving time and reducing the risk of downloading incorrect ones
Click the download button to get the latest version of Driver Talent, then open the software and click "Scan".
After scanning, it will show any drivers that are not installed or need updating; find the audio driver in the list and click the "Download" button.

Once updated, restarting your computer is advised to ensure the new drivers take effect.
Method 3: Set Default Audio Device
Right-click the volume icon in the bottom right corner of the taskbar and select "Sound Settings".
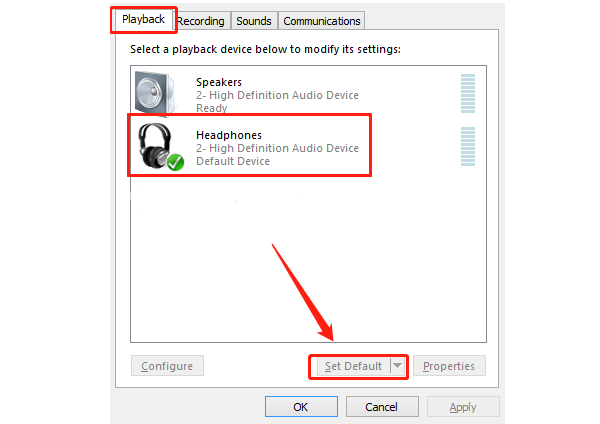
In the "Playback" tab, check the device list to ensure your plugged-in headphones are listed.
Right-click the headphone device, select "Set as Default Device", and then click "OK" to save changes.

Method 4: Adjust Volume Settings
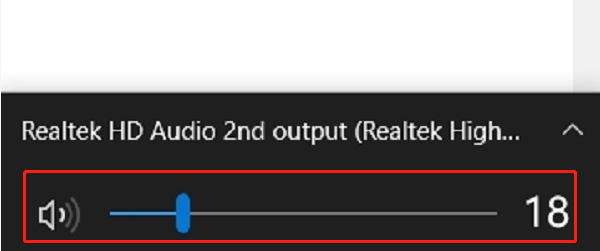
Make sure the computer's volume is not muted. You can find the volume icon on the taskbar; click it to check the volume slider.

Some applications (like media players or games) may control volume separately, so ensure these application volume settings are normal.
Method 5: Check Application Settings
Open the audio application you are using and check if the correct output device is selected in its settings.
Ensure the application is updated to the latest version, as older software may have compatibility issues.
Method 6: Run Audio Troubleshooter
Press "Win + I" to open Settings, then select "Update & Security".
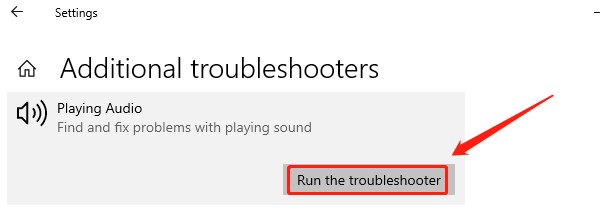
In the left menu, select "Troubleshoot", then click "Additional Troubleshooters".
Find the "Playing Audio" option, click "Run Troubleshooter", and follow the prompts.

Method 7: Restart the Device
Sometimes a simple restart can resolve temporary audio issues. Shut down the computer or device, wait a few seconds, then restart.
When restarting, you can try unplugging the headphones first, restarting the device, and then plugging the headphones back in to see if it resolves the issue.
By using these methods, you can resolve the issue of headphones being plugged in but not producing sound. If the problem continues, consider replacing the headphones or seeking professional support to enhance your listening experience.
See also:
How to Fix Windows 10 Update Error Code 0x80070643
Fixing Keyboard Not Working Issues in Windows 10
How to Fix Black Screen Issues on Windows 10


