Logitech M510 is a popular wireless mouse, but some Windows users encounter issues such as driver installation failure or the mouse not being recognized after connection, which negatively affects user experience.
This article analyzes the common causes of driver installation failure and provides several practical solutions to help you successfully install the driver and restore mouse functionality.
Common Causes of Logitech M510 Driver Installation Failure
Driver incompatibility with the system: Outdated Windows versions or missing updates may cause the driver to be unrecognized.
Faulty USB connection: The receiver may be improperly inserted, loose, or the USB port may be malfunctioning.
Corrupted driver files: Incomplete or damaged driver files during download can lead to installation failure.
Background program conflicts: Security software, system optimization tools, or older drivers may interfere with the installation.
Insufficient system permissions: Driver installation may require administrator rights; otherwise, it might be blocked by the system.
How to Fix Logitech M510 Driver Installation Failure
Method 1: Check Mouse Connection
Remove the Logitech Unifying receiver and plug it into a rear USB port directly on the motherboard.
Avoid using USB hubs, extenders, or docking stations for the receiver.
Ensure the mouse has sufficient battery power and that the power switch on the bottom is turned on.
Method 2: Update Mouse Driver
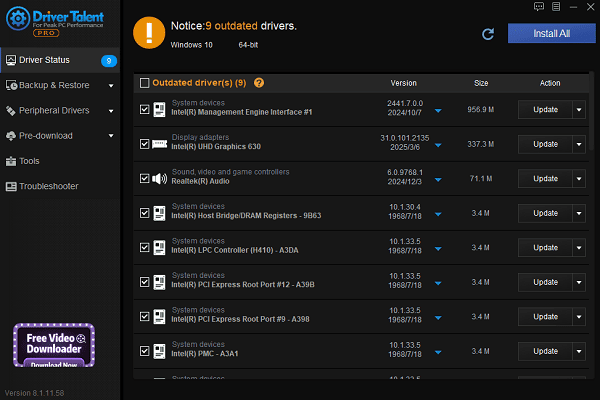
Outdated or incompatible drivers are a common cause of driver installation failure. For users unfamiliar with manual driver updates, it's recommend to use Driver Talent, a tool that can automatically detect and update the appropriate drivers, avoiding installation errors.
Download the latest version of Driver Talent.
Install and launch the software, then click "Scan".
After scanning, find the mouse driver in the results and click "Update".

Restart your computer to ensure the updated driver is properly applied.
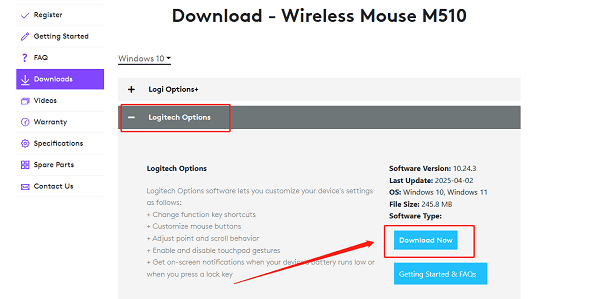
Method 3: Download the Driver from the Official Website
Visit the Logitech Support Page.
Search for "Logitech M510" and open the corresponding product page.
Download and install the recommended "Logitech Options" or "SetPoint" software.

Restart your computer after installation and reconnect the mouse.
Method 4: Uninstall Old Drivers and Reinstall
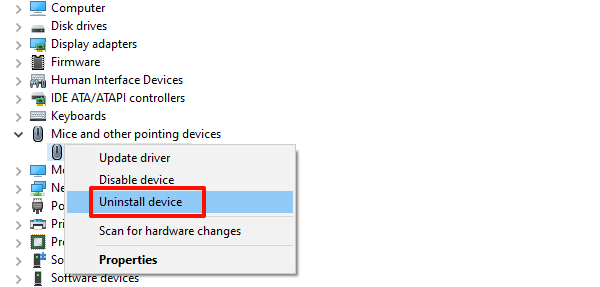
Press Win + X, then select "Device Manager".
Expand "Mice and other pointing devices", right-click on Logitech M510, and choose "Uninstall device".

After uninstallation, remove the receiver and restart your computer.
Reinsert the receiver and let Windows automatically reinstall the driver.
Method 5: Install the Driver with Administrator Rights
If the driver installation is blocked by the system:
Right-click the driver setup file and select "Run as administrator".
Temporarily disable antivirus and firewall software to prevent false detection.
After installation, re-enable your security software.
Method 6: Update Windows System
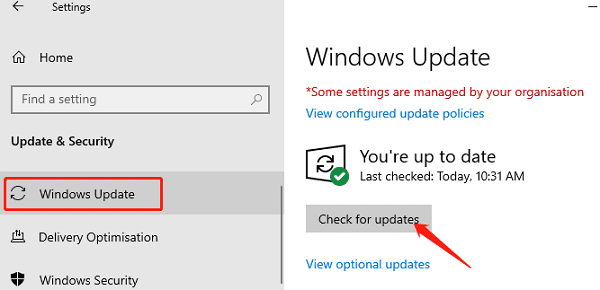
Press Windows + I to open "Settings", then go to "Update & Security".
Under "Windows Update", click "Check for updates".

Download and install any available updates.
Restart the computer to apply the changes.
Tips to Prevent Logitech M510 Driver Issues
Regularly update both your system and drivers to ensure compatibility.
Install the driver before connecting the mouse to a new device.
Turn off the mouse when not in use to extend battery life and reduce errors.
Logitech M510 driver installation failures are common, but most issues can be resolved by switching USB ports, updating drivers, or using official Logitech software.
Follow the methods in this guide to troubleshoot and reconnect your M510 mouse successfully. If the issue persists, contact Logitech Support for further assistance.
See also:
How to Download and Install Epson L3110 Driver on Windows
Fallout 4 Crashing on Startup? Try These Methods
How to Fix PC Not Detecting Graphics Card Issue


