The Epson LX-310 is popular among users for its high-speed printing and reliability. However, some users may encounter problems such as the printer not being recognized, failing to print, or producing garbled output.
These issues are often related to driver problems. This article explains the common causes of Epson LX-310 printing issues and provides methods for updating the driver to help you quickly restore printing functionality.
1. Common Symptoms of Printing Issues
The printer is connected but does not print
System shows "Printer not found" or "Printer unavailable"
Print output is garbled, misaligned, or missing content
Printing speed becomes very slow or unresponsive
"Unknown device" or yellow exclamation mark in Device Manager
2. Common Causes of Printing Problems
Printer driver is not installed or is outdated
The driver is incompatible with the current operating system (e.g., Windows 11)
Windows update overwrote or damaged the driver
USB port or data cable connection issues
The system fails to correctly detect the printer
3. How to Update the Printer Driver
Method 1: Use Driver Talent to Automatically Update Drivers
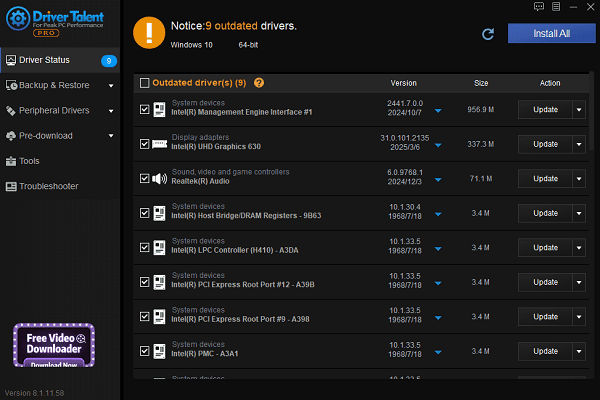
For users unfamiliar with manual driver installation, it's recommend to use the professional driver management tool Driver Talent, which can automatically detect devices and match the correct drivers.
Click the download button to get the latest version of Driver Talent. Install and open the software, then click "Scan".
Once scanning is complete, it will list any missing or outdated drivers. Locate the printer driver and click the "Update" button.

After the update, it's recommended to restart your computer to ensure the new driver takes effect.
Method 2: Download from Epson Official Website
To download the driver:
Open your browser and go to the Epson Official Website.
Click "Support" > "Printers".

In the search bar, enter your printer model (e.g., Epson LX-310) and click search.
Select your operating system (Windows 11, 10, or 8) and click "Download".
To install the driver:
Double-click the downloaded file. The installation wizard will appear. Click "Next" to proceed.
Read the Epson License Agreement, check "I agree", and click "Next".
Connect the printer:
Follow the instructions to connect the Epson LX-310 to your PC via USB.
For network printers, you may opt for Wi-Fi connection.
Complete installation:
The installation usually takes a few minutes. Once done, you'll see a message indicating success.
Try printing a test page.
Method 3: Update via Device Manager
Press Win + X and select "Device Manager".
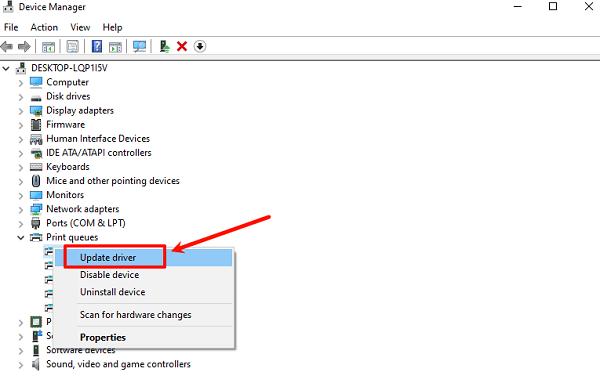
Expand "Print queues" or "Universal Serial Bus controllers" and locate the Epson printer.
Right-click the device and select "Update driver".

Choose "Search automatically for drivers" and let Windows complete the installation.
4. Additional Troubleshooting Tips
Reset the print queue: Go to "Settings > Devices > Printers & Scanners", cancel any existing print jobs, then resend.

Check the USB cable: Make sure it is not damaged. Try using a different cable or USB port.
Verify printer readiness: Ensure the printer is powered on and in a ready state.
Try another PC: Connect the printer to a different computer to rule out OS-level issues.
In most cases, Epson LX-310 printing problems are caused by driver issues. Using the methods described in this article, you can effectively resolve the majority of printing errors.
Regularly updating the driver not only restores full functionality to your Epson LX-310 but also improves printing efficiency and device stability. If you're facing printing problems, start with checking the driver!
See also:
Elden Ring: Nightreign Highlights and System Requirements Overview
[Fixed] 'xinput1_3.dll Was Not Found' Error on Windows


