
Some Windows 10 users may face Ethernet connection issues. This article offers solutions to fix the problem and restore normal network connectivity.
1. Update Network Adapter Drivers
Outdated or corrupted network adapter drivers can cause Ethernet to not function correctly. It is important to ensure that your network adapter drivers are up to date. We recommend using Driver Talent to automatically detect and update drivers, saving you time and avoiding the risk of downloading or installing incorrect drivers.
Click the download button to get the latest version of Driver Talent. After installation, open the software and click "Scan".
After the scan is complete, it will show any missing or outdated drivers. Find the network adapter driver in the list and click the "Download" button.
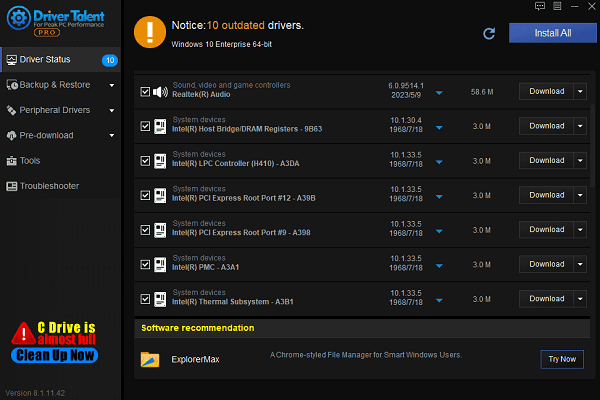
Once the update is complete, it is recommended to restart your computer to ensure the updated drivers take effect properly.
2. Check Ethernet Connections
Ensure that both ends of the Ethernet cable are securely plugged in and not loose. Damaged cable connectors or plugs may cause signal interruption.
If the Ethernet cable shows obvious signs of wear or aging, it is recommended to replace it with a new high-quality cable.
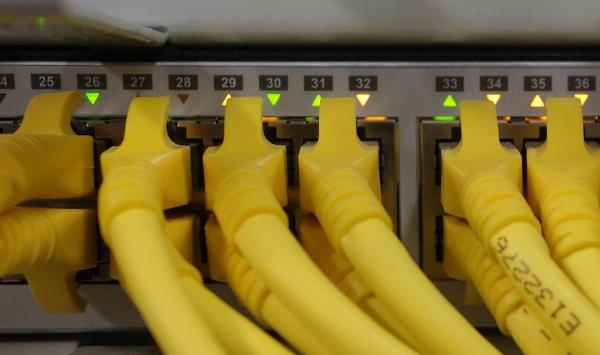
If you are using a switch or router, ensure these devices are working properly. Check the indicator lights—typically, the "Power" and "Connection" lights should be flashing normally to indicate proper functionality.
If your router or switch has multiple Ethernet ports, try plugging the Ethernet cable into a different port to rule out the possibility of a faulty port.
If possible, try using another device (e.g., a different computer) to connect to the same Ethernet cable and port to check if the connection works. This helps determine whether the issue lies with the device itself.
3. Reset Network Settings
Click the Start button, select "Settings", and then click "Network & Internet".
From the left menu, select "Status", and at the bottom of the page, click "Network reset".
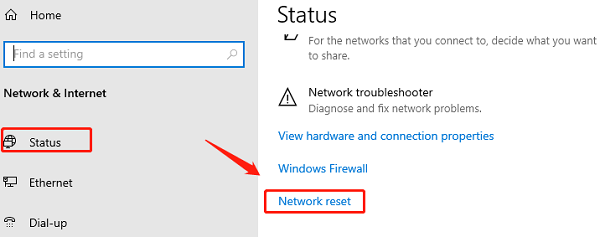
Click the "Reset Now" button, and confirm when prompted. This will reset all network adapters to their default settings.
After the reset is complete, your computer will automatically restart.
Once restarted, you may need to reconnect to your Wi-Fi or Ethernet network. Ensure you enter the correct network password.
4. Check Network Adapter Settings
Check Network Adapter Status:
Press Win + X and select "Device Manager".
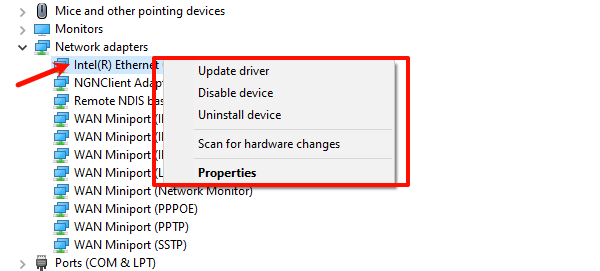
In Device Manager, expand the "Network Adapters" section. This will list all installed network adapters, including Ethernet and Wi-Fi adapters.
Right-click on your active network adapter (such as Ethernet or Wi-Fi) and select "Properties".
In the "General" tab, check the status of the adapter. If it says "This device is working properly", the adapter is fine. If there are any errors or warnings, try updating the driver or reinstalling it.
Ensure that the adapter is enabled:
If the adapter is disabled, right-click on it and select "Enable device". If it shows as enabled, skip this step.
Check the adapter's protocol settings:
In the Properties window, select "Internet Protocol Version 4 (TCP/IPv4)" and click "Properties".
Ensure "Obtain an IP address automatically" and "Obtain DNS server address automatically" are selected. If you have specific IP or DNS requirements, you can configure them manually.
5. Disable Power Saving Mode
Press Win + X and select "Device Manager".
In "Device Manager", expand the "Network Adapters" section. Right-click on your active network adapter and select "Properties".
In the "Properties" window, select the "Power Management" tab.
Uncheck "Allow the computer to turn off this device to save power".
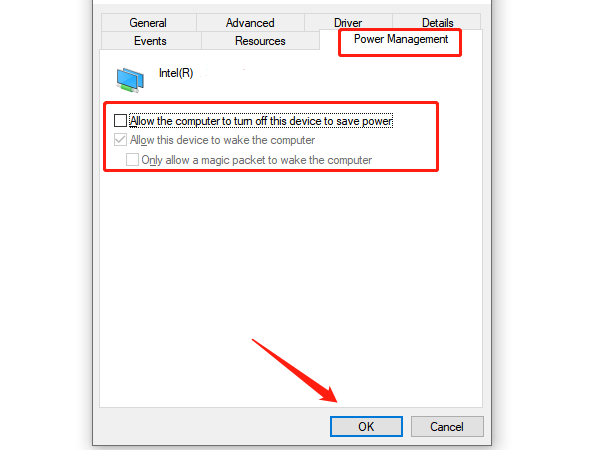
Click "OK" to save the changes.
6. Run Network Troubleshooter
Click the "Start" menu, select "Settings", and click "Update & Security".
Select "Troubleshoot", and scroll down to click "Additional troubleshooters".
Find and select "Internet Connections", then click "Run the troubleshooter".
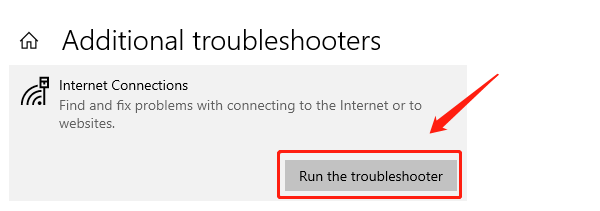
The system will automatically detect issues with the network adapter and attempt to fix any problems found.
7. Disable Firewall or Security Software
Disable Windows Firewall:
Open "Control Panel" > "Windows Defender Firewall".
On the left, select "Turn Windows Defender Firewall on or off".
Choose "Turn off Windows Defender Firewall" (Note: This action is only for troubleshooting, and it is not recommended to keep the firewall disabled permanently).
Disable Third-Party Security Software:
If you are using third-party antivirus or security software, try temporarily disabling it and check if the network connection is restored.
After disabling the firewall or security software, test the network connection. If it works fine, the security software may be the cause of the issue.
Important Note:
Disabling the firewall or security software exposes your computer to network threats. Therefore, only disable them temporarily for troubleshooting and re-enable them as soon as possible.
Following these steps should help resolve most Ethernet connection issues. If the problem continues, contact technical support or your network service provider.
See also:
Guide to Fix Mouse Cursor Disappearing
7 Methods to Fix Mouse Not Working
Guide to Fix No Signal on Monitor


