Some Windows 11 users may encounter the "Unidentified Network" issue, preventing them from accessing the internet. This article provides detailed troubleshooting methods to help you quickly restore your network connection.
1. Check Network Devices
Press Win + X, select "Shut down or sign out" > "Restart".
Turn off your router, wait 1-2 minutes, and turn it back on to refresh the network connection.
2. Update Device Drivers
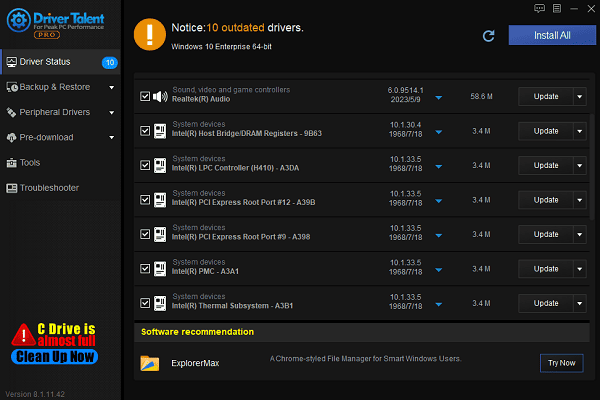
Outdated or corrupted drivers can cause the "Unidentified Network" issue in Windows 11. Keeping your drivers up to date can effectively resolve this problem. To save time and avoid downloading incorrect drivers, Driver Talent can automatically detect and update network drivers.
Download and install Driver Talent. Open the software and click "Scan".
After scanning, a list of missing or outdated drivers will appear. Locate the network driver and click "Update".

Once the update is complete, restart your computer to ensure the changes take effect.
3. Reset Network Settings
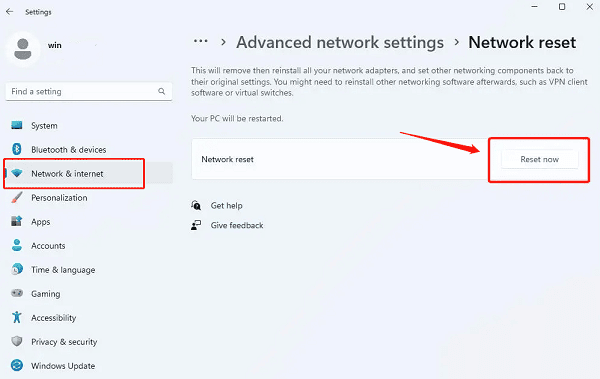
Open Settings and navigate to "Network & internet".
Scroll down and select "Advanced network settings".
Find "Network reset", then click "Reset now".

A prompt will ask you to confirm resetting all network adapters. Click "Yes" to proceed.
Your system will restart automatically. After resetting, reconnect to WiFi and check the network status.
4. Change DNS Server Settings
Press Win + I to open Settings, then go to "Network & internet".
Find and click "Advanced network settings".
In "More network adapter options", locate the affected network connection, right-click it, and select "Properties".
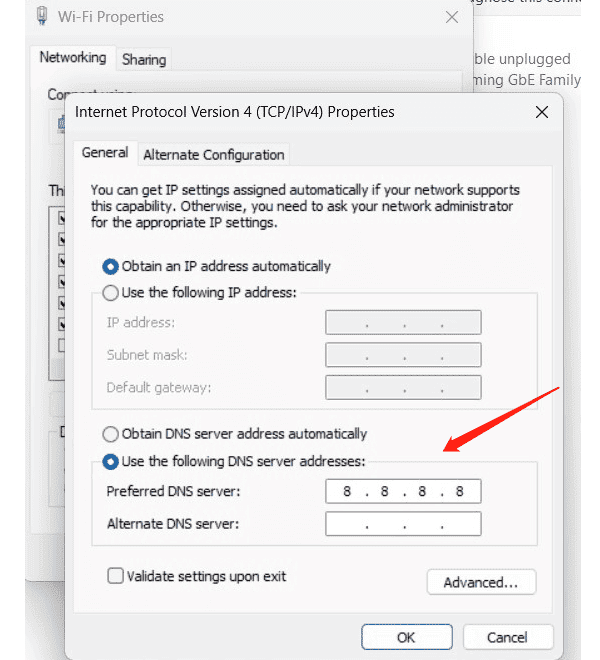
Select "Internet Protocol Version 4 (TCP/IPv4)", then click "Properties".
Enter the following DNS server addresses:
Preferred DNS server: 8.8.8.8

Click "Save", reconnect to the network, and check if the issue is resolved.
5. Check Network Services Status
Press Win + R, type "services.msc", and press Enter.
In the Services Manager, locate the following services:
DHCP Client
DNS Client
Network Connections
Network List Service
WLAN AutoConfig (for WiFi-related connections)
Ensure their "Startup Type" is set to "Automatic". If any service is disabled, right-click it and select "Start".
6. Run Network Troubleshooter
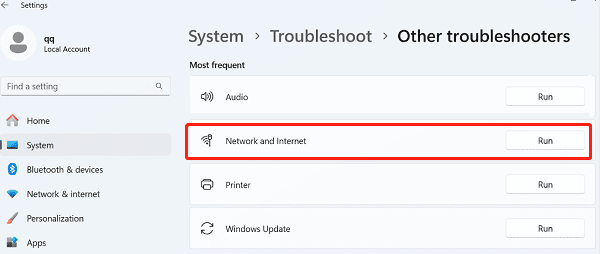
Open Settings (press Win + I), click "System", then select "Troubleshoot".
Under "Troubleshoot", click "Other troubleshooters".
Locate "Network and Internet", then click "Run".

Follow the on-screen instructions to complete troubleshooting and check if the issue is fixed.
By following these methods, you can effectively diagnose and resolve the "Unidentified Network" issue in Windows 11. If the problem persists, consider contacting your Internet Service Provider (ISP) or technical support for further assistance.
See also:
How to Fix High Latency on a Computer
A Step-by-Step Guide to Installing and Updating Sound Card Drivers
How to Fix GeForce Experience Driver Download Failed


