
GIGABYTE Control Center is an official system management tool provided by GIGABYTE. It allows users to easily adjust fan speeds, monitor hardware status, switch performance modes, and more.
However, if it fails to launch properly, it can significantly affect your overall user experience. This guide will walk you through several effective solutions to help you quickly fix the issue.
1. Reinstall GIGABYTE Control Center
Go to "Control Panel" > "Programs and Features", and uninstall the existing GIGABYTE Control Center.
Restart your computer.
Search for "Gigabyte Control Center" on your browser and go to the official download page.
Click "Download Now" on the official GIGABYTE site to download the installer.
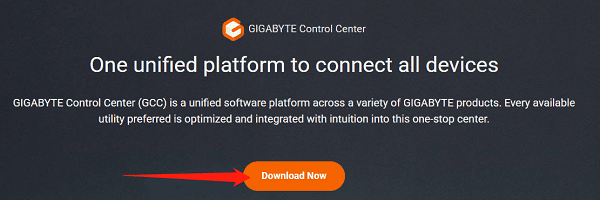
Right-click the installer and select "Run as Administrator" to install it.
Restart your computer and check if the software launches normally.
2. Update Device Drivers
Outdated or corrupted drivers can disrupt communication between the GIGABYTE Control Center and your system hardware, causing it to malfunction. It's recommend to use Driver Talent to automatically detect and update drivers, which helps avoid downloading incorrect versions and saves time.
Click the download button in this article to get the latest version of Driver Talent. Install and open the software, then click "Scan".
After scanning, it will show a list of outdated or missing drivers. Find the necessary ones and click "Update".
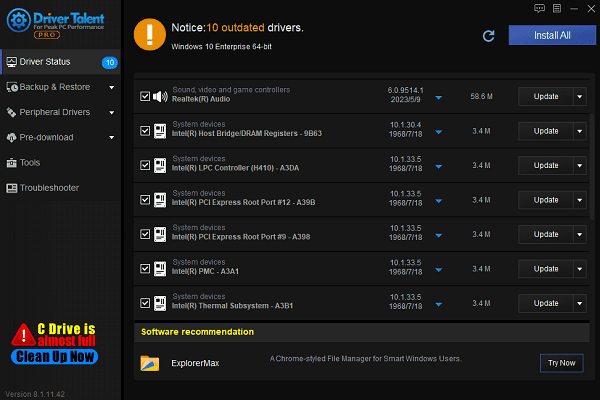
Once the update is complete, restart your PC to ensure the changes take effect.
3. Install Microsoft .NET Framework & Visual C++ Redistributables
Install Microsoft .NET Framework:
Visit the official .NET Framework download page.
Choose the latest version, usually listed at the top.
Click to download the .NET 4.8.1 Runtime version.
Run the installer and restart your PC once installation is complete.
Install Visual C++ Redistributables:
Go to the official Microsoft Visual C++ Redistributables download page.
Download the installers for your system architecture (ARM64, x86, x64).
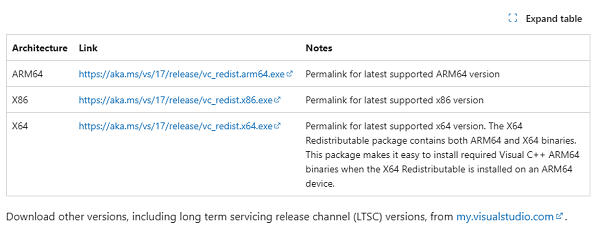
Run each installer, complete the installation, and restart your computer.
4. Run as Administrator
Locate the GIGABYTE Control Center shortcut on your desktop.
Right-click the icon and select "Properties".
Go to the "Compatibility" tab.
Check "Run this program as an administrator", then click "Apply" and "OK".
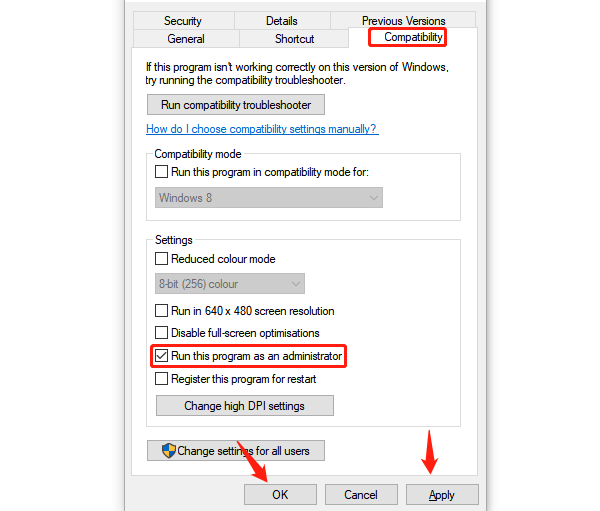
Try launching the software again.
5. Temporarily Disable Windows Defender:
Click the "Start Menu" > "Settings" > "Update & Security "> "Windows Security".
Go to "Virus & Threat Protection" > "Manage Settings".
Turn off Real-time protection (you may get a warning—confirm to proceed).
Note: Disabling security software temporarily carries risks. Only do this briefly during troubleshooting and make sure you're using trusted sources.
6. Perform a Clean Boot
Press Win + R, type "msconfig", and hit Enter.
Under the "Services" tab, check "Hide all Microsoft services", then click "Disable all".
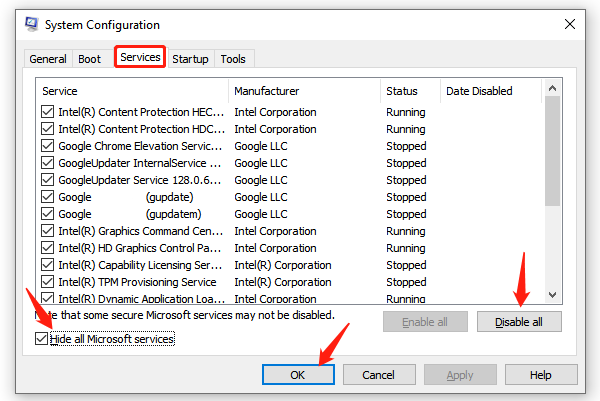
Go to the Startup tab, click "Open Task Manager", and disable all startup items.
Restart your PC and try launching the Control Center.
Common Issues & Fixes
Issue 1: GIGABYTE Control Center crashes or shows a white screen?
Uninstall old versions and install the latest one.
Make sure your GPU and chipset drivers are up to date.
Issue 2: Fan or RGB lighting controls not working?
Check BIOS settings to ensure related features are enabled.
Update your BIOS firmware.
Use the version of Control Center from GIGABYTE's official website.
Most issues can be resolved using the steps above. Follow them one by one based on your situation, and ensure your system, drivers, and software are always up to date. If the problem persists, consider contacting a technician or GIGABYTE support for further assistance.
See also:
Effective Ways to Fix Computer Speakers Not Working
How to Fix Microphone Not Working on Windows 11
6 Ways to Resolve LogiLDA.dll Missing on Windows


