
Keeping your graphics driver updated is the single most important action you can take to ensure optimal performance and stability for your Windows 10/11 PC. Outdated drivers are the leading cause of poor frame rates, game crashes, and system instability, especially after major operating system updates.
Whether you have an NVIDIA, AMD, or Intel graphics card, this comprehensive guide provides multiple, step-by-step methods for updating your drivers, starting with the most efficient and error-free solution for driver management.
Part I: Automated Driver Management
Manually updating drivers requires knowing your exact GPU model and involves complex steps like performing a "clean install" to remove old files, which can be prone to user error. An automated utility simplifies this entire process.
One-Click Driver Update with Driver Talent X
Driver Talent X provides an intelligent, automated solution that scans your system, identifies the precise driver version needed, and executes a clean, conflict-free installation for your graphics card.
Download and Install:
Click the "Download" button to download the software package.
Install it on your Windows 10 or 11 PC.
Run Scan:
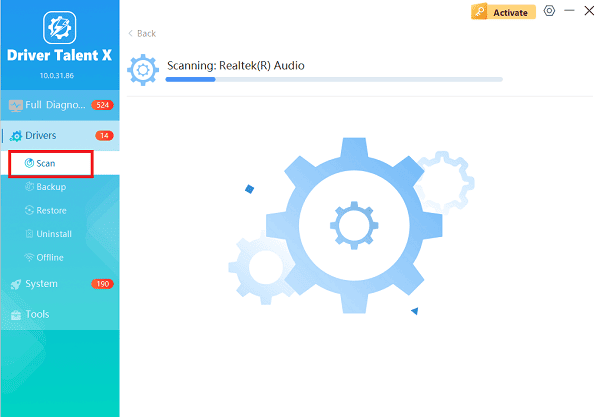
Launch the application and go to "Drivers" > "Scan", click "Scan".
The software will perform a deep analysis of your system, focusing specifically on your Graphics Processing Unit(s) and motherboard Chipset.
Execute Clean Update:
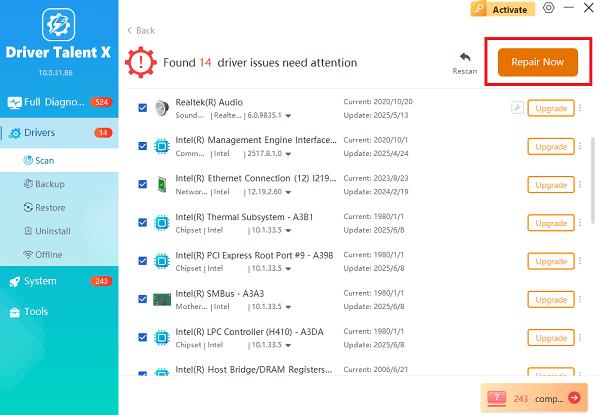
After the scan is complete, the software will display a list of all drivers that need attention.
Select the necessary graphics drivers and click the "Upgrade" or "Repair Now" button. The tool will download the latest, WHQL-certified (Windows Hardware Quality Labs) driver and execute a clean installation, replacing any unstable files.
Finalize:
Once the installation progress reaches 100%, restart your computer to fully integrate the new driver and software.
Part II: Official Manufacturer Methods
The official software provided by NVIDIA and AMD offers the most comprehensive control over graphics settings and features.
Method 1: Update via NVIDIA GeForce Experience
For NVIDIA GPUs, GeForce Experience is the official tool for managing drivers and optimizing game settings.
Open GeForce Experience: Launch the NVIDIA GeForce Experience application.
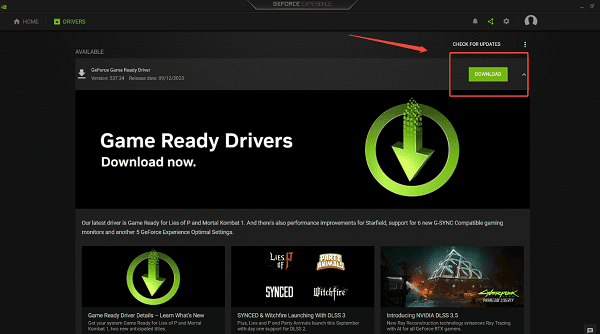
Check for Updates: Navigate to the "Drivers" tab.
Download: Click "Check for Updates" and select "Download" for the newest driver version.
Install Option: Choose "Custom Installation" instead of Express. On the next screen, check the box labeled "Perform a Clean Installation". This step is crucial for removing old driver conflicts.
Follow the prompts to complete the installation and restart your PC.
Method 2: Update via AMD Software: Adrenalin Edition
For AMD Radeon GPUs, the Adrenalin software provides driver updates, game optimization, and advanced graphics features.
Open Adrenalin: Right-click on your desktop and select "AMD Software: Adrenalin Edition".
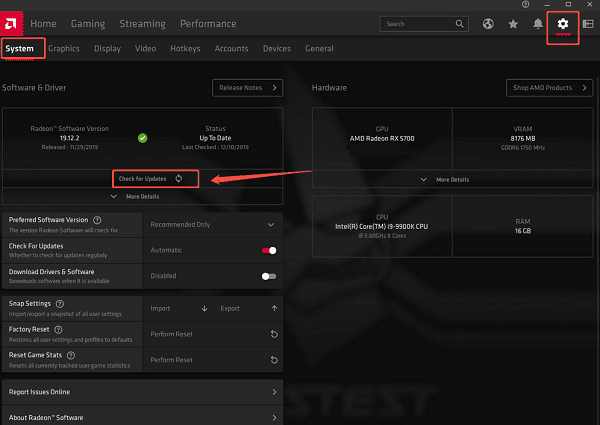
Check for Updates: Navigate to the "System" > "Drivers & Software" tab (often via the home screen or the settings gear icon).
Install Option: When a new driver is found, click "Download". During installation, choose "Custom Install" and select the "Perform Factory Reset" option to ensure a clean install.
Complete the installation and restart your PC.
Part III: Windows Built-in Methods
These methods use the Windows operating system itself to find, install, or revert drivers.
Method 1: Update via Windows Device Manager
This method is best for Intel integrated graphics or for installing a basic, functional driver if you are troubleshooting a display problem.
Press Windows Key + X and select "Device Manager".
Expand the "Display adapters" category.
Right-click on your graphics device (e.g., Intel UHD Graphics) and select "Update driver".
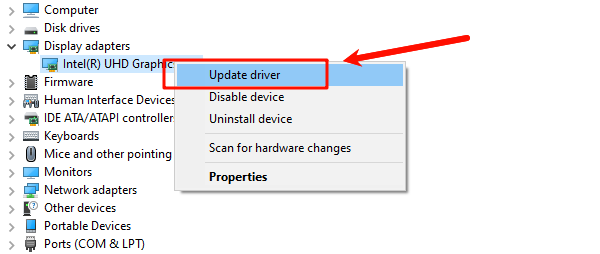
Choose "Search automatically for drivers". Windows will check its internal libraries and Windows Update for a suitable driver.
Method 2: Roll Back the Driver (For Troubleshooting)
If a recent update caused stability issues, you can quickly revert to the previous working version.
Press Windows Key + X and select "Device Manager".
Expand the "Display adapters" category.
Right-click on your graphics card and select "Properties".
Go to the "Driver" tab and click the "Roll Back Driver" button.
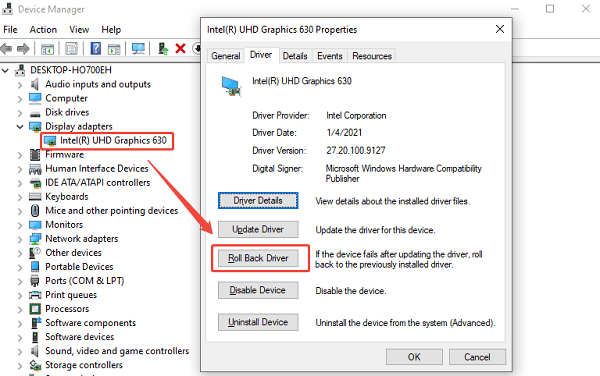
If the button is available, follow the on-screen steps. If unavailable, the previous version was not saved.
Conclusion
Keeping your graphics driver updated is non-negotiable for stable performance on Windows 10/11. The most reliable and conflict-free method is to ensure driver integrity with Driver Talent X.
By combining this with the official clean installation methods offered by NVIDIA GeForce Experience or AMD Adrenalin, you guarantee your system is running with the latest optimizations, preventing crashes and maximizing frame rates.
See also:
Elden Ring: Nightreign Highlights and System Requirements Overview
[Fixed] 'xinput1_3.dll Was Not Found' Error on Windows


