Upgrading your Graphics Processing Unit (GPU) is the single most impactful change you can make to improve gaming performance. However, a successful upgrade involves more than just swapping out the hardware; it requires careful planning and crucial driver preparation.
This comprehensive guide will walk you through the entire process, focusing on essential steps to ensure a smooth transition and maximize the performance of your new graphics card.
Part I: Essential Pre-Upgrade Preparation
Before installing new hardware, you must ensure your system can physically and electrically support the new card, and that old, conflicting drivers are completely removed.
Method 1: Update System Drivers with Driver Talent X
The most common mistake when upgrading a GPU (especially when switching from NVIDIA to AMD, or vice versa) is failing to completely remove the old graphics drivers. Residual files can cause conflicts, leading to blue screens (BSODs) or installation failures for the new card.
Download and Install:
Click the "Download" button to download the software package.
Install it on your Windows PC.
Run Scan:
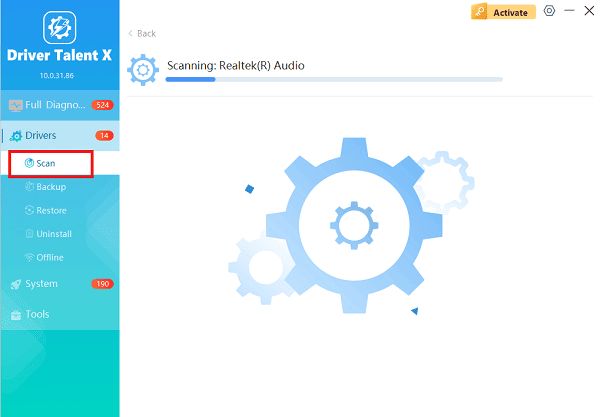
Launch the application and go to "Drivers" > "Scan", click "Scan".
The software will perform a deep analysis of all drivers, including the one for your current graphics card.

Install the Update:
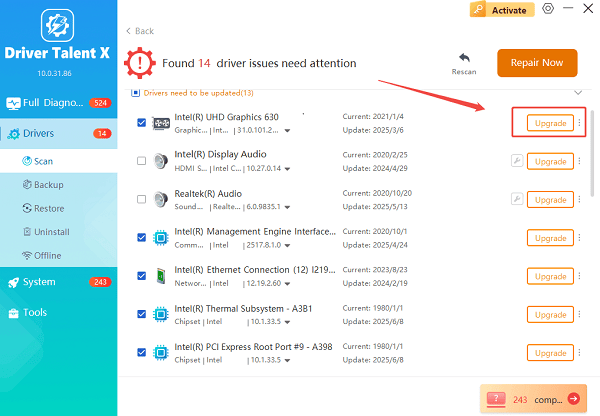
After the scan is complete, the software will display a list of all drivers that need attention. Select the detected graphics driver and click the "Upgrade" button.

Driver Talent X will download and install the latest, digitally signed driver package for your specific GPU model.
Restart Your PC:
Once the screen is blank or in Safe Mode, fully shut down the computer. The system is now ready for the hardware swap.
Method 2: Verify Power Supply and Physical Fit
Your new, powerful GPU will likely require more power and physical space than your old one.
1). Check Power Supply Unit (PSU):
Wattage: Compare your new GPU's minimum required wattage (found on the manufacturer's website) against your current PSU's rating. Insufficient wattage will cause crashes or failure to boot.
Connectors: Ensure your PSU has the correct PCIe power connectors (e.g., 6-pin, 8-pin, or 12-pin) required by the new card.
2). Check Case Size:
Length and Height: Measure the space available inside your PC case. Graphics cards have varying lengths and thicknesses (occupying 2 or 3 slots). Verify your case can accommodate the dimensions of the new GPU.
Part II: Hardware Installation and Post-Swap Driver Install
Once the prep work is complete, the physical swap can take place, followed by the installation of the new driver.
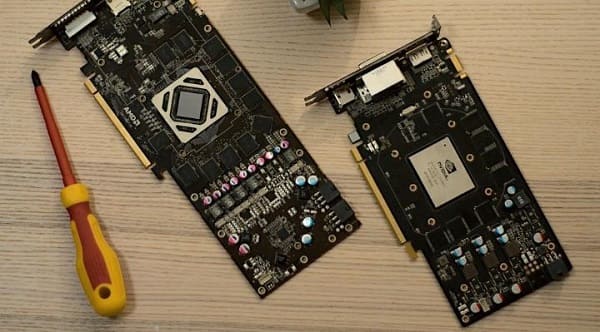
Method 1: The Physical Swap
This process requires a standard Phillips screwdriver and basic anti-static precautions.
1). Power Off: Turn off the computer, flip the PSU switch to the OFF position, and unplug the power cable from the wall.
2). Ground Yourself: Touch a bare, metallic part of the case to discharge any static electricity.
3). Remove Old Card:
Disconnect all PCIe power cables from the old GPU.
Unscrew the retention screw(s) holding the card bracket to the case.
Press the PCIe retention clip (usually a small plastic tab at the end of the slot) and gently pull the old card straight out of the motherboard.
4). Install New Card:
Open the PCIe retention clip.
Align the new GPU with the long PCIe slot and press it down firmly and evenly until it clicks into place and the retention clip snaps shut.

Secure the card bracket with the screw(s).
Reconnect the appropriate PCIe power cables from the PSU to the new GPU.
5). Close Case and Boot: Close the case and reconnect the power cable.
Method 2: Install New Drivers (Post-Swap)
With the new GPU installed, you need to load its specific driver software.
1). Boot Up: Power on the computer. Windows should boot using a generic display driver (low resolution).
2). Download New Driver:
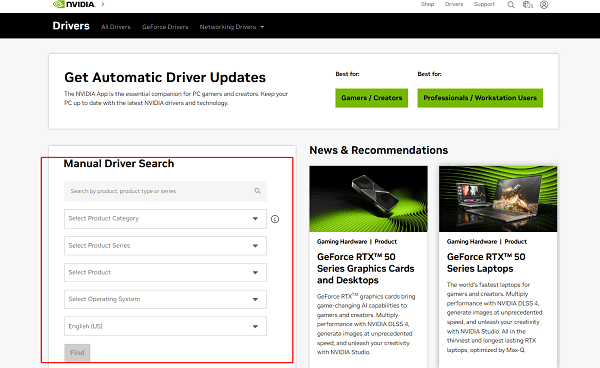
Go to the official website of your new GPU manufacturer (NVIDIA, AMD, or Intel).
Manually select your specific GPU model and Windows version.

Download the latest driver package (e.g., GeForce Game Ready Driver, AMD Adrenalin Software).
3). Run Installer: Locate the downloaded file, right-click it, and select "Run as administrator".
4). Select Clean Install: During the installation, choose the "Custom" or "Advanced" option and check the box for "Perform a clean installation" to ensure any remaining generic files are overwritten.
5). Restart: Complete the installation and restart your PC. Your new graphics card should now be fully functional at its native resolution.
Conclusion
Upgrading your graphics card is the best way to boost your PC's performance, but success lies in preparation. By using Driver Talent X to upgrade system drivers , you mitigate the most common risks. Once installed, a fresh, clean driver installation completes the process, allowing you to enjoy your enhanced gaming and rendering power.
See also:
Qualcomm Atheros QCA61x4A Driver Download and Installation Guide
Network Adapter Not Working on Windows? Try These Fixes


