Updating your Gigabyte BIOS (Basic Input/Output System) is a crucial maintenance step that can enhance system stability, improve compatibility with new CPUs and RAM, and introduce new features.
While it may seem intimidating, using a USB drive with Gigabyte's built-in Q-Flash utility is the safest and most reliable way to perform the update. This comprehensive guide walks you through every step, ensuring a smooth and successful BIOS flash.
1. Critical Preparation: Ensure System Stability with Driver Updates
Before you begin the BIOS flash, it is absolutely essential to ensure your operating system and all core drivers are current.
Outdated chipset or system drivers can sometimes lead to conflicts or instability when entering the BIOS environment, potentially affecting the flash process. A quick, automated check is the safest way to prepare your PC.
How to Update Drivers with Driver Talent X?
Driver Talent X is an efficient tool that scans your PC, identifies outdated or missing drivers, and installs the correct versions for you, ensuring your system is in optimal condition.
Download and Install:
Click the "Download" button to download the software package.
Install it on your system.
Scan Your System:
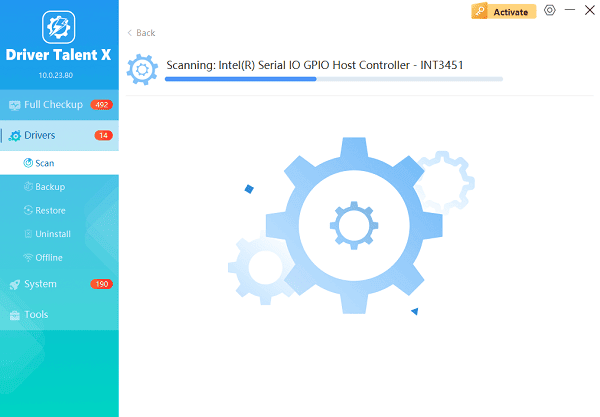
Launch the application. Go to "Drivers" > "Scan", click "Scan".
Driver Talent X will automatically perform a comprehensive scan, paying close attention to chipset and system drivers critical for motherboard stability.

One-Click Update:
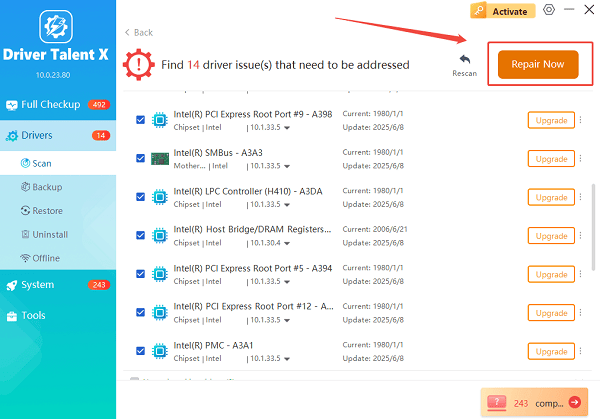
The results will show you all the drivers that need attention.
Simply click the "Repair Now" button. The tool will download and install the latest, verified versions of every driver at once.

Restart Your PC:
After the updates are complete, restart your computer. Do not proceed to the BIOS update until this step is complete.
Method 1: The Standard Q-Flash Method (Recommended)
The standard Q-Flash utility, accessed directly from the BIOS screen, is the most robust and recommended way to update your firmware using a USB drive.
1. Prepare the USB Drive
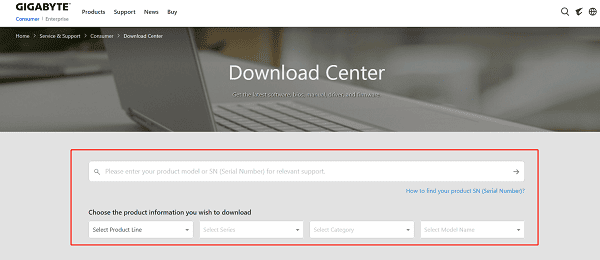
Get the Latest BIOS File: Go to the official Gigabyte Support website and search for your specific motherboard model.

Download the File: Download the latest available BIOS version. The file will be a compressed ZIP folder.
Extract the File: Unzip the downloaded folder. Inside, you will find the actual BIOS file (e.g., Z790AORUSMASTER.F10) and a utility called Efiflash.exe (you do not need the utility).
Format the USB Drive: Insert a USB drive (8GB or smaller is ideal). Right-click on it in File Explorer and select "Format". Choose the FAT32 file system and click "Start".

Copy the BIOS File: Copy only the BIOS file (the one without the extension) to the root directory (not inside any folder) of the newly formatted USB drive.
2. Execute the Q-Flash Update
Enter Q-Flash: Restart your PC and repeatedly press the End key or the Delete key immediately after pressing the power button to enter the BIOS/UEFI.
Launch Q-Flash: Inside the BIOS/UEFI interface, press the F8 key to launch the Q-Flash Utility.
Select Update BIOS: Choose the option "Update BIOS from Drive".
Select the File: Navigate to the USB drive and select the BIOS file you copied earlier.
Confirm and Flash: The utility will verify the file and ask for confirmation. Click "Yes" to begin the flash process.
DO NOT INTERRUPT: It is critical that you DO NOT interrupt the process or lose power. The system will restart automatically once the flash is complete.
Method 2: Q-Flash Plus (USB Only, No CPU/RAM Required)
For extreme cases, such as recovering from a failed BIOS update or updating to support a new CPU when the current BIOS doesn't support it, Gigabyte offers Q-Flash Plus. This method requires no CPU, RAM, or GPU to be installed or working.
Prepare the USB Drive: Follow steps 2-5 from Method 2A above. Ensure the BIOS file is renamed to GIGABYTE.BIN for the utility to recognize it.
Locate the Port: Plug the USB drive into the dedicated Q-Flash Plus port on the back I/O panel of your motherboard (this port is usually labeled white or red).
Power On: Plug the 24-pin and 8-pin power connectors into the motherboard (the system does not need to be fully built).
Start the Flash: Press the dedicated Q-Flash Plus button (usually near the I/O ports).
Wait for Completion: A light will flash, indicating the update is in progress. The light will stop flashing when the process is complete (this can take 5-10 minutes).
Conclusion
Updating your Gigabyte BIOS with a USB drive using the Q-Flash utility is the most stable and reliable way to handle firmware updates.
By first ensuring your system drivers are stable with Driver Talent X, and then following the detailed steps for either the standard Q-Flash or the recovery-focused Q-Flash Plus, you can safely update your motherboard firmware and enjoy improved performance and compatibility.
See also:
Epson L3250 Driver Download & Installation Guide for Windows 10/11
How to Update BIOS on MSI Motherboard – Step-by-Step Guide


