
Is your HP printer suddenly refusing to print, showing an "Offline" status, or producing blurry, incomplete, or streaky pages? The vast majority of these frustrating printing issues are directly caused by outdated, corrupted, or incompatible printer drivers.
The driver is the critical piece of software that allows your Windows computer to correctly communicate commands and data to the physical HP hardware. Ensuring this driver is current and healthy is the first and most effective step in fixing almost all common printing problems. This guide provides a systematic, detailed approach to updating your HP printer drivers safely and effectively.
1. Automatic Driver Update and System Stabilization
Manually searching for the correct driver can be time-consuming and risks downloading the wrong file. Using a trusted driver utility ensures you get the exact, certified driver for your specific printer and operating system version, quickly resolving conflicts and communication errors.
Driver Talent X is an efficient tool that quickly scans, identifies, and installs the latest, most stable drivers, ensuring the communication channel between your PC and HP printer is optimized for flawless operation.
Download and Install:
Click the "Download" button to download the software package.
Install it on your Windows PC.
Scan Your System:
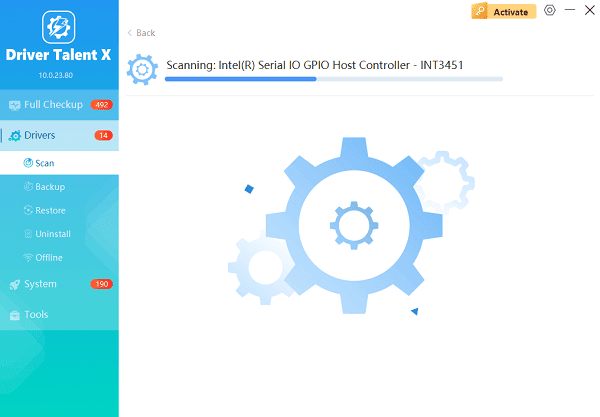
Launch the application. Go to "Drivers" > "Scan", click "Scan".
Driver Talent X will automatically perform a comprehensive scan, specifically identifying the latest, most stable updates for your HP Printer Driver, along with related USB Controller or Network Adapter Drivers that affect connectivity.
One-Click Update:
After the scan is complete, the software will display a list of all drivers that need attention. Select the HP Printer Driver entry or click the "Repair Now" button.
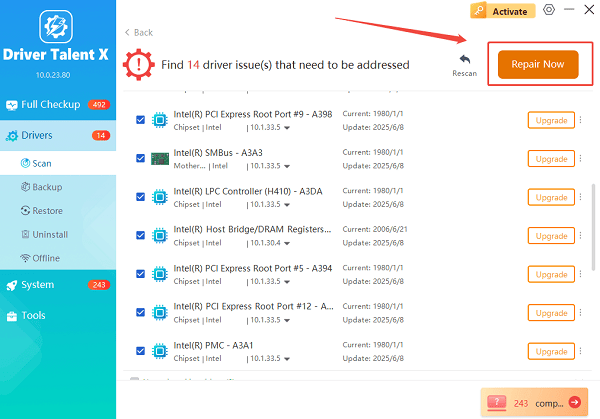
The tool will automatically download and install the latest, verified versions compatible with your specific HP model.
Restart Your PC and Printer:
Once the installation is finished, it is absolutely crucial to restart your computer AND power-cycle your printer (turn it off, wait 10 seconds, then turn it back on).
This allows the new drivers to fully integrate and re-establish the connection correctly.
2. Official HP Methods for Driver Management
If a simple driver update doesn't immediately fix the issue, HP provides two excellent official methods for deeper diagnostics and installation.
Method 1: Use HP Support Assistant (HPSA)
For HP computers, HPSA is the fastest way to get certified updates directly from HP.
Launch HPSA: Search for and open HP Support Assistant from your Start Menu (it is pre-installed on most HP PCs).
Locate Your Printer: Select your HP printer from the list of connected devices.
Check for Updates: Click the "Updates" or "Check for updates and messages" button.
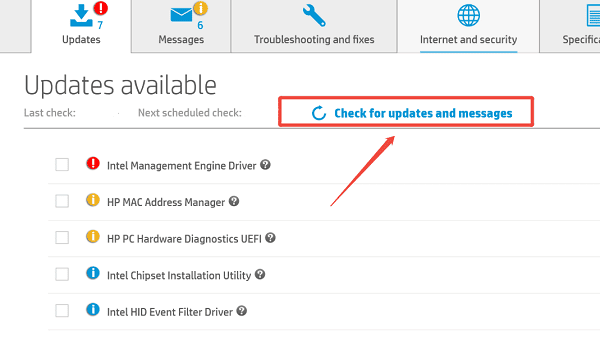
Install: HPSA will list available updates (drivers, firmware, and software). Select them and click "Download and install". This process is automatic and highly reliable for official HP drivers.
Method 2: Use HP Print and Scan Doctor
This free HP utility is a powerful diagnostic tool designed to automatically detect and fix common issues, often by uninstalling and reinstalling the correct driver version.
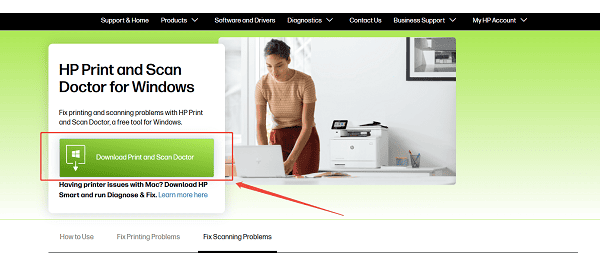
Download and Run: Download the HP Print and Scan Doctor from the official HP website.
Select Printer: Run the utility and select your affected HP printer model.
Diagnose and Fix: The tool will run a series of tests (checking connectivity, driver status, print queue, and hardware). If it finds driver issues, it will automatically download and install the correct, certified driver for you.
3. Manual and Advanced Troubleshooting Fixes
If automated methods fail, you may need to manually intervene via the Windows Device Manager.
Method 1: Manually Reinstall Driver via Device Manager
This method forces Windows to forget the existing driver installation and search for a fresh one.
Open Device Manager: Right-click the Start button and select "Device Manager".
Locate Printer: Expand the "Printers" or "Print queues" category (sometimes listed under "Other devices" if the driver is completely missing).
Uninstall Driver: Right-click on your specific HP printer name and select "Uninstall device". (Crucial Step: If prompted, check the box that says "Delete the driver software for this device".)
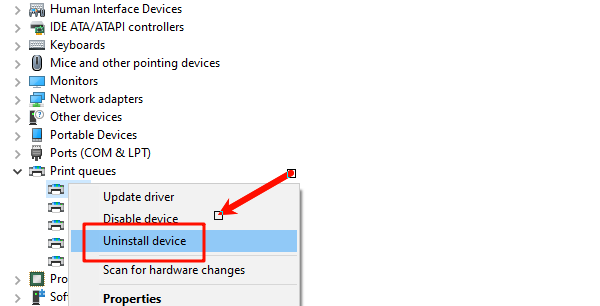
Rescan: Click the "Action" menu at the top of Device Manager and select "Scan for hardware changes". Windows will automatically detect the printer again and attempt a clean re-installation of the driver.
Method 2: Clear the Print Queue
A stuck or corrupted print job in the queue can prevent the printer from accepting new commands, making it appear "broken" or "offline".
Stop Print Spooler Service: Search for "Services" in the Windows search bar and open the Services application.
Find Spooler: Locate the service named "Print Spooler". Right-click it and select "Stop".
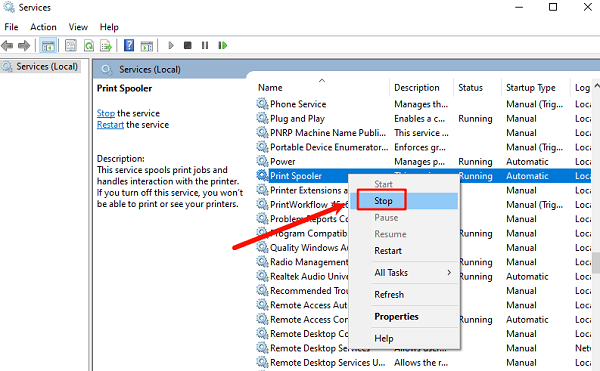
Clear Files: Open File Explorer and navigate to the spooler folder: C:\Windows\System32\spool\PRINTERS
Delete Contents: Delete everything inside the PRINTERS folder. (These are the stuck print jobs.)
Restart Spooler: Return to the Services application, right-click the "Print Spooler" service, and select "Start".
Conclusion
Fixing printing issues on your HP printer is primarily a matter of ensuring perfect communication between the computer and the device.
By starting with a system-wide driver update using Driver Talent X, then leveraging official tools like HP Support Assistant and Print and Scan Doctor, and finally manually intervening via Device Manager or clearing a clogged Print Queue, you can efficiently diagnose and permanently resolve most common HP printing malfunctions.
See also:
How to Update Drivers for Free: Simple Methods for Windows 10/11
How to Update Drivers on Dell Laptops (Windows 10/11)


