Running out of ink is never fun, but replacing the cartridges in your HP printer should be a quick and painless process. Whether you're using standard cartridges or high-yield options, knowing the correct procedure is key to avoiding spills, printer errors, and wasted ink.
This comprehensive guide will walk you through the easy, step-by-step process of HP printer ink replacement and provide crucial troubleshooting tips to ensure your new cartridges are recognized immediately.
1. Critical Preparation: Update Your Printer and System Drivers
A common reason a new cartridge isn't recognized is outdated or corrupted printer drivers. Since the printer uses software to communicate with the cartridge chip, an old driver can cause conflicts. Before installing new ink, it's smart to ensure all system components are ready for the change.
How to Update Drivers with Driver Talent X?
Driver Talent X is an efficient tool that automates the driver update process, making it the quickest and safest way to ensure your printer and PC drivers are perfectly matched.
Download and Install:
Click the "Download" button to download the software package.
Install it on your Windows PC.
Scan Your System:
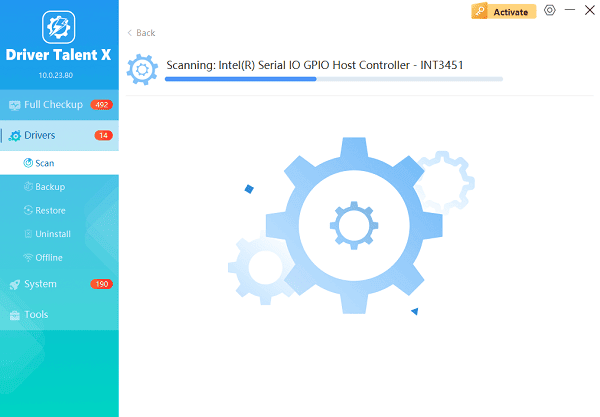
Launch the application. Go to "Drivers" > "Scan", click "Scan".
Driver Talent X will automatically perform a comprehensive scan of your entire system to identify all outdated, missing, or corrupted drivers, focusing specifically on your HP Printer Driver and associated USB/Chipset drivers.

One-Click Update:
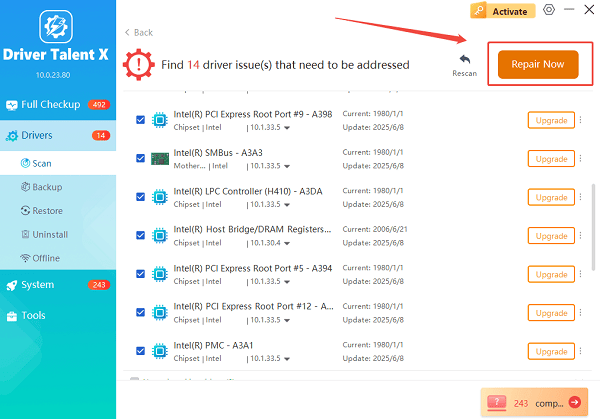
The results will show you a list of all drivers that need attention.
Simply select the printer driver or click the "Repair Now" button. The tool will automatically download and install the latest, verified version for your specific HP printer model.

Restart Your PC:
Once the installation is finished, restart your computer to finalize the update and ensure a smooth ink replacement process.
2. HP Ink Replacement: Step-by-Step Cartridge Swap
While specific steps vary slightly by model (DeskJet, Envy, OfficeJet), the general procedure for replacing standard HP ink cartridges is the same.
Turn the Printer On: Ensure your printer is powered on. If the printer is off, the carriage holding the cartridges won't move to the center position.
Open the Access Door: Open the exterior access door or lid that covers the ink cartridges. Wait until the carriage stops moving and is centered in the printer's path.
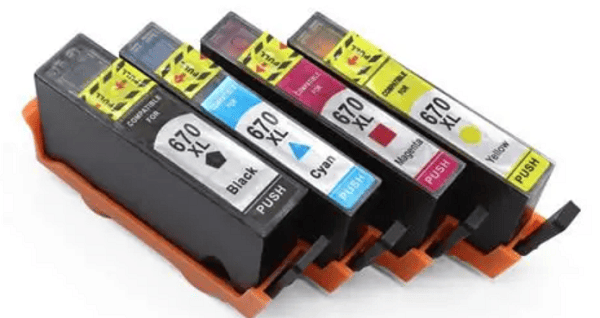
Remove the Old Cartridge: Gently push down on the old cartridge to release the lock, then pull it out toward you to remove it from the slot. Dispose of the old cartridge responsibly (HP has recycling programs).
Prepare the New Cartridge: Take the new cartridge out of its packaging. Only touch the black plastic body. Carefully remove the protective plastic tape from the electrical contacts (usually copper-colored). Do not touch the copper contacts or the ink nozzles.

Insert the New Cartridge: Hold the new cartridge with the contacts facing the printer. Slide the new cartridge into the empty slot until it clicks securely into place. It should feel firm.
Close the Door: Close the access door. The printer will typically perform an alignment process automatically.
3. Troubleshooting: New Cartridge Not Recognized
If the printer displays a "cartridge error" or "cartridge not recognized" message after the swap, try these troubleshooting methods:
Method 1: Clean the Electrical Contacts
The most common reason for this error is a dirty contact chip.
Remove the Cartridge: Gently remove the new cartridge.
Clean Contacts: Use a lint-free cloth or cotton swab lightly dampened with bottled water (do not use tap water or cleaning solvents) to wipe the copper electrical contacts on the cartridge.
Clean Carriage Contacts: If possible, use the same cloth to gently wipe the matching electrical contacts inside the printer carriage.
Reinsert: Let both sets of contacts air-dry completely (about 5 minutes), then reinsert the cartridge.
Method 2: Perform a Hard Reset (Power Cycle)
A hard reset can clear temporary errors stored in the printer's memory.
With the Cartridges Installed, turn the printer on.
Unplug the Power Cord from the back of the printer while the printer is on.
Unplug the other end of the power cord from the wall outlet.
Wait 60 Seconds.
Plug the power cord back into the wall, then back into the printer. The printer will turn on and try to recalibrate.
Conclusion
Replacing the ink in your HP printer is a simple process that guarantees high-quality prints. By ensuring your drivers are updated using Driver Talent X, you eliminate software conflicts.
If the printer still presents issues, a quick clean of the electrical contacts or a simple power cycle can usually fix the problem and get your new ink recognized immediately.
See also:
Epson L3250 Driver Download & Installation Guide for Windows 10/11
How to Update BIOS on MSI Motherboard – Step-by-Step Guide


