A sudden failure of your Lenovo laptop's built-in keyboard can halt your work immediately. This issue is particularly common after major Windows updates or prolonged use. Before panicking about a hardware replacement, it's crucial to understand the most likely causes, which are usually rooted in software and simple connectivity.
Why Your Lenovo Keyboard Stops Working: The Main Causes
The problem of an unresponsive Lenovo laptop keyboard can typically be traced to one of these three areas:
Corrupted or Outdated Drivers: Windows updates, driver conflicts, or improper shutdowns can corrupt the keyboard's device driver. The OS then loses the ability to properly communicate with the hardware, rendering it useless.
BIOS/Firmware Issues: The Basic Input/Output System (BIOS) controls how hardware components interact with the operating system at the most fundamental level. Incorrect BIOS settings or simple power-related glitches can cause the keyboard to be disabled before Windows even loads.
Physical/Software Conflicts: This includes spilled liquid, crumbs lodged beneath keys, or accidental toggles of Windows accessibility features (like Filter Keys) or Lenovo-specific keyboard locks (using the Fn key).
Method 1: Update Drivers with Driver Talent X
Since driver issues are the leading cause of keyboard failure, addressing this first is the most efficient troubleshooting step. Using Driver Talent X automates the process of finding the specific, correct driver for your Lenovo model.
Download and Install:
Click the "Download" button to download the software package.
Install it on your computer.
Run a System Scan:
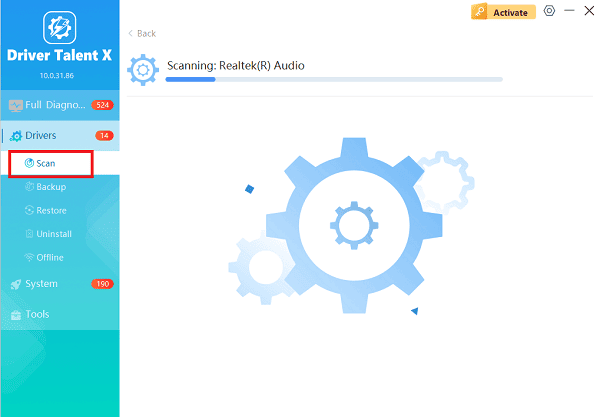
Launch the program and go to "Drivers" > "Scan", click "Scan".
Driver Talent X will analyze all hardware components, including your integrated keyboard and chipset controllers.

Complete Update:
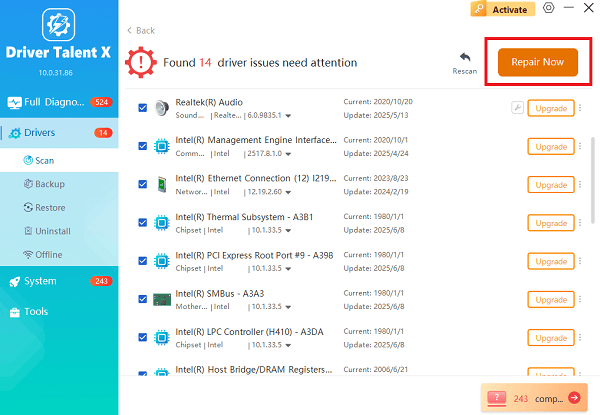
After the scan is complete, the software will display a list of all drivers that need attention. Click the "Repair Now" button.

The application will download the latest official driver versions and install them automatically.
Reboot to Finalize:
Restart your Lenovo laptop to complete the driver installation and allow Windows to load the keyboard using the new, stable software.
Method 2: Resetting the System and Clearing Power Glitches
If the keyboard remains unresponsive, a static discharge or system reset can clear out temporary conflicts often caused by power issues
Solution 1: Perform a Hard Reset / Power Cycle
This method clears residual charge that can cause peripheral glitches.
Power Down: Shut down your Lenovo laptop completely and unplug the power adapter.
Disconnect Peripherals: Disconnect all external devices (USB mouse, flash drives, external monitors, etc.).
Discharge Static: Press and hold the Power Button for a full 60 seconds. This is crucial, as it drains any residual static electricity.
Restart: Plug the power adapter back in and turn on the laptop. Test the keyboard immediately.
Solution 2: Check and Disable Filter Keys
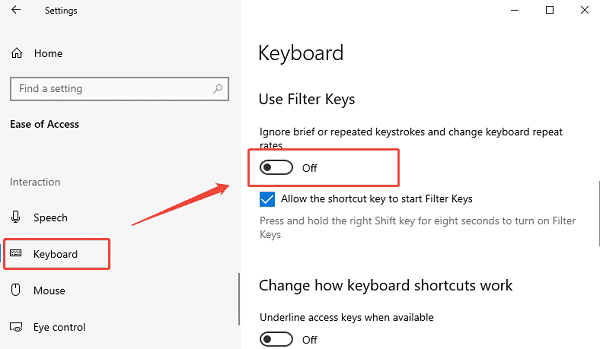
Filter Keys is an accessibility feature that can cause keystrokes to be delayed or ignored if accidentally enabled.
Open Settings: Press the Windows Key + I (or navigate to Settings using your mouse/touchpad).
Access Accessibility: Select "Accessibility" (or "Ease of Access" in older Windows versions).
Find Keyboard Settings: Select "Keyboard" from the left-hand menu.
Disable Filter Keys: Ensure the toggle switch for "Filter Keys" is set to Off.

Method 3: BIOS, Device Manager and Component-Specific Fixes
For more persistent problems, you need to delve deeper into the system's firmware and software configuration.
Solution 1: Test Keyboard Functionality in the BIOS
Testing the keyboard outside of Windows determines if the problem is hardware (keyboard itself) or software (Windows driver/OS).
1). Access BIOS: Restart your laptop. As it boots up, repeatedly press the designated BIOS key (usually F2, Fn + F2, or Enter to interrupt the normal startup).
2). Test Keys: Once in the BIOS/UEFI setup screen, use the arrow keys and other keys to navigate the menus.
3). Analyze Results:
If the keys work in BIOS: The problem is definitely software-related (drivers or OS settings). Proceed to Solution B.
If the keys do NOT work in BIOS: The problem is likely hardware failure (the physical keyboard unit or its internal connector). Consider professional repair.
4). Exit: Exit the BIOS without saving any changes.
Solution 2: Manually Reinstall the Keyboard Driver
If you cannot use a third-party tool, forcing Windows to reload the keyboard driver can resolve corruption.
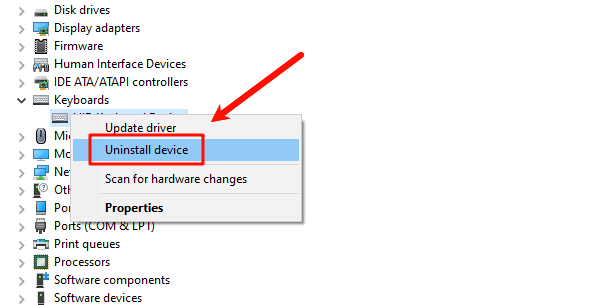
Open Device Manager: Press Windows Key + X and select "Device Manager".
Expand Keyboards: Use the Tab key and arrow keys to navigate to and expand the "Keyboards" section.
Uninstall Driver: Use the arrow keys to select your keyboard device (often labeled "Standard PS/2 Keyboard" or a model-specific name). Press the context menu key (or Shift + F10) and select "Uninstall device".

Reinstall: Restart your laptop. Windows will automatically detect the missing hardware upon boot-up and reinstall the keyboard driver. Test the keys once the desktop loads.
Conclusion
A non-working keyboard on your Lenovo laptop can almost always be fixed using a targeted approach. Start by eliminating the most common culprit—outdated or corrupt drivers—by using Driver Talent X.
If that doesn't work, perform a hard reset to clear power glitches and review your accessibility settings. Then, run a BIOS test to see if it's a software or hardware issue. This helps you decide whether to reinstall drivers or seek professional repair, saving time and effort.
See also:
Mandragora: Whispers of the Witch Tree Overview
Overview of Tempest Rising on Steam
[Fixed] Red Dead Redemption 2 ERR_GFX_STATE Graphics Error
Ways to Fix The Elder Scrolls IV: Oblivion Remastered Startup Crash


