
Maintaining the correct drivers for your Logitech mouse is essential for optimal performance, smooth scrolling, and reliable connectivity on Windows 10/11. Outdated or incompatible drivers can lead to cursor lag, erratic movement, or the failure of advanced features (like customizable buttons or high DPI settings).
This guide provides a systematic, step-by-step approach to downloading and installing the necessary Logitech mouse drivers, starting with the most efficient method for driver management.
Part I: Driver Integrity and System Synchronization
The most common cause of poor mouse performance is a conflict between the mouse driver, the Logitech Unifying Receiver driver, and the PC's core USB/Chipset drivers.
Automated Driver Update with Driver Talent X
Manually updating the various drivers required for a Logitech mouse (especially if it uses a proprietary receiver) can be complex and tedious. A specialized utility automates this process, ensuring all necessary input, USB, and chipset drivers are perfectly stable.
Download and Install:
Click the "Download" button to download the software package.
Install it on your Windows 10 or 11 PC.
Run Scan:
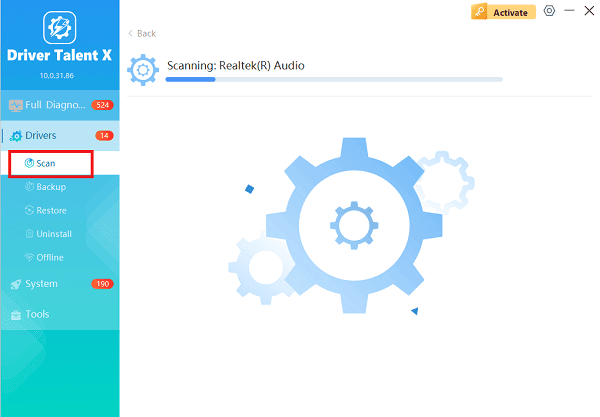
Launch the application and go to "Drivers" > "Scan", click "Scan".
The software will perform a deep analysis of your system, focusing on peripheral and controller drivers.
Install the Update:
After the scan is complete, the software will display a list of all drivers that need attention. Select the necessary drivers and click the "Repair Now" button.
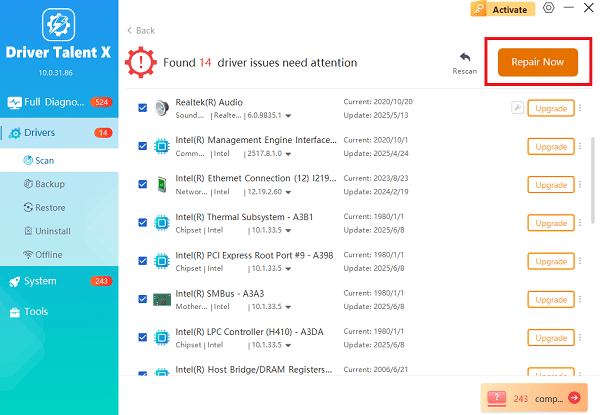
Driver Talent X will download the latest, certified versions specific to your Logitech mouse model and Windows version.
Finalize:
After the installation is complete, restart your computer. Stable drivers are essential for consistent and responsive mouse performance.
Part II: Official Logitech and Windows Methods
These methods rely on official software channels to ensure you get the correct, validated drivers.
Method 1: Use the Logitech G HUB / Options Software
For most modern Logitech mouse (especially G-series or MX series), the companion software automatically installs and manages the correct drivers and firmware.
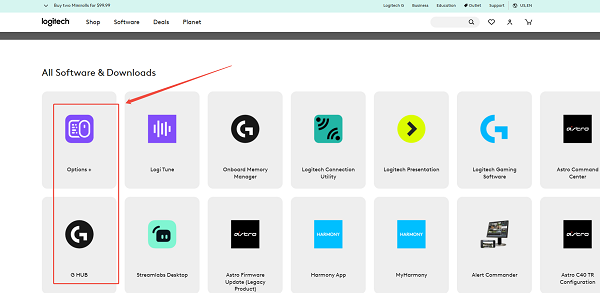
Download Software: Go to the official Logitech website and download either Logitech G HUB (for gaming mouse) or Log Logitech Options / Options+ (for productivity mouse like the MX Master).
Install: Run the installer and follow the on-screen prompts.
Driver Check: The software will detect your connected mouse and automatically install all necessary drivers and firmware updates specific to that model.
Configuration: Use this software to customize buttons, adjust DPI, and check battery life.
Method 2: Update via Windows Device Manager
This is the standard Windows method for checking driver status, often used to resolve a "yellow exclamation mark" error.
Press Windows Key + X and select "Device Manager".
Expand the "Mice and other pointing devices" category.
Right-click on your Logitech mouse entry (or "HID-compliant mouse").
Select "Update driver".
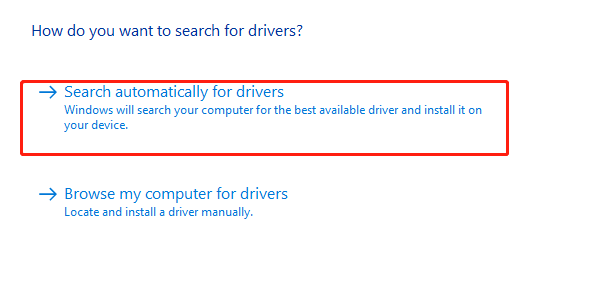
Choose "Search automatically for drivers". Windows will check online for a newer basic driver version.
If a new driver is found, install it and restart your PC.
Part III: Troubleshooting Connection and Re-Pairing
If the mouse is failing to connect or function, the issue may be related to the pairing or the receiver itself.
Method 1: Reseat and Re-Pair the Unifying Receiver
If your mouse uses a Unifying Receiver (a small USB dongle), it may have lost its pairing connection.
Change Port: Unplug the Unifying Receiver and plug it into a different USB port on your PC.
Download Unifying Software: Download and install the Logitech Unifying Software from the official Logitech website.
Re-Pair: Launch the software and follow the instructions to re-pair your specific mouse to the receiver. This re-establishes the connection link.
Method 2: Check for Windows Filter Keys
Windows accessibility settings, if enabled unintentionally, can cause the mouse to feel slow or unresponsive, mimicking a driver issue.
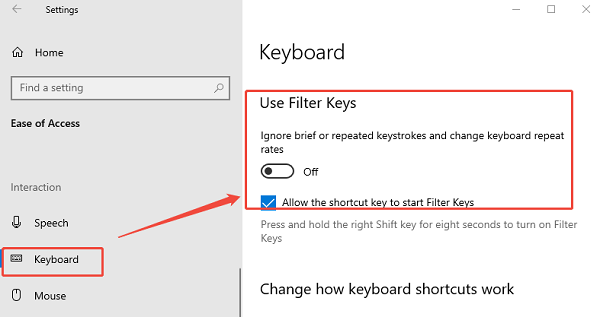
Press Windows Key + I to open Settings.
Navigate to "Ease of Access" > "Keyboard".
Ensure the "Filter Keys" toggle switch is set to "Off". Filter Keys is designed to ignore quick presses and can introduce input delay.
Conclusion
Obtaining and maintaining the correct Logitech mouse drivers is essential for peak performance on Windows 10/11. The most reliable method is to first ensure system stability with Driver Talent X.
By combining this foundational driver check with installing the necessary Logitech G HUB or Options software and ensuring the receiver is properly re-paired, you can eliminate common issues and enjoy smooth, precise cursor control.
See also:
Elden Ring: Nightreign Highlights and System Requirements Overview
[Fixed] 'xinput1_3.dll Was Not Found' Error on Windows


