Network adapter issues are common in Windows and can disrupt your connection. This article offers solutions to help restore normal connectivity.
1. Update Network Adapter Driver
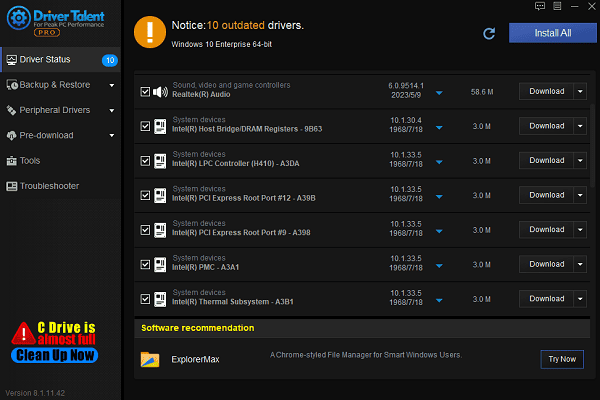
Outdated or corrupted network adapter drivers can prevent the adapter from functioning properly. Ensuring your drivers are up to date is an essential step to resolve this issue. It is recommended to use Driver Talent to automatically detect and update drivers, saving time and avoiding the risk of downloading or installing incorrect drivers.
Click the download button to get the latest version of Driver Talent. After installation, open the software and click "Scan".
After the scan completes, it will display the drivers that need to be installed or updated. Find the network adapter driver in the list and click the "Download" button.

After the update is complete, it is recommended to restart your computer to ensure the updated drivers take effect.
2. Check Network Adapter Status
Press Windows + X and select "Device Manager".
In Device Manager, expand "Network Adapters".
Check if there is a yellow exclamation mark (indicating a problem) or a red X (indicating the device is disabled) next to your network adapter's icon.
If you see a yellow exclamation mark or any other error symbol, right-click the adapter, select "Update Driver" or "Uninstall Device", then restart your computer.
If there are no issues with the network adapter, skip this step and proceed with the other actions.
3. Reset Winsock Directory
Press Windows + S, type "Command Prompt", and select "Run as Administrator".
In the command window, type the following command and press Enter: netsh winsock reset

Wait for the command to complete. Once successful, restart your computer.
4. Check Power Management Settings
Press Windows + X and select "Device Manager".
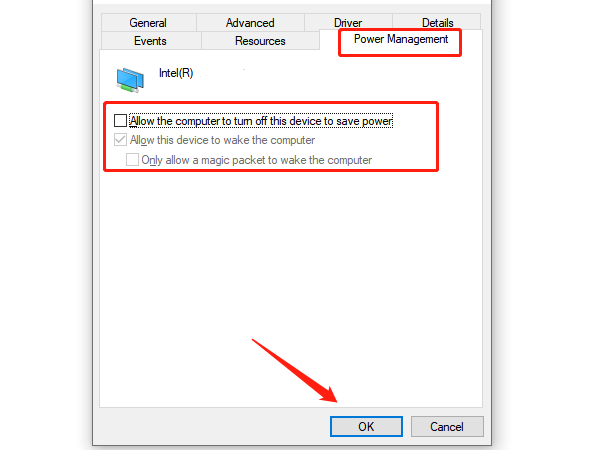
In Device Manager, expand "Network Adapters", right-click your network adapter, and select "Properties".
Go to the "Power Management" tab and uncheck" Allow the computer to turn off this device to save power".

Click "OK" to save the settings and exit Device Manager.
5. Run Network Troubleshooter
Open Settings, click "Update & Security".
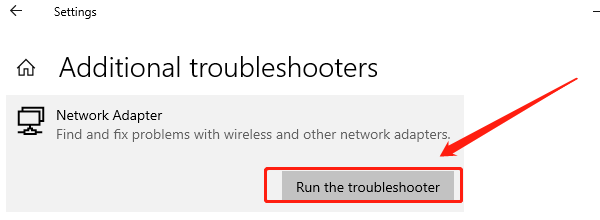
In the left menu, select "Troubleshoot", then click "Additional troubleshooters".
Find "Network Adapter" and click "Run the troubleshooter".

The system will automatically scan and attempt to fix any issues with the network adapter.
After completion, restart your computer and check if the network adapter is functioning properly.
6. Check System Updates
Open Settings, click "Update & Security".
In the left menu, select "Windows Update", then click "Check for Updates".
If updates are available, click "Download and Install".
After the update is complete, restart your computer.
By following these steps, you can effectively resolve issues with a non-working network adapter. If the problem persists, it is recommended to contact technical support or a professional for further diagnosis and repair.
See also:
How to Fix Mouse Arrow Disappearance on Windows 10
6 Ways to Fix an Unresponsive Wireless Mouse
Fixing Valheim Keeps Freezing on PC


