Many Windows 10 users may face the "No audio output device is installed" error. This article offers solutions to help fix the issue and restore normal audio output.
1. Update Audio Drivers
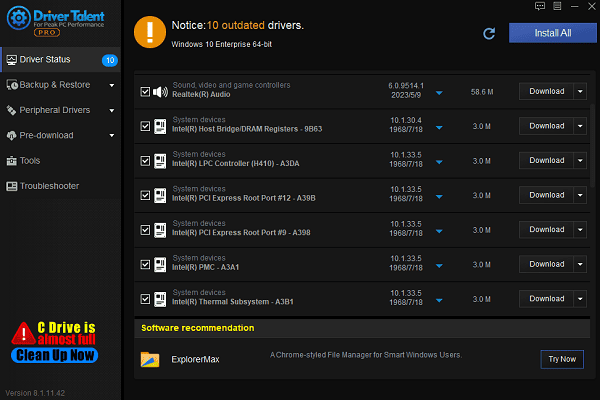
Outdated or corrupted audio drivers are one of the most common causes of the "No audio output device is installed" error. Keeping your audio drivers up to date can effectively prevent this issue. It is recommended to use Driver Talent for automatic driver detection and updates, saving time and avoiding the risk of downloading or installing incorrect drivers.
Click the download button to get the latest version of Driver Talent, and after installation, open the software and click "Scan".
After scanning, it will display the drivers that are either missing or need updating. Locate the audio driver in the list and click "Download".

Once the update is complete, restart your computer to ensure the updated driver functions correctly.
2. Check Audio Device Connections
Check External Audio Devices:
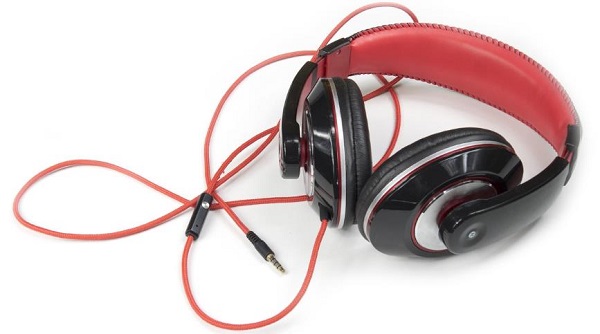
For headphones or speakers, check if the plug is securely inserted into the headphone jack or audio output port.
If using a USB audio device, ensure it is properly inserted into the USB port and recognized by the system.

Check Wireless Audio Devices:
Open "Settings" > "Devices" > "Bluetooth & other devices" to check if the wireless audio device is connected. If there are connection issues, try re-pairing the device.
Replace the Connection Cable:
If using a wired audio device, try replacing the audio cable to rule out cable-related issues.
3. Enable Audio Devices
Right-click the Start button and select "Device Manager".
In Device Manager, expand the "Sound, video and game controllers" section.
Check if there is a downward arrow next to the audio device (such as Realtek High Definition Audio), indicating that the device is disabled.
If the audio device is disabled, right-click the device and select "Enable device".
After enabling the device, restart the computer and check if the audio is restored.
4. Check Windows Audio Services
Press Win + R, type "services.msc", and press Enter to open the Services window.
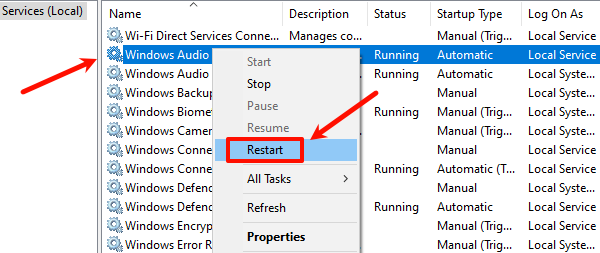
In the services list, find "Windows Audio".
Ensure that the service status is Running. If it is not running, right-click it and select "Start". If the status is "Running", click "Restart".

Also, ensure that the "Windows Audio Endpoint Builder" service is also running, as this is crucial for the proper functioning of audio devices.
If the audio service is already running but the issue persists, try right-clicking the service and selecting Restart.
5. Run Windows Audio Troubleshooter
Press Win + I to open the "Settings" menu.
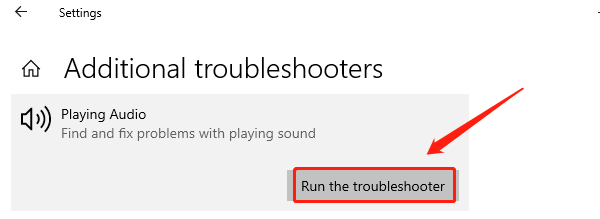
Select "Update & Security" > "Troubleshoot" > "Additional troubleshooters".
Under "Playing Audio", click "Run the troubleshooter".

The system will automatically detect and fix any issues related to audio playback. Follow the on-screen instructions to complete the process.
6. Check for Hardware Issues
Connect the audio device to another computer or device to check if it works correctly. If the device doesn't work on another computer either, it may be faulty and needs replacement.
If you are using a wired audio device, try plugging it into a different audio jack on your computer to rule out port issues. If using a USB audio device, try a different USB port.
If you're using an integrated sound card, try restarting your computer and check if the audio driver in Device Manager is functioning normally. If the hardware is damaged, you may need to consider replacing the audio hardware or contacting professional repair services.
Following these steps can resolve most audio issues. If the problem continues, it may be due to a hardware fault or require professional technical support.
See also:
Guide to Fix Mouse Cursor Disappearing
7 Methods to Fix Mouse Not Working
Guide to Fix No Signal on Monitor


