
Encountering an "NVIDIA Driver Install Failed" error is a common but frustrating problem for PC users, particularly after downloading a new GeForce Game Ready Driver. This failure prevents you from accessing the latest performance boosts, stability fixes, and features for your NVIDIA graphics card.
The primary cause of installation failure is almost always a conflict with existing, corrupted driver files, background services or aggressive antivirus software. This guide provides step-by-step solutions to diagnose and fix the error, ensuring a successful NVIDIA driver installation.
Part I: Automated Driver Cleanup
The most reliable way to fix an installation failure is to perform a complete, clean removal of all old, conflicting NVIDIA files before attempting the new install. Manually doing this can be complex, but specialized software automates the process.
Install & Update with Driver Talent X
Driver Talent X can identify the exact driver version needed for your GPU and perform a guaranteed clean installation, bypassing conflicts that cause manual installation to fail.
Download and Install:
Click the "Download" button to download the software package.
Install it on your Windows PC.
Run Scan:
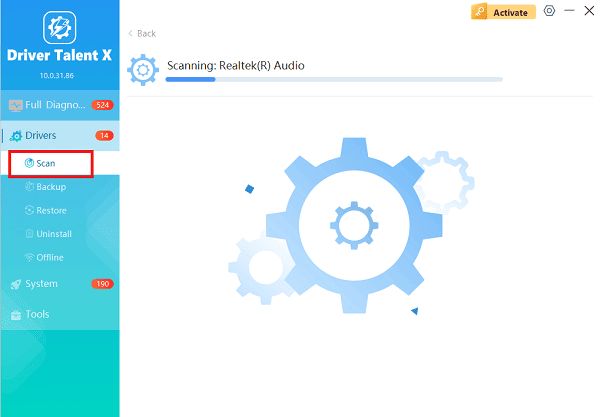
Launch the application and go to "Drivers" > "Scan", click "Scan".
The tool will conduct a deep analysis of your system, focusing on your current display driver status.
Install the Update:
After the scan is complete, the software will display a list of all drivers that need attention.
Select the NVIDIA driver and click the "Upgrade" button. Driver Talent X will download the correct, latest driver package, and perform a completely clean installation automatically.
Restart Your PC:
Once the process is finalized, restart your PC.
The new, clean driver will load correctly, resolving the installation error.
Part II: Conflict Resolution and System Checks
If the automated fix is not an option, you must manually resolve conflicts caused by Windows settings or background processes.
Method 1: Disable Security Software and Services
Antivirus programs or NVIDIA's own background services can interfere with the installer's ability to write critical files to the system folder.
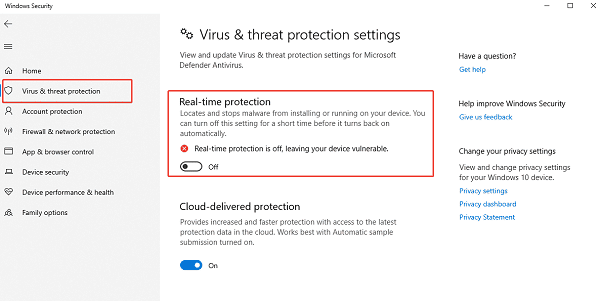
1). Disable Antivirus/Firewall: Temporarily disable any third-party antivirus software or security suite you are running. If you are using Windows Defender, temporarily disable the Real-time protection.
2). End NVIDIA Processes:
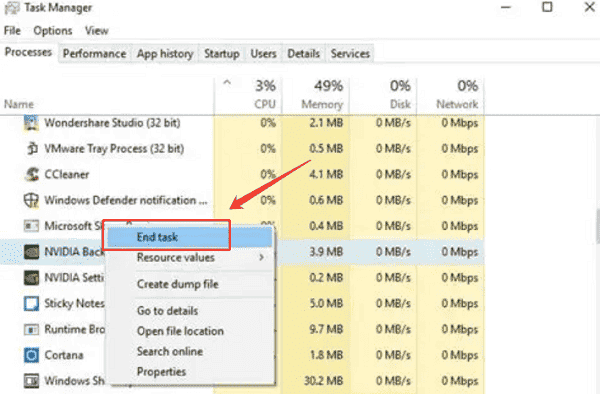
Press Ctrl + Shift + Esc to open the Task Manager.
Click the "Processes" tab.
Look for any processes named "NVIDIA", "GeForce Experience" or "NVIDIA Installer" running in the background.
Right-click on each related process and select "End task".
3). Run Installer: Try running the NVIDIA driver installer again as an administrator (right-click the installer file and select "Run as administrator").
Method 2: Run the System File Checker (SFC)
Corrupted core Windows system files can prevent any installer, including the NVIDIA driver installer, from completing its operations successfully.
Type "Command Prompt" in the Windows search bar, then select "Run as administrator".
Type the command: sfc /scannow
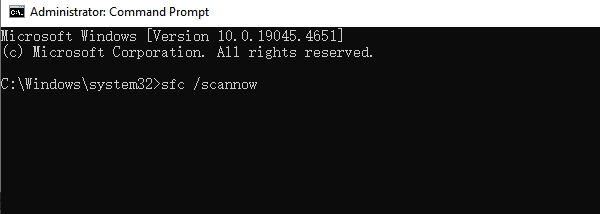
Press Enter and wait for the scan to reach 100%. If the tool finds and fixes errors, restart your PC and attempt the NVIDIA installation again.
Part III: Manual Installation Overrides
These steps address corruption in the installer itself or force a low-level clean installation.
Method 1: Manually Download and Force Clean Install
The driver package you attempted to install may have been corrupted during the download process.
Delete Corrupted Files: Navigate to C:\ProgramData\NVIDIA Corporation\Downloader and delete the contents of this folder.
Download Fresh Installer: Go to the official NVIDIA Driver Download website. Manually select your GPU model and Windows version to download a fresh, verified copy of the installer.
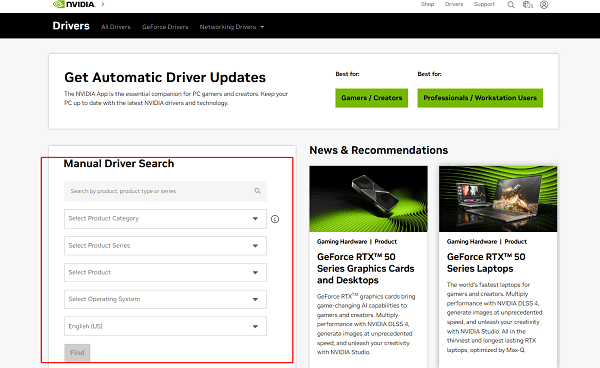
Run Custom Install: Run the newly downloaded installer file. When prompted for the installation type, choose "Custom (Advanced)".
Crucial Step: On the next screen, check the box labeled "Perform a clean installation". This tells the installer to wipe all previous settings and files before installing the new driver.
Complete the installation and restart your PC.
Method 2: Use Display Driver Uninstaller (DDU)
For persistent failures where corruption is deep-seated, DDU is the most thorough manual cleanup tool available.
Download DDU: Download the Display Driver Uninstaller (DDU) utility.
Boot into Safe Mode: Reboot your PC and access Safe Mode (search online for your specific Windows version's instructions).
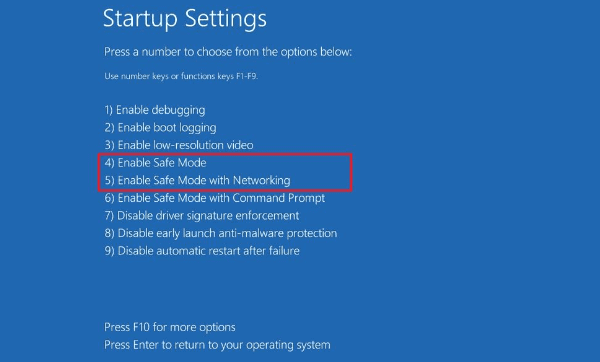
Execute Clean Wipe: In Safe Mode, run DDU. Select "GPU" and "NVIDIA" and click "Clean and restart". DDU will completely remove all driver remnants.
Install New Driver: When the PC restarts (in normal mode), immediately run the fresh NVIDIA driver installer you downloaded in Method 1 of Part III (as administrator).
Conclusion
The "NVIDIA Driver Install Failed" error is almost always a sign that a conflict exists within your system. By first upgrade drivers with Driver Talent X or manually performing a clean install via the Custom option, you can bypass these conflicts. Systematically checking for interfering software and running the SFC tool ensures a stable environment for your new NVIDIA driver.
See also:
Qualcomm Atheros QCA61x4A Driver Download and Installation Guide
Network Adapter Not Working on Windows? Try These Fixes


