
Setting up an NVIDIA graphics card in a laptop, particularly those with NVIDIA Optimus technology, is crucial for maximizing gaming performance. An incorrect setup can lead to poor frame rates, high power consumption or applications failing to utilize the powerful NVIDIA card entirely.
This guide provides comprehensive, step-by-step instructions on setting up and optimizing your NVIDIA laptop graphics card, beginning with the most critical foundational step: driver integrity.
Part I: Driver Installation and Optimization
Before configuring any settings, you must ensure your system has the correct, non-conflicting drivers for both the Intel (integrated) and NVIDIA (dedicated) GPUs.
Method 1: Automated Driver Update with Driver Talent X
Manually updating dual-GPU systems (Intel + NVIDIA) can be prone to error, as the Intel chipset and graphics drivers must also be current for the NVIDIA card to function optimally. A specialized utility synchronizes all necessary drivers.
Download and Install:
Click the "Download" button to download the software package.
Install it on your laptop.
Run Scan:
Launch the application and go to "Drivers" > "Scan", click "Scan".
The software will perform a deep analysis, focusing on both your Intel integrated graphics and your NVIDIA dedicated graphics card.
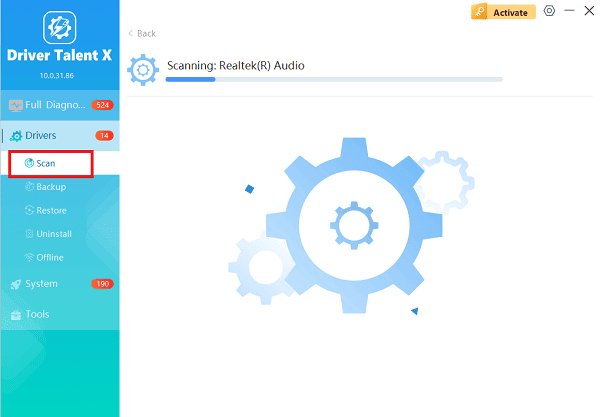
Execute Update:
After the scan is complete, the software will display a list of all drivers that need attention. Select the necessary Intel and NVIDIA drivers and click the "Upgrade" or "Repair Now" button.
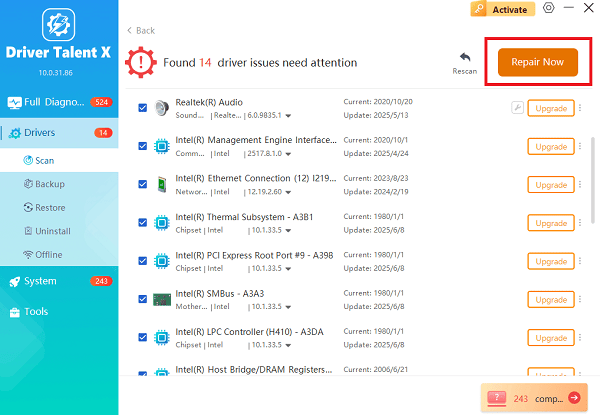
Driver Talent X will download the latest, certified drivers, ensuring no conflicts exist between the two GPUs.
Finalize:
After the installation is complete, restart your computer to load the new, optimized drivers.
Method 2: Clean Manual Driver Installation (Via GeForce Experience)
If you prefer the official NVIDIA tool, always perform a "clean" installation to remove old files.
Download GeForce Experience: Install the NVIDIA GeForce Experience application from the official NVIDIA website.
Check for Updates: Open GeForce Experience, navigate to the "Drivers" tab, and click "Check for Updates".
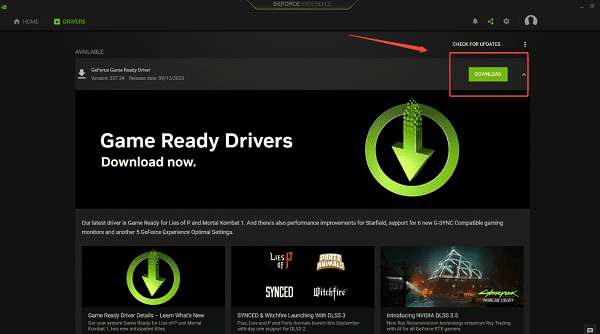
Perform Clean Install: If there are any updates, just click "Download". Once the update is downloaded, select the "Custom Installation" option (instead of Express).
On the next screen, check the box labeled "Perform a Clean Installation". This process removes old driver traces and settings before installing the new driver package.
Part II: Windows and NVIDIA Control Panel Configuration
After driver stability is confirmed, you must instruct Windows and the NVIDIA software which GPU to use for specific applications.
Method 1: Configure Graphics Performance in Settings
On Windows 10 and 11, you can assign high-performance graphics on an application-by-application basis.
Press Windows Key + I to open Settings.
Go to "System" > "Display" > "Graphics".
Click "Browse" to locate the executable file (.exe) for your game or demanding application (e.g., Fortnite.exe or PremierePro.exe).
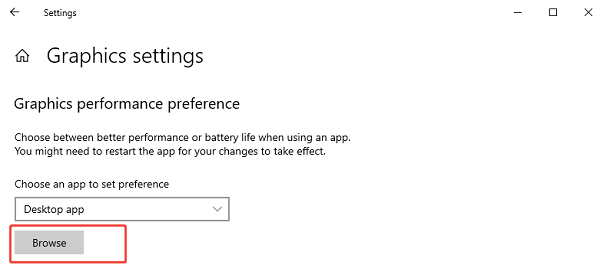
Once the application is added, click on it, select "Options", and choose "High performance".
Windows will now force that application to run using the dedicated NVIDIA GPU.
Method 2: Set Global Defaults in NVIDIA Control Panel
You can set a default behavior for applications that are not manually configured in Windows Settings.
Right-click on your desktop and select "NVIDIA Control Panel".
Go to "3D Settings" > "Manage 3D settings".
Under the "Global Settings" tab, find the drop-down menu for "Preferred graphics processor".
Change the setting from "Auto-select" or "Integrated graphics" to "High-performance NVIDIA processor".
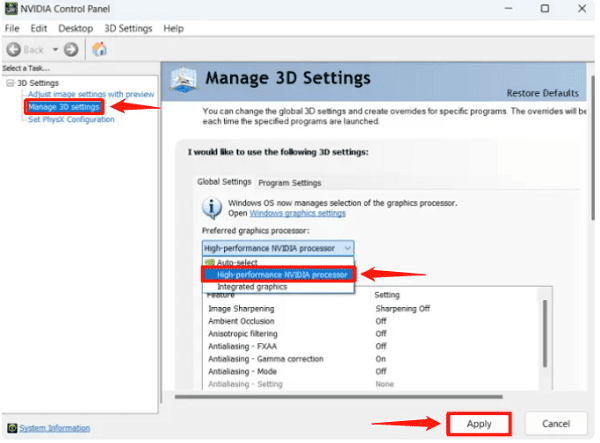
Click "Apply". (Note: This ensures maximum performance but will increase battery drain when running any 3D application.)
Part III: Power and Troubleshooting
These final steps address power settings that might be throttling your GPU performance.
Method 1: Adjust Windows Power Plan
If your laptop is set to an overly aggressive power-saving mode, the NVIDIA GPU may be intentionally throttled.
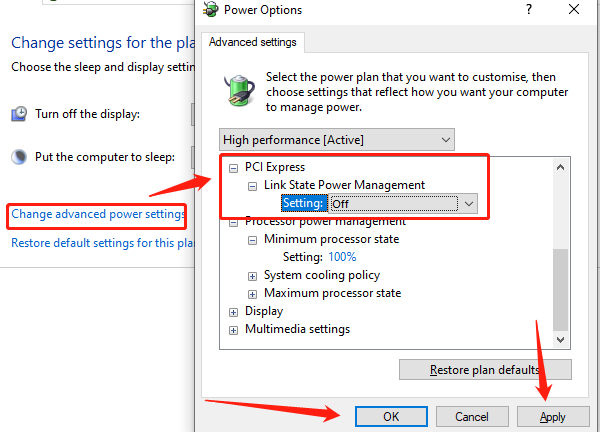
Press Windows Key + R, type "powercfg.cpl", and press Enter.
Select the "High performance" power plan (or "Balanced" if you prioritize battery life outside of gaming).
If using "Balanced", click "Change plan settings", then "Change advanced power settings".
Expand "PCI Express" > "Link State Power Management" and set it to "Off" when plugged in.
Method 2: Verify Temperatures and Clean Vents
Overheating is the quickest way to limit GPU performance, causing it to throttle or crash.
Use a monitoring tool (like HWMonitor) to check your GPU temperature during heavy load (e.g., gaming). Temperatures over 90°C can cause throttling.
Ensure your laptop is on a flat, hard surface to allow maximum airflow.
Use compressed air to gently clear any dust blockage from the intake and exhaust vents on the bottom and sides of the laptop.
Conclusion
Setting up your NVIDIA graphics card for a laptop requires synchronization across hardware, drivers and software settings. The critical first step is establishing driver stability using Driver Talent X to manage the complex dual-GPU system.
By combining this with properly setting the "High performance" preference in both Windows Settings and the NVIDIA Control Panel, you ensure every application leverages the dedicated GPU for maximum speed and performance.
See also:
Qualcomm Atheros QCA61x4A Driver Download and Installation Guide
Network Adapter Not Working on Windows? Try These Fixes


