NVIDIA graphics cards are known for their performance, but some users may face detection issues. This article offers solutions to help troubleshoot and fix the problem.
1. Check for Driver Updates
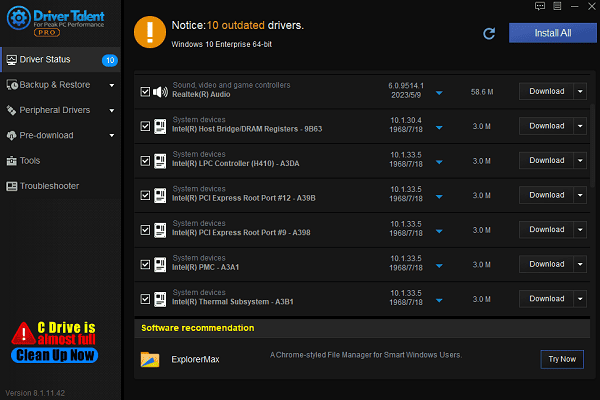
Outdated or corrupted drivers are one of the most common causes of the "graphics card not detected" issue. Updating the GPU driver is a crucial step in resolving the problem. Using Driver Talent is recommended for automatically detecting and updating drivers, saving time and preventing errors from downloading or installing incorrect drivers.
Download the latest version of Driver Talent and install it. Open the software and click "Scan".
Once the scan is complete, a list of missing or outdated drivers will appear. Locate the GPU driver in the list and click "Download".

After updating, restart your computer to ensure the updated driver takes effect.
2. Check Hardware Connections
Turn off your computer and unplug the power cord to ensure safety during operation.
Open the computer case and check if the GPU is properly seated in the PCI-E slot.
If the GPU is loose or not fully inserted, reseat it firmly and ensure it is securely fixed in place.
Verify that the power connectors to the GPU are securely connected. If the GPU requires additional power, make sure all power cables are connected.
Replace damaged or faulty power cables if necessary.
Use compressed air or a soft brush to clean dust from the GPU and slot to ensure proper contact.
3. Ensure the GPU Is Not Disabled
Press Win + X and select "Device Manager".
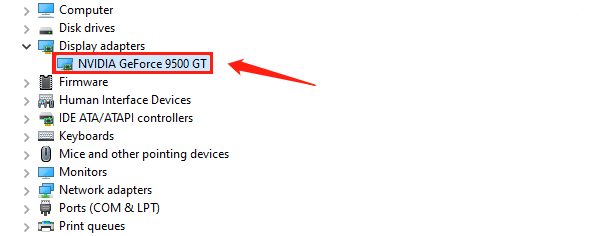
Expand the "Display Adapters" category and check if your NVIDIA GPU is listed.

If a downward arrow appears next to the GPU, it means the device is disabled.
Right-click the GPU and select "Enable Device".
Right-click the GPU again and select "Scan for Hardware Changes" to check if the GPU is functioning properly.
4. Reinstall the GPU Driver
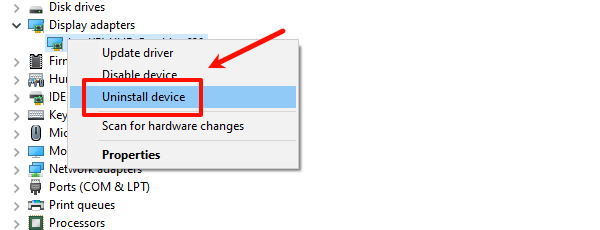
Open Device Manager, right-click your NVIDIA GPU, and select "Uninstall Device".

Check "Delete the driver software for this device", then click "Uninstall".
Visit the NVIDIA official website and download the latest driver for your GPU model and operating system.
Run the downloaded installer, select "Custom Installation", and check "Perform a Clean Installation".
Follow the prompts to complete the installation and restart your computer.
Open Device Manager again to ensure the NVIDIA GPU is correctly recognized.
5. Enable the Discrete GPU in BIOS
During startup, press Del, F2, or another BIOS hotkey (this varies by motherboard model) to enter the BIOS setup.
Navigate to "Advanced Settings" or "Integrated Peripherals" in the BIOS.
Ensure the discrete GPU (Discrete Graphics) is enabled.
Set the primary graphics device to the discrete GPU (PCI-E).
Press F10 to save changes and restart your computer to check if the GPU is detected.
6. Update Windows
Press Win + I to open "Settings".
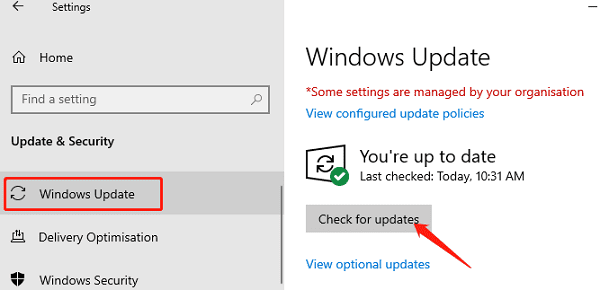
Navigate to "Update & Security" > "Windows Update", and click "Check for Updates".

If updates are available, download and install them.
Some updates may include GPU drivers or patches that help resolve detection issues.
Ensure your system version is compatible with the GPU driver to avoid detection failures caused by outdated system software.
Follow these steps to resolve the "graphics card not detected" issue with NVIDIA GPUs. If the issue persists, contact NVIDIA support or a professional technician for help.
See also:
HP DeskJet 2755e Driver Update Steps for Windows 10
How to Fix Mouse Arrow Disappearance on Windows 10
6 Ways to Fix an Unresponsive Wireless Mouse


