HP printers are well-known for their reliability and ease of use in everyday scenarios. However, some users may encounter issues such as printing failures, delays, or the printer not being recognized by the system, problems often related to driver errors.
This article will walk you through how to reinstall HP printer drivers to quickly fix these issues and restore normal functionality.
1. Why Reinstall the HP Printer Driver?
The printer driver acts as a bridge between your computer and printer. If the driver becomes corrupted, incompatible, or conflicted after a system update, the printer may stop working correctly. Reinstalling the driver helps eliminate residual issues, updates to the latest version, and resolves problems such as printing delays, failures, or connection issues.
2. Preparations Before Reinstallation
Confirm the Printer Model:
Check the printer body or user manual to identify the exact model for downloading the correct driver.
Back Up Important Files:
To avoid accidental data loss during the process, back up essential documents in advance.
Disconnect the Printer:
Before reinstalling, disconnect the USB cable or disconnect the wireless connection between the printer and computer.
3. Use Driver Talent for Easy Driver Management
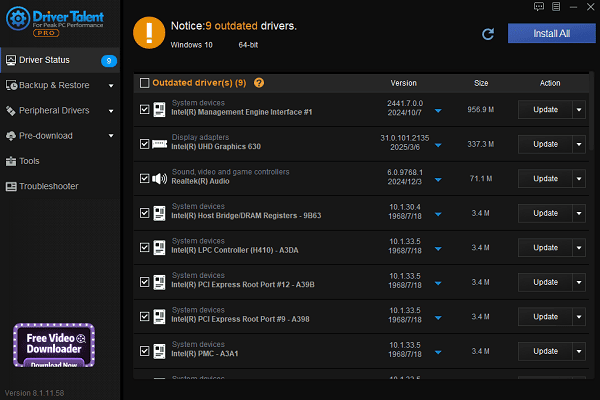
For users unfamiliar with manually installing drivers, it's recommend to use Driver Talent, a tool that automatically detects and updates drivers, reducing the risk of downloading or installing incorrect versions.
Click the download button to get the latest version of Driver Talent. Install and launch the software, then click "Scan".
After scanning, the tool will list outdated or missing drivers. Locate the HP printer driver and click "Update".

Restart your computer to ensure the new driver takes effect.
4. Manual Installation Steps
Step 1: Uninstall the Old Driver
Press Win + R, enter "appwiz.cpl", and press Enter to open Programs and Features.
Find the HP printer driver, right-click it, and select "Uninstall". Follow the prompts to complete the process.
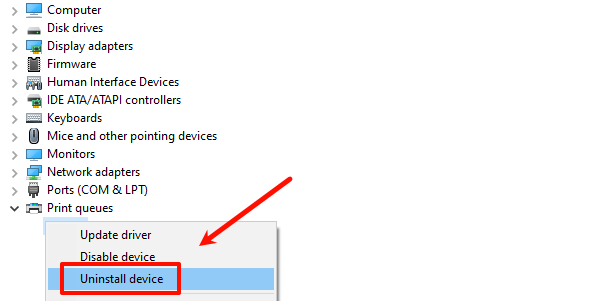
Open Device Manager, expand "Printers" or "Universal Serial Bus Controllers", and uninstall any remaining printer-related entries.
Restart your computer.

Step 2: Install the Latest Driver
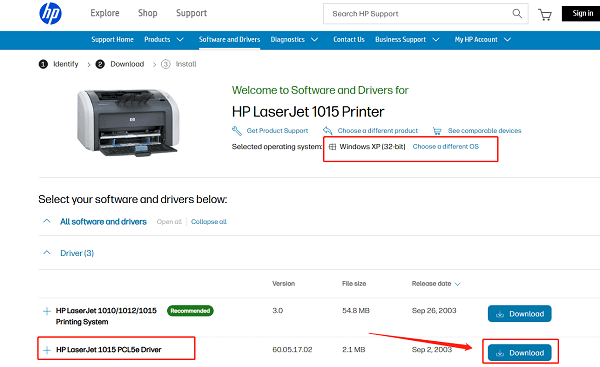
Go to the official HP driver download page, enter your printer model, and choose your operating system.
Download the installation package, run the installer, and follow the on-screen instructions.

When prompted, reconnect the printer via USB or Wi-Fi.
After installation, try printing a test page to confirm functionality.
5. Common Issues & Solutions
Issue 1: Printing is Slow or Incomplete
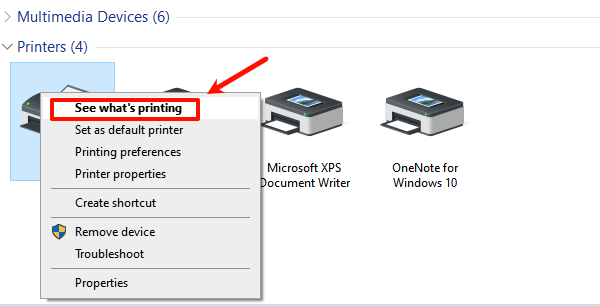
Clear the print queue and cancel any stuck jobs.

Update the printer firmware to improve compatibility.
Adjust printer settings to lower print quality and reduce load.
Issue 2: Driver Installation Fails
Verify system compatibility (32-bit vs. 64-bit).
Temporarily disable antivirus software and firewall.
Use the "HP Print and Scan Doctor" tool to auto-diagnose and fix installation problems.
Issue 3: Printer Not Detected
Try a different USB cable or port.
Ensure the printer is powered on with no error lights.
Restart both the computer and printer, then reconnect.
6. How to Keep Your HP Printer Driver Running Smoothly
Use Driver Talent to regularly check and update drivers.
Avoid frequently switching between printer models to reduce driver conflicts.
Close unnecessary background apps to free up system resources.
Clean the printer hardware periodically to prevent mechanical issues.
Reinstalling the HP printer driver is an effective solution to various printing issues. By properly uninstalling the old driver and installing the latest official version, you can improve compatibility and stability.
Hope this step-by-step guide helps you resolve printing problems with ease and enjoy a smoother printing experience.
See also:
How to Download and Install Epson L3110 Driver on Windows
Fallout 4 Crashing on Startup? Try These Methods
How to Fix PC Not Detecting Graphics Card Issue


