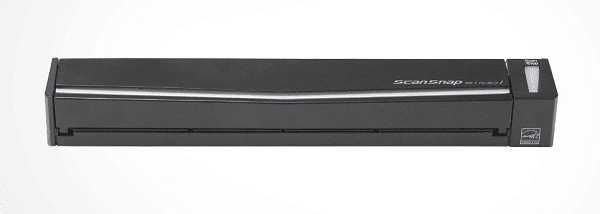
The ScanSnap S1100i is a high-performance document scanner developed by Fujitsu, widely used across various industries. To ensure smooth operation on Windows 10/11, properly downloading and installing the driver is a crucial step.
This guide provides a complete walkthrough for downloading and installing the ScanSnap S1100i driver, helping you configure the device quickly for efficient use.
1. Overview of the ScanSnap S1100i Driver
The ScanSnap S1100i driver is the official device control software provided by Fujitsu. Its main features include:
Enabling communication between the scanner and your system.
Supporting one-touch scanning, image enhancement, PDF generation, etc.
Compatibility with software like ScanSnap Home and ScanSnap Manager.
Supported Operating Systems:
Windows 11 (64-bit)
Windows 10 (64-bit / 32-bit)
2. How to Download the ScanSnap S1100i Driver
Method 1: Download from the Official Website
Use your browser to search and visit the official ScanSnap website.
Click on "Support" > "Downloads".
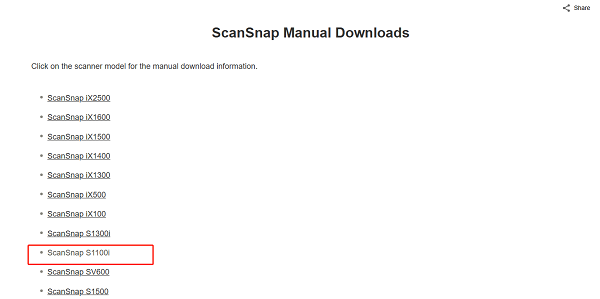
Scroll down to find "Manuals", then click on "Global Download Site".
Click on "ScanSnap S1100i".

Select your operating system and download the latest driver package (e.g., ScanSnap Installer or ScanSnap Manager).
Method 2: Use Driver Talent
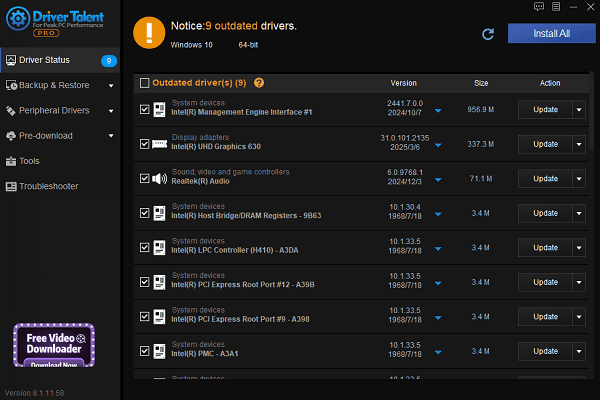
If you're not familiar with manually installing drivers, you can use the Driver Talent tool. It can automatically detect missing or outdated drivers and offers one-click repair.
Click the download button to get the latest version of Driver Talent, install and open it, then click "Scan".
After scanning, it will show which drivers are missing or need updates. Find the scanner driver in the list and click "Update".

Once the update is complete, restart your computer to ensure the new driver takes effect.
Note: Compatibility Tips
Some older ScanSnap drivers (like ScanSnap Manager V5) may not function properly on Windows 11. It is recommended to use the latest ScanSnap Home software that supports Windows 11, available from Fujitsu's official site.
3. How to Install the ScanSnap S1100i Driver
Download the driver package or ZIP file.
Extract the file and run "Setup.exe" or "Install.exe".
Follow the on-screen instructions to complete the installation.
After installation, restart your computer.
Connect your ScanSnap S1100i scanner — the system should recognize and connect automatically.

4. How to Test if the Installation Was Successful
Open "ScanSnap Home" or "ScanSnap Manager".
Connect the scanner and press the scan button.
If the software detects the device and completes the scan, the driver is successfully installed.
5. Frequently Asked Questions (FAQ)
Q1: Windows 11 can't detect the ScanSnap S1100i?
Ensure the latest Windows 11-compatible driver is installed.
Try a different USB port, preferably one built into the motherboard.
Run the installer as administrator.
Q2: ScanSnap Home won't launch or crashes?
Make sure Windows is up to date.
Uninstall old versions of ScanSnap Manager and reinstall ScanSnap Home.
Check for conflicting software (e.g., antivirus blocking driver loading).
Q3: Can I use the S1100i without ScanSnap Home?
Technically yes, but many features like OCR or auto image correction will not be available.
For full functionality, it's recommended to use official software.
To ensure stable performance of the ScanSnap S1100i scanner on Windows 10/11, keeping the driver up to date is essential.
Whether you're connecting for the first time or dealing with compatibility issues after a system upgrade, the download links and methods in this article will help you solve driver-related problems and improve your work efficiency.
See also:
Getting Error Code 0x80070035 on Windows? How to Fix It
Tips to Improve PC Performance for Gaming (Windows 10/11)
How to Fix Logitech K780 Keyboard Not Pairing on Windows


