
Cursor lag or stuttering in Windows 10 can severely hinder productivity and ruin the gaming experience. The root cause is typically a software conflict, especially with outdated or corrupted mouse, USB or chipset drivers.
To eliminate cursor lag and restore smooth, responsive control, this comprehensive guide provides detailed, step-by-step solutions, starting with the most effective fix: ensuring driver stability.
Part I: Driver and System Integrity
The stability of your mouse depends on synchronized drivers across your input devices and the system's USB controllers.
Method 1: Automated Driver Update with Driver Talent X
Manually troubleshooting and updating multiple drivers (including the mouse, the USB controller, and the main chipset) can be tedious and prone to error. A specialized driver utility automates this complex coordination, ensuring conflict-free performance.
Download and Install:
Click the "Download" button to download the software package.
Install it on your Windows 10 PC.
Run Scan:
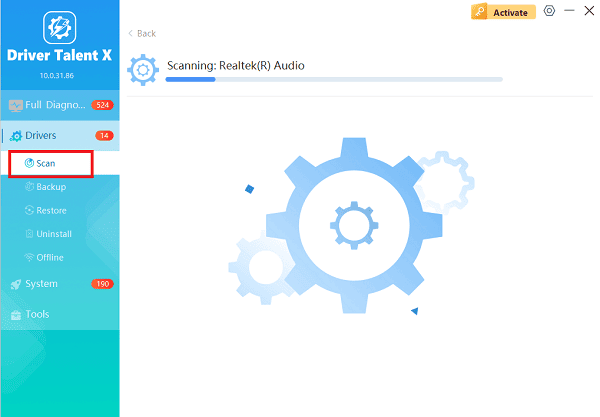
Launch the application and go to "Drivers" > "Scan", click "Scan".
The software will perform a deep analysis of your system, focusing on peripheral and controller drivers.
Install the Update:
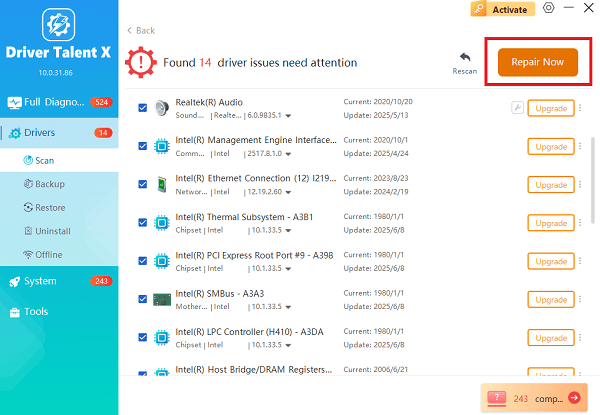
After the scan is complete, the software will display a list of all drivers that need attention.
Select the necessary drivers and click the "Repair Now" button. Driver Talent X will download the latest, certified versions, often resolving the lag issue instantly.
Finalize:
Once the installation is complete, restart your computer.
The new drivers should eliminate input latency.
Method 2: Reinstall Mouse Driver via Device Manager
This method forces Windows to forget the existing driver configuration and load a fresh, default copy.
Press Windows Key + X and select "Device Manager".
Expand the "Mice and other pointing devices" category.
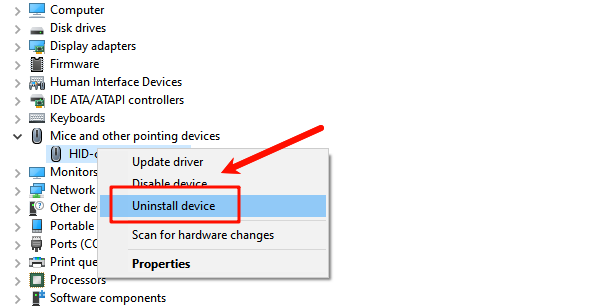
Right-click on your mouse entry (e.g., "HID-compliant mouse" or your specific mouse brand).
Select "Uninstall device". Do NOT check the box to delete the driver software.
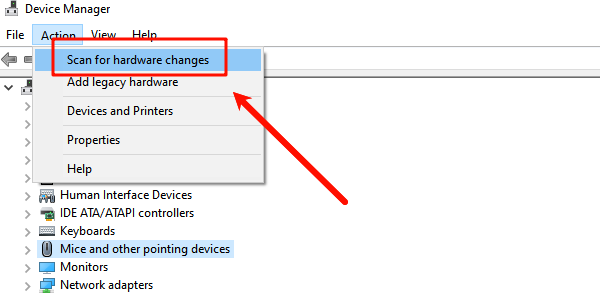
In the Device Manager menu, click "Action" > "Scan for hardware changes". Windows will automatically detect the uninstalled device and load a fresh default driver.
Restart the PC.
Part II: Windows Settings and Performance Fixes
Windows built-in settings can often be the source of erratic cursor movement due to power throttling or pointer enhancements.
Method 1: Disable Enhanced Pointer Precision
Windows' pointer precision feature (mouse acceleration) can introduce inconsistency and perceived lag.
Press Windows Key + R, type "main.cpl", and press Enter to open Mouse Properties.
Go to the "Pointer Options" tab.
Uncheck the box next to "Enhance pointer precision".
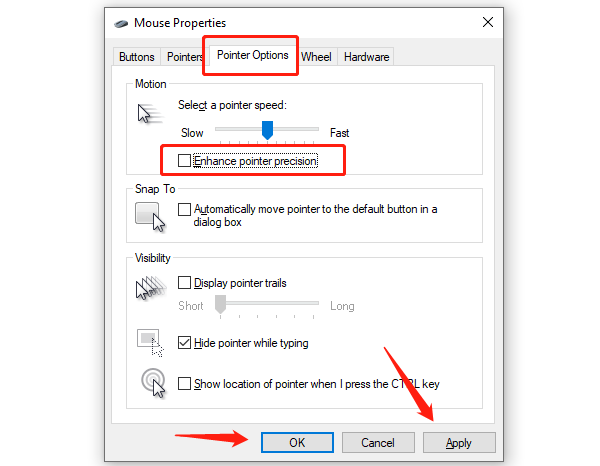
Click "Apply" and "OK".
Method 2: Adjust Power Management Settings for USB Ports
If Windows is aggressively throttling power to USB ports, the mouse connection can become unstable, causing lag.
Press Windows Key + X and select "Device Manager".
Expand "Universal Serial Bus controllers".
Right-click the entry for "USB Root Hub" (you may have several) and select "Properties".
Go to the "Power Management" tab.
Uncheck the box next to "Allow the computer to turn off this device to save power".
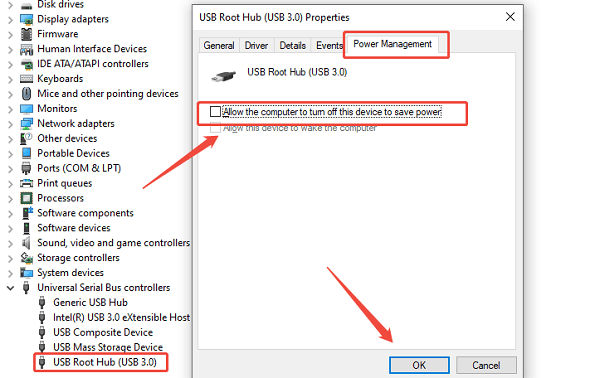
Repeat for all USB Root Hub entries.
Part III: Hardware and Interference Troubleshooting
These steps address physical causes of lag, particularly with wireless devices.
Method 1: Check Polling Rate and USB Port Usage
Polling Rate: If your mouse has specialized software (e.g., Razer Synapse, Logitech G Hub), ensure the polling rate is set to a stable value (e.g., 500Hz or 1000Hz). An unstable polling rate can introduce stutter.
Change USB Port: If using a wired or wireless USB mouse, unplug it and plug it into a different USB port on your PC (try a different type, like USB 2.0 vs. USB 3.0).
Check Wireless Interference: If using a wireless mouse, ensure the receiver is not obstructed and is not placed near large metal objects, cordless phones, or routers that use the same 2.4 GHz frequency.
Method 2: Disable Background Apps and Windows Services
High CPU usage from background apps or services can starve the mouse driver of resources, leading to system-wide lag.
Press Ctrl + Shift + Esc to open Task Manager.
In the "Processes" tab, check for any applications or services consuming an unusually high percentage of CPU or Memory resources.
Temporarily close or end the task for non-essential applications to see if the lag disappears.
Conclusion
Cursor lag issues on Windows 10 are almost always a fixable software conflict. The most efficient way is to update drivers by using Driver Talent X. By combining a clean driver install with disabling Enhanced pointer precision and checking USB power management settings, you can eliminate frustrating lag and restore smooth mouse performance.
See also:
Elden Ring: Nightreign Highlights and System Requirements Overview
[Fixed] 'xinput1_3.dll Was Not Found' Error on Windows


