
If your network adapter isn't working, you can't connect to the internet or local networks. This article provides common solutions to fix the issue in Windows 10.
1. Check for Driver Updates
Outdated or corrupted drivers are a major cause of network adapter issues. Updating the drivers can solve most network adapter-related problems. It is recommended to use Driver Talent to automatically detect and update drivers, saving time and avoiding the risk of downloading or installing incorrect drivers.
Click the download button to get the latest version of Driver Talent. After installation, open the software and click "Scan".
After scanning, it will show which drivers are missing or need updating. Find the network adapter driver in the list and click the "Download" button.
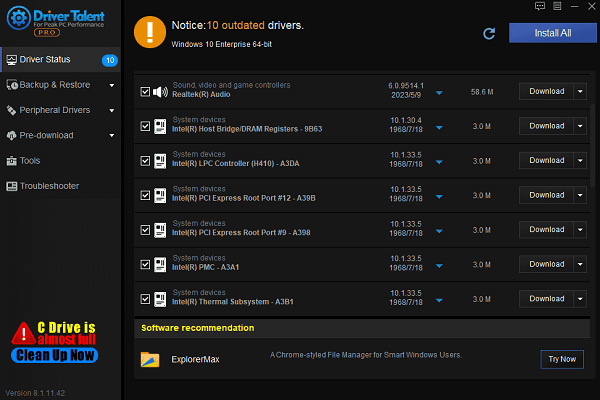
Once the update is complete, it is recommended to restart your computer to ensure the updated drivers take effect.
2. Reset the TCP/IP Stack
Press Win + S, type "Command Prompt", and choose "Run as Administrator".
In the Command Prompt window, type the following command and press Enter: netsh int ip reset
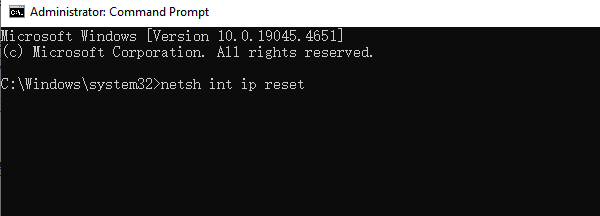
After executing the command, restart your computer and check if the network adapter is working properly.
3. Re-enable the Network Adapter
Press Win + X and select "Device Manager".
Expand the "Network Adapters" section and find your network adapter.
Right-click the network adapter and select "Disable device", then right-click again and select "Enable device".
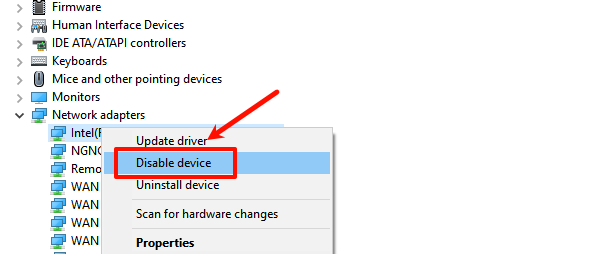
Ensure that the network adapter has been successfully enabled and check if the network connection is restored.
4. Check Power Management Settings
Press Win + X and select "Device Manager".
Expand the "Network Adapters" section, right-click your adapter, and select "Properties".
In the "Power Management" tab, uncheck the option "Allow the computer to turn off this device to save power".
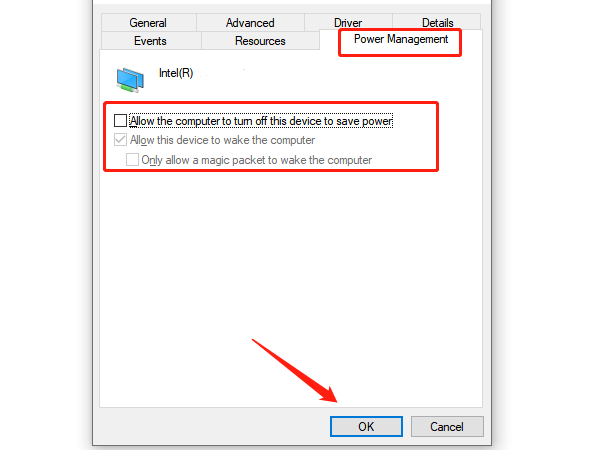
Click "OK" to save the settings and check if the adapter is working properly.
5. Run the Network Troubleshooter
Press Win + I to open "Settings", and select "Update & Security".
In the left menu, select "Troubleshoot", then click "Additional troubleshooters".
In the list, find "Network Adapter" and click "Run the troubleshooter".
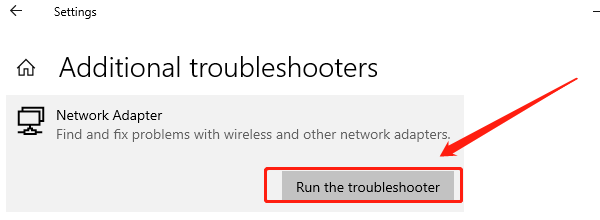
The system will automatically detect and fix the issue. After completing the repair, check if the network adapter has been restored.
6. Check for Hardware Issues
If you are using an external wireless adapter, ensure the adapter is properly connected to the USB port of your computer.
For built-in network adapters, check the motherboard connection on your computer.
Try inserting another network adapter or using a different port to see if it works properly.
If the network adapter still does not work, it may be due to a hardware failure on the motherboard or other components. In such cases, it is recommended to contact professional technical support for further inspection.
By following the methods above, you can resolve the issue of a non-working network adapter in Windows 10. If the issue persists, it is advised to contact technical support for further assistance.
See also:
Quick Fix for Nvidia Driver Installation Failed Error
Fix Missing Network Adapter on Windows 10
How to Fix Windows 11 That Keeps Crashing


