The Epson L130 is a highly efficient and energy-saving color inkjet printer, widely used in homes and small office settings. However, some users may encounter driver-related issues during installation or daily use, such as the printer not being recognized, failure to print, or frequent error messages.
This article will thoroughly explain the common causes of Epson L130 driver failures and provide clear instructions on how to update or install the driver to help you quickly restore printing functionality.
1. Common Symptoms of Epson L130 Driver Issues
Printer is connected but not recognized by the system
Print jobs are sent but there is no response
Error messages like "Printer not found" or "Driver unavailable"
Garbled text, skipped lines, or interrupted printing
Yellow exclamation mark or unknown device shown in Device Manager
2. Common Causes of Driver Malfunctions
Driver not installed properly or completely missing
Current driver is incompatible with newer systems like Windows 10/11
System updates overwrite or corrupt the driver
Incorrect third-party driver installed
Damaged USB cable or USB port recognition issues
3. Methods to Update and Install Epson L130 Driver
Method 1: Use Driver Talent for Automatic Repair
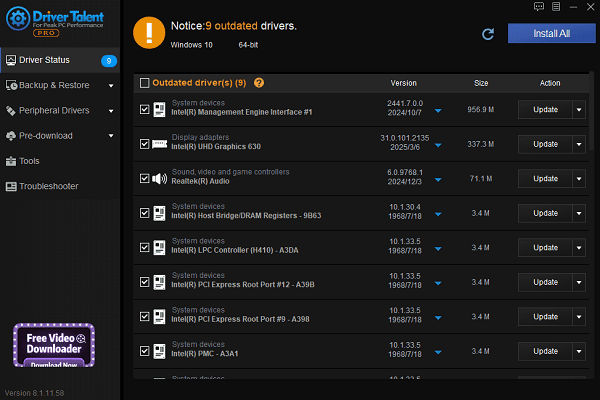
For users unfamiliar with manual driver installation, it's recommend to use a professional driver management tool like Driver Talent, which can scan your system and automatically repair or update the necessary drivers for the Epson L130.
Click the download button to get the latest version of Driver Talent. Install and open the software, then click "Scan".
After scanning, it will display a list of missing or outdated drivers. Find the printer driver in the list and click the "Update" button.

Once the update is complete, it is recommended to restart your computer to ensure the new driver takes effect properly.
Method 2: Download and Install from Epson Official Website
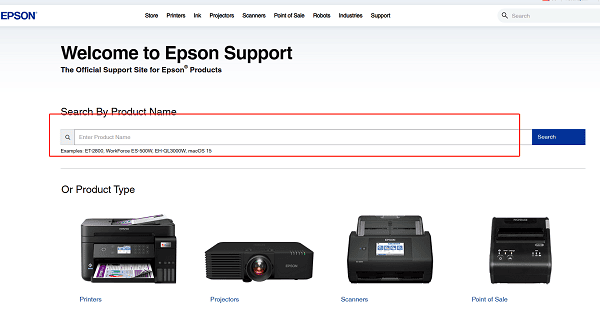
Open your browser and go to the Epson Support Website.
Enter "Epson L130" in the search bar and select the correct model.

On the driver download page, choose the driver version that matches your operating system.
Click the "Download" button. Once the download is complete, double-click the file to run the installer.
Follow the on-screen instructions to complete the installation. Restart your computer and test the printer.
Method 3: Update via Device Manager
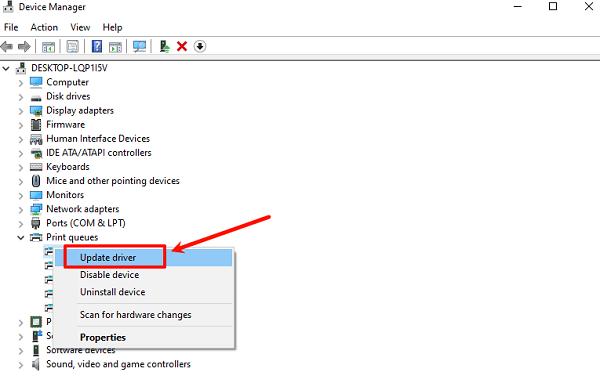
Press Win + X and choose "Device Manager".
Expand "Print queues" or "Universal Serial Bus controllers".
Locate the Epson L130 device, right-click it, and select "Update driver".

Choose "Search automatically for updated driver software" and let the system complete the installation.
Restart your computer after the update to apply the changes.
4. Additional Suggestions and Troubleshooting Tips
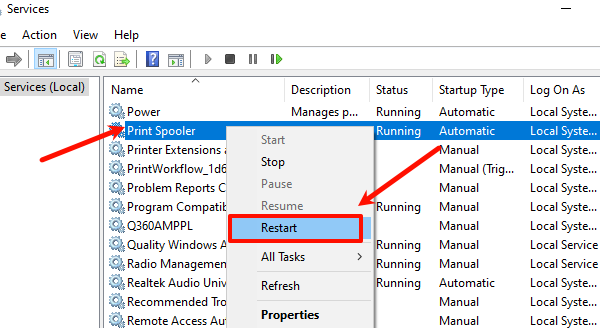
Check whether the print service is disabled. Open the "Services" and ensure the "Print Spooler" service is running. Restart it if necessary.

Make sure you are using the original USB cable and connecting it to a primary USB port on the motherboard.
Confirm the printer is powered on and in standby mode.
Try connecting the printer to another computer to check if the issue is hardware-related.
Driver-related issues are quite common with the Epson L130, especially after OS upgrades or when connecting the printer to a new computer for the first time. By following the steps in this guide, you can easily update or repair your driver and quickly restore printing functionality.
To avoid similar problems in the future, we recommend regularly checking your driver status and using tools like Driver Talent for ongoing maintenance. If the issue persists, contact Epson Customer Support for further assistance.
See also:
Elden Ring: Nightreign Highlights and System Requirements Overview
[Fixed] 'xinput1_3.dll Was Not Found' Error on Windows


