
Some Windows users may face Realtek audio driver issues, like no sound, non-functional headphone jacks, or poor audio quality. This article offers solutions to fix these problems.
1. Update Realtek Audio Drivers
Outdated or corrupted audio drivers are often the root cause of sound issues. Updating the Realtek audio driver can effectively resolve problems with audio output. It is recommended to use Driver Talent to automatically detect and update the driver, saving time and avoiding the risk of downloading or installing incorrect drivers.
Click the download button to get the latest version of Driver Talent. After installation, open the software and click "Scan".
Once the scan is complete, it will show which drivers are missing or need updating. Find the Realtek audio driver in the list and click the "Download" button.
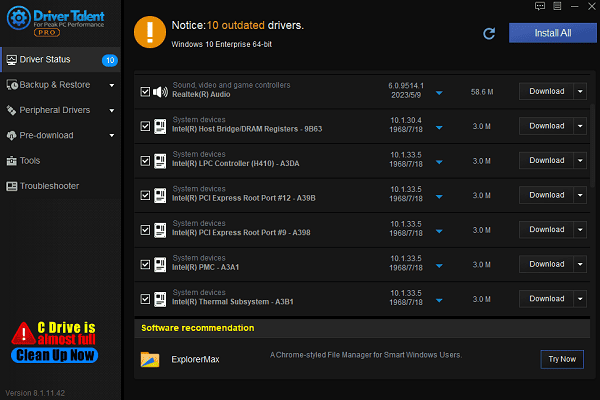
After the update is complete, it is recommended to restart the computer to ensure the updated driver is applied properly.
2. Check Hardware Connections
Ensure that the audio device is properly plugged into the computer's audio port. For external speakers or headphones, make sure the connection is fully inserted.
Try connecting the headphones or speakers to another device to confirm that the hardware itself is working fine.
If you are using a USB audio device or external speakers, try switching the USB port or audio jack on the computer to rule out port issues.
3. Reinstall Realtek Audio Drivers
Press Win + X and select "Device Manager".
Expand the "Sound, video and game controllers" section, and find the "Realtek High Definition Audio" device.
Right-click the "Realtek High Definition Audio" device, select "Uninstall device", and check the box for "Delete the driver software for this device".
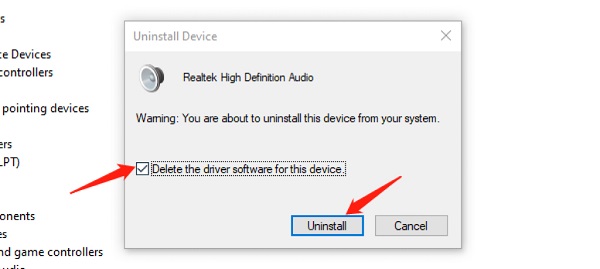
After uninstallation, restart your computer. Windows will automatically reinstall the audio driver.
If Windows does not automatically install the driver, visit the Realtek website or your computer manufacturer's site to manually download and install the latest audio driver.
4. Check if Windows Audio Services Are Running
Press Win + R, type "services.msc", and press Enter to open the Services Manager.
Find the "Windows Audio" service and confirm that its status is Running.
If the service is running, right-click it and select "Restart". If the service is not running, right-click it and select "Start".
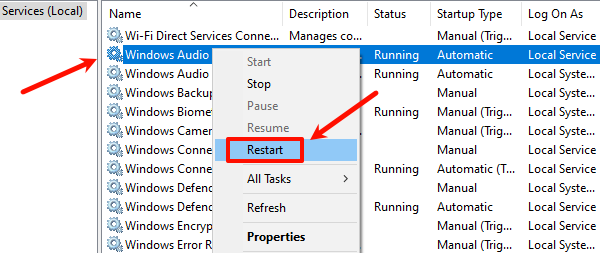
After starting the service, right-click it again, select "Properties", and set the "Startup type" to "Automatic".
Ensure that the "Windows Audio Endpoint Builder" service is also running to make sure both services are active.
5. Run the Windows Audio Troubleshooter
Press Win + I to open "Settings".
Go to "Update & Security" > "Troubleshoot" > "Additional troubleshooters".
Select "Playing Audio", and click "Run the troubleshooter". The system will automatically scan and fix audio-related issues.
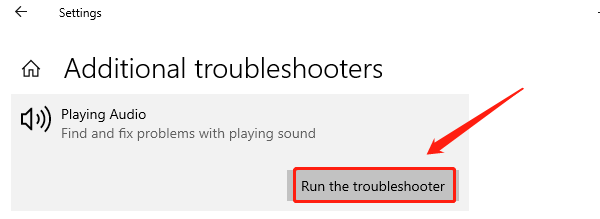
Follow the on-screen instructions to complete the troubleshooting process.
6. Check for System Updates
Press Win + I to open "Settings", and select "Update & Security".
Under the "Windows Update" tab, click "Check for updates".
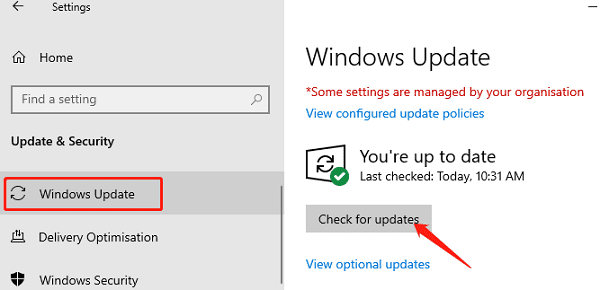
If updates are available, click "Download and Install".
After installation, restart the computer to complete the update process.
Follow these steps to resolve Realtek audio driver issues on Windows. If the problem persists, contact technical support for help.
See also:
How to Fix the Mouse Cursor Moving on Its Own Error
7 Ways to Fix the Spinning Blue Circle Issue in Windows 10
Effective Fix for Windows Update Error Code 0x800f0922


