Fix: Computer unable to record audio
Apr. 29, 2024 / Updated by Seraphina to Windows 11
The recording function plays an important role in computers. It allows users to capture sound through a microphone and convert it into digital signals for processing and storage on the computer. Recording functionality is widely used in various scenarios, including voice calls, music production, speech recognition, meeting recording, education, and training. Whether for personal or business use, recording functionality provides a convenient way for users to record and share audio information.
CONTENTS:
1. Types of Computer Recording
2. Guide to Using Computer Recording Programs
3. Steps for Using a Computer Recording Microphone
4. Solutions for Computer Unable to Record Audio
1. Types of Computer Recording:
Built-in Recording Software: Some operating systems (such as Windows and MacOS) come pre-installed with basic recording applications that users can directly use for recording.
Third-party Recording Software: In addition to built-in recording applications, users can choose to install third-party recording software, which usually offers richer features and more user-friendly interfaces to meet different user needs.
Online Recording Services: Some online services provide browser-based recording functionality, allowing users to record audio directly on web pages without installing any software.
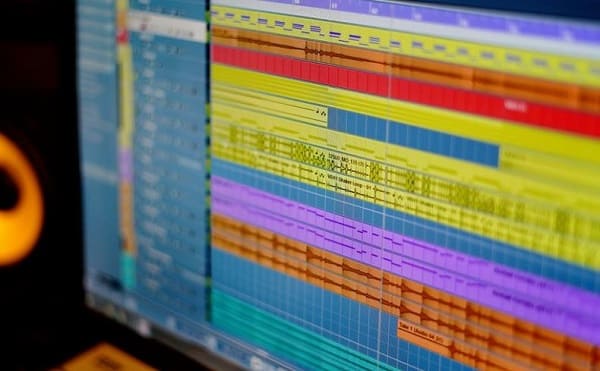
Professional Audio Editing Software: In addition to general recording functionality, some professional audio editing software (such as Adobe Audition, Pro Tools, etc.) also offer more advanced audio processing features suitable for professional users and music producers.
2. Guide to Using Computer Recording Programs:
Open the Recording Program: First, find or launch the recording program of your choice on the computer. This can be the system's built-in recording application or third-party recording software you have installed.
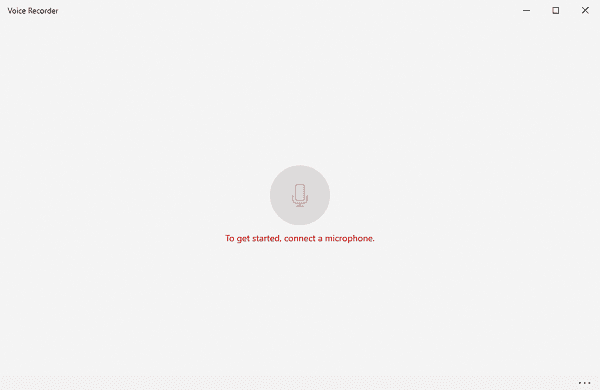
Select Recording Device: In the recording program, there is usually a setting or option to select the recording device. Choose the microphone or audio input device you wish to record from.
Adjust Recording Settings: Depending on your needs, you can adjust recording settings such as volume, recording format (e.g., MP3, WAV), recording quality, etc. Ensure the settings meet your recording requirements.
Start Recording: When you're ready, click the "Record" button or start button in the recording program to begin recording. The program will start capturing sound input from the selected recording device.
Stop Recording: Once the recording is complete, click the "Stop" button or end button in the recording program to stop recording. The program will save the recording file to the location you specified.
Save Recording: Follow the prompts in the recording program to choose the location and filename for saving the recording file. It's recommended to choose a recognizable name for the recording file and save it to an easily accessible location.
Play Recording: After saving, you can find the recording file in the recording program or file manager and play it to confirm the recording quality.
Edit or Share Recording: Depending on your needs, you can use audio editing software to edit the recording file, such as clipping, mixing, adding effects, etc. You can also share the recording file with others or upload it to online platforms to share.
3. Steps for Using a Computer Recording Microphone:
Connect the Microphone: Insert the microphone plug into the computer's audio input port (usually a microphone jack or USB port). If it's a USB microphone, simply plug it into a USB port.
Confirm Microphone Status: Ensure the microphone is connected and in working condition. Check if the microphone is correctly recognized by the operating system and ensure it is enabled in the system settings.

Choose Recording Software: Open the recording software or application of your choice. Common recording software includes built-in recording programs (such as "Voice Recorder" for Windows or "QuickTime Player" for MacOS) and third-party recording software (such as Audacity, Adobe Audition, etc.).
Adjust Recording Settings: In the recording software, select the correct audio input source (i.e., microphone), and adjust recording parameters (such as volume, sample rate, bit depth) to meet your recording needs.
Start Recording: Ensure the microphone's environment is quiet, then click the "Start Recording" button in the recording software to begin recording sound.
Stop Recording: When the recording is complete, click the "Stop Recording" button in the recording software to save the recording file.
Playback Recording: Open the saved recording file in the recording software and check the recording quality. Make any necessary edits.
Storage and Sharing: Save the recording file to your computer or external storage device, or share it with others as needed.
4. Solutions for Computer Unable to Record Audio:
1). Check Microphone Connection:
Ensure the microphone is correctly connected to the computer's audio input port (usually a microphone jack or USB port). If it's a USB microphone, try using a different USB port.
2). Confirm Microphone Status:
Check if the microphone is in working condition and correctly recognized by the operating system. Check its volume settings.
3). Update or Install Audio Drivers:
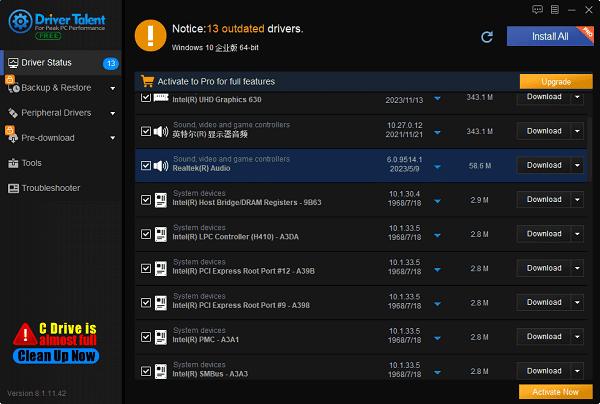
Use Driver Talent to detect and update computer drivers, ensuring compatibility between the computer's audio drivers and the system.
4). Check Recording Settings:
In the operating system's sound settings or recording device management, confirm the microphone is enabled, and volume settings are appropriate. Ensure the correct recording device is selected.
5). Disable Antivirus Software:
Some antivirus software may interfere with microphone operation. Temporarily disable antivirus software and try recording again.
6). Check Recording Software Settings:
If using third-party recording software, ensure the recording settings are correct, and the microphone is not disabled or set to the wrong recording device.
7). Check Microphone for Faults:
If none of the above methods work, there may be an issue with the microphone itself. Try using a different reliable microphone to determine if the problem lies with the microphone.
8). Update Operating System:
Ensure the operating system is up to date to receive any updates that may resolve recording issues.
These are the solutions for fixing computer inability to record audio. If you encounter driver-related issues such as network card, graphics card, Bluetooth, sound card, etc., you can download "Driver Talent" to detect and fix them. Driver Talent supports driver download, installation, backup, etc., providing flexible driver management.
See also:
Downloading and Installing Guide for Realtek Sound Card Drivers
Steps to clean up a full C drive on the computer
How to Solve the Issue of Keyboard Lights Not Turning On
No Internet Connection-5 Common Solutions
How to Solve Slow Speed and High Latency on Win11 Computers

|
ExplorerMax |

|
Driver Talent for Network Card | |
| Smart and advanced file explorer tool for Windows platforms | Download & Install Network Drivers without Internet Connection | |||
| 30-day Free Trial | Free Download |


