"NVIDIA Installer failed" error makes Windows 10 users mad after the Creators Update. Windows 10 is still far from perfect and graphics issues crop up every day. And in this case, you receive an error message when trying to use the NVIDIA software to keep your display driver up-to-date:

The NVIDIA graphics issue often occurs after the latest Windows 10 update. During the update, Windows may install the proper graphics driver for the system, but sometimes, it fails to make it and causes driver conflict. If you try to install the driver with the software, then you have the "NVIDIA Installer failed" error.
If you're in the same boat now, don't be worried. This post will show you top 3 methods to troubleshoot the "NVIDIA Installer failed" error after the Windows 10 Fall Creators Update or the Creators Update.
Way 1. Uninstall NVIDIA Graphics Driver and Install Proper Driver
Removing the graphics driver and reinstalling the best-matched one is the universal method to fix all the common display driver problems, such as black screen problem, distorted screen issue, display driver failed to start error, etc. Here is how to uninstall and reinstall the NVIDIA graphics driver:
Step 1. Uninstall NVIDIA Graphics Driver in Device Manager
1. Use Windows shortcut keysWin + X and select the Device Manager.
2. Expand the Display adapters entry.
3. Right-click the NVIDIA display device and select Uninstall device.
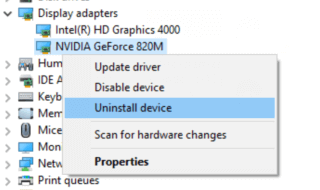
Note: After that, the NVIDIA display device will roll back to the early state when the original NVIDIA graphics driver was installed. DON'T select the Scan for hardware changes, or Windows will automatically install incorrect NVIDIA driver version again.)
Step 2. Install Proper Display Driver Update to Fix the "NVIDIA Installer Failed" Hitch
You can manually install proper NVIDIA graphics driver by downloading the update from NVIDIA official site. But if you prefer a quicker solution, you can use Driver Talent, the professional and safe driver manager, to fix the annoying NVIDIA Installer failed error.
It is available via the button below:
1. Click the Scan button to find NVIDIA graphics driver glitch on your Windows 10 Creators Update desktop or laptop.
2. Select Update or Reinstall button to download and install the latest official NVIDIA graphics driver.
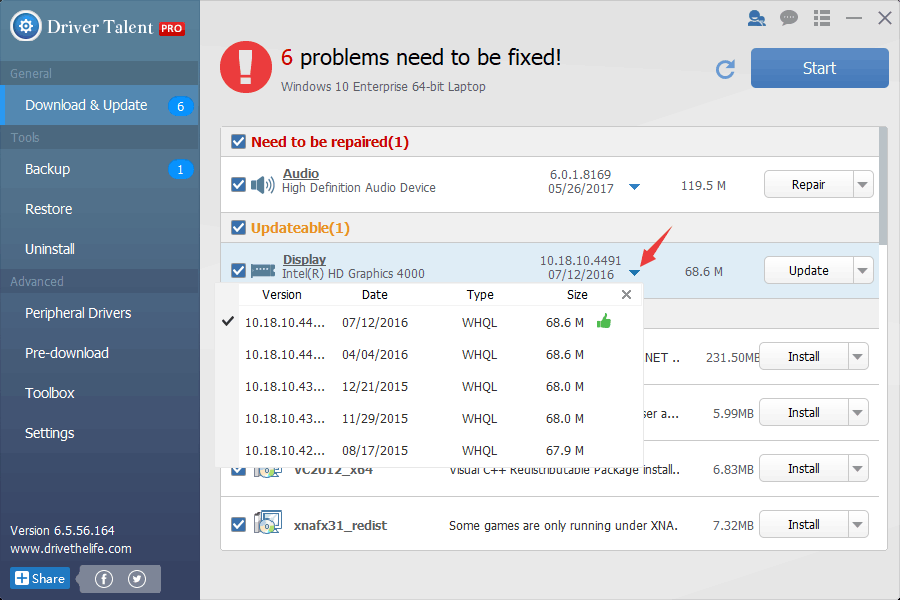
3. Perform a restart to make the driver changes take effect.
See Also:NVIDIA GeForce Drivers Download for Windows 10, 8.1, 8, 7, XP, Vista
Way 2. End NVIDIA Processes and Remove Related Files
Also, you can stop all the NVIDIA processes and delete the display driver files. After that, you can reinstall the correct graphics driver version to fix the "NVIDIA Installer failed" error.
Step 1. Stop NVIDIA Processed in Task Manager
1. Use shortcut keys Ctrl + Shift + Esc to launch Task Manager.
2. Choose the Processes tab.
3. Scroll down and find those running NVIDIA processes. Right-click them and select End task.
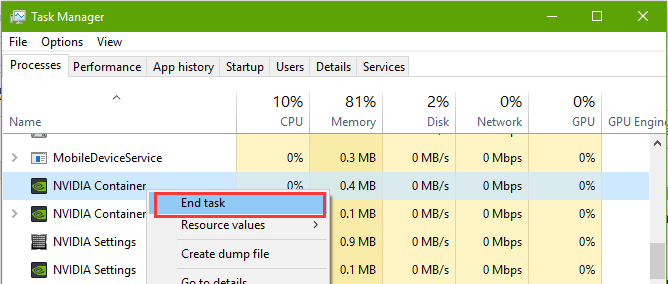
The processed should be the following or so:
NVIDIA ContainerNVIDIA SettingsNVIDIA Backend (32 bit)NVIDIA Driver Helper ServiceNVIDIA Network service (32 bit)NVIDIA User Experience Driver Component…
Step 2. Delete NVIDIA Files in C: Drive
1. Go to the system drive with the path C:\Windows\System32\DriverStore\FileRepository
2. Delete the following files if they are in the folder:
nvdsp.infnv_lhnvoclock
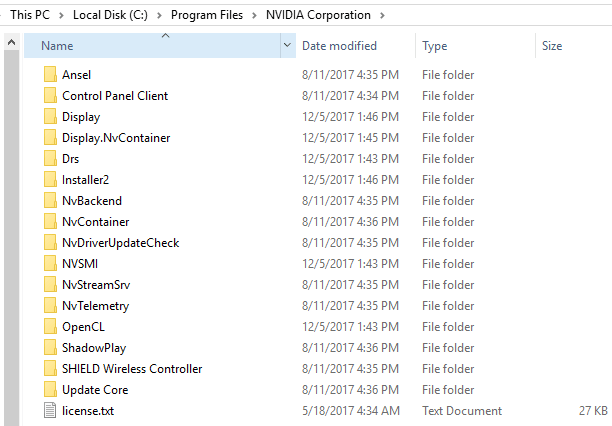
3. Go to C:\Program Files\NVIDIA Corporation
4. Remove the files from the NVIDIA Corporation folder.
5. Go to C:\Program Files (x86)\NVIDIA Corporation
6. Delete the files under the folder.
7. Restart the computer.
Step 3. Run the NVIDIA Installer to Install the Graphics Driver
1. Launch your NVIDIA Installer.
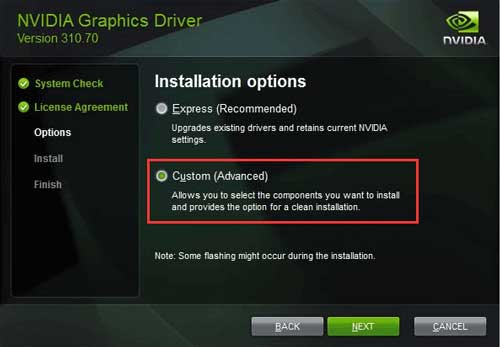
2. When it comes to the Installer options, choose the Custom options. Click the Next button.
3. Check the Perform a clean installation option and click the Next button.
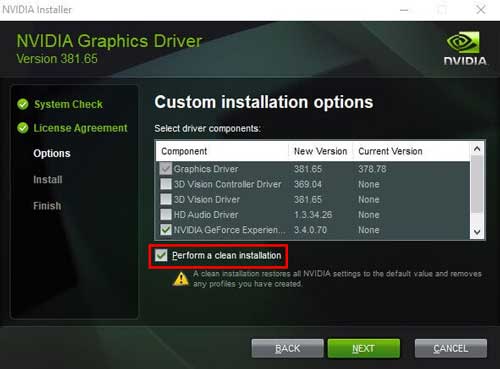
Then follow the on-screen instruction to install the NVIDIA driver.
See Also:Top 2 Solutions to Download and Update NVIDIA Drivers for Windows 10
Way 3. Perform a Clean Boot to Fix "NVIDIA Installer Failed"
If the above methods did not work, you may need to perform a clean boot to find those culprits that trigger the "NVIDIA Installer failed" error.
1. Use shortcut keys Win + R to launch Run.
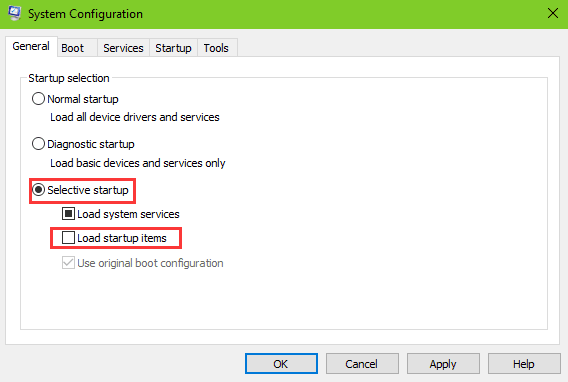
2. Type into msconfig and hit the Enter.
3. Choose Selective startup and uncheck Load startup items.
4. Go to the Services tab and check Hide all Microsoft services.
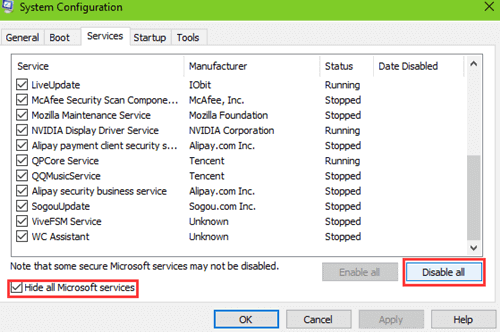
5. Click the Disable all button.
6. Go to the Startup tab and click Open Task Manager.
7. Disable the startups and reboot.
This is the simple clean boot steps to exclude faulty startups that cause the NVIDIA graphics issue after the Windows 10 Update. If you want to filter the exact startup that triggers this, you can go to How to Use Windows 10 Clean Boot to Fix PC Errors for more details.
Those Display-related Topics May Also Interest You:
How to Add or Remove Display Desktop Context Menu on Windows 10
Fix: Display Driver Stopped Responding and Has Recovered on Windows 10
All of the above are the possible best solutions of how to fix NVIDIA Installer failed error after the Windows 10 Fall Creators Update. If you still fail to fix the NVIDIA issue or if you encounter any other problems after the latest Windows 10 update, you can also drop a line below or click the support menu on the left of this page for more help.
Hope you continue to have access to Windows 10 section as well as provide support.


