How to Use System Restore to Fix Windows 10 Issues
Jun. 23, 2022 / Updated by Helia to Windows 10
System restore is a good choice for you to repair system issues after Windows 10 Fall Creators Update/Creators Update/Anniversary Update. You might encounter a series of system problems after Windows 10 update, such as no Wi-Fi available, black screen, endless reboot loop, etc. To repair such issues, you may install professional software for system repairing.
In fact, you could fix the issues with system restore. Here we will introduce to you top 2 ways of solving system issues with system restore.
What Is System Restore
System restore allows the user to roll back the PC's state to that of a previous point in time. It is used to solve problems such as running tardiness, responding halt and other system problems of the PC.
System restore will not affect any of your documents, images or other personal data, but it will remove apps, drivers, and other programs installed after the restore point was made.
You could create system restore points manually when you install a new app, driver, or Windows update, and then roll back the system to an earlier date.
Note: System Recovery can also help solve system issues if you don't care the data. System Recovery allows you to reset your PC to the default factory settings. It can roll back the PC to the same state as a new one you bought, but all the data will be wiped out when you take system recovery.
See Also:How to Create a System Restore Point in Windows 10
How to Restore System to an Earlier Date
Below are top 2 methods to fix the Windows issues after the system is upgraded to Windows 10 Fall Creators Update/Creators Update/Anniversary Update. If there are driver issues that cause system problems on your computer, like display driver stopped responding, Scanning and Repairing Drive, 100% disk usage, etc. you can use Driver Talent involved in the second method to restore the system quickly.
Note: The two solutions are also access to restore Windows 7 and 8.
Solution 1: Restore from the Restore Point on Windows 10 Fall Creators Update/Creators Update/Anniversary Update
Windows System Restore allows you to restore the system to an earlier state without affecting your personal files. Windows 10 can save system restore points automatically when something important changes. For example, new apps are installed.
Following are the steps for how to create system restore points on Windows 10 Fall Creators Update/Creators Update/Anniversary Update.
Step 1. Right-click This Computer.
Step 2. Select Property.
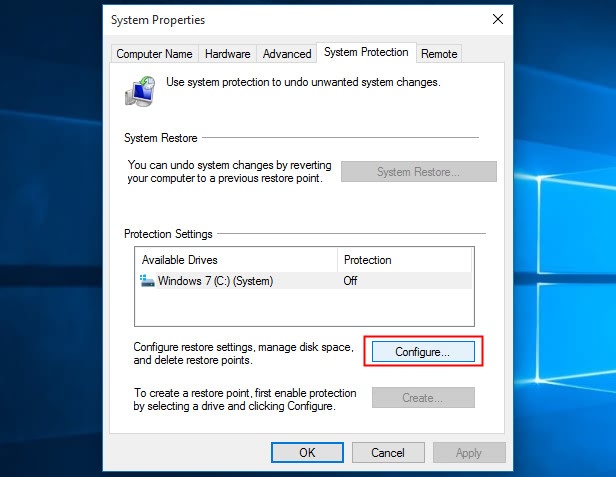
Step 3. Select from the left for System Protection
Step 4. Click the System Properties
Step 5. Click the button Configure.
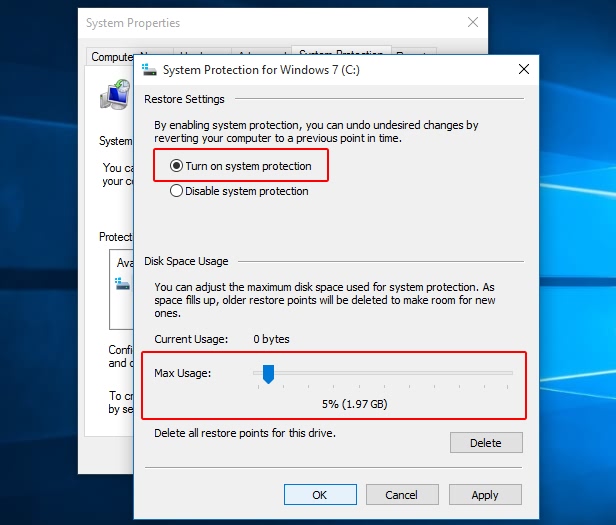
Step 6. Click Turn on system protection.
Step 7. Set the Max Usage (5% to 10% is recommended),
Step 8. Click the OK.
Step 9. Back to System Properties.
Step 10. Click the Create button to create a system restore point.
Now you create a system restore point successfully on Windows 10. If there is something wrong with the system, you can roll it back by System Restore of Windows 10 to get things going again. Here are the steps to restore the system.
Step 1. Right click This Computer on the Windows 10 desktop.
Step 2. Select Property.
Step 3. Select from the left for System Protection
Step 4. Click the System Properties
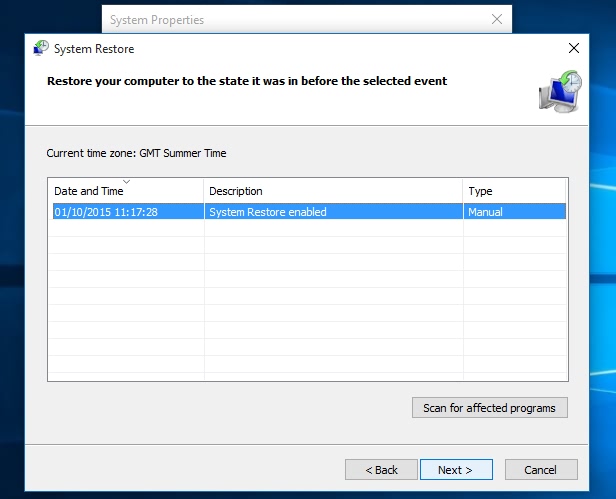
Step 5. Go to the System Restore.
Step 6. Click Next.
Step 7. Choose a desired system restore point form the table (you can also click the Scan for affected programs for a further checking).
Step 8. Click Next and follow the on-screen instructions.
Step 9. Click Finish.
Step 10. Restart the PC.
Note:Restore Settings default to Disable system protection in Windows 10, so you always need to turn it on manually if this is your initial setting of System Restore.
Solution 2: System Restore by Driver Talent
If it appears Windows System Restore not working, you could use Driver Talent to solve the problem quickly.
Compared to the time-consuming method above, this can help to repair driver issues and restore system at the same time, without damaging the important data.
(If there is no Driver Talent on your PC, you could download it directly by clicking the button below.)
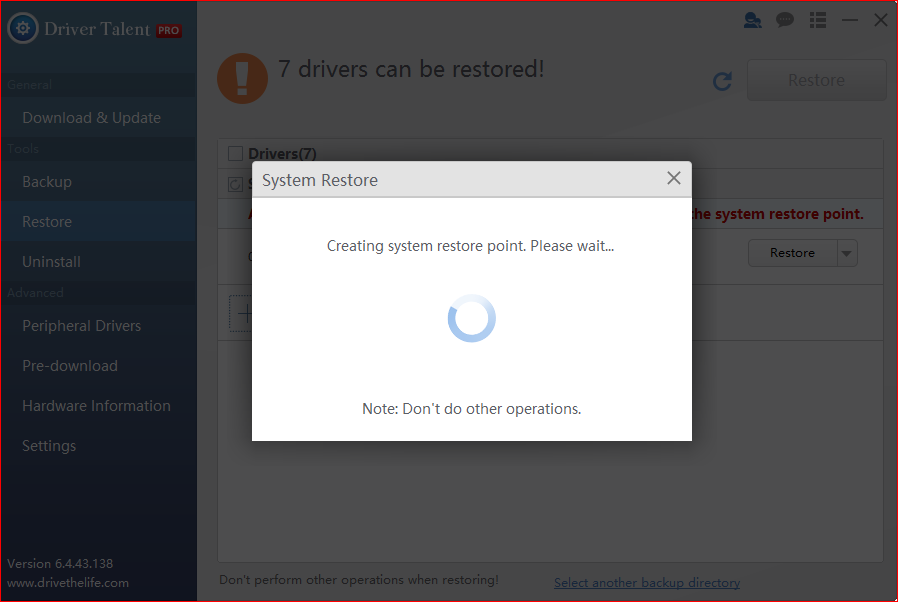
Here's how Driver Talent creates a restore point:
Step 1. Select Restore menu on the left and then select System Restore tab on the right.
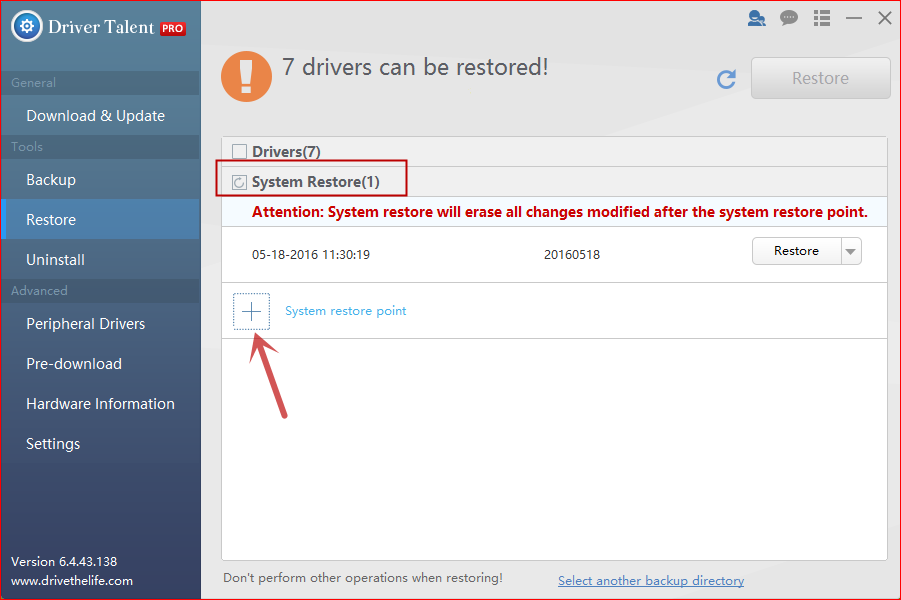
Step 2. Click System restore point and name the point.
Step 3. Click Create to create a restore point.
You can also delete any system restore point you created before by clicking the triangle beside the Restore button.
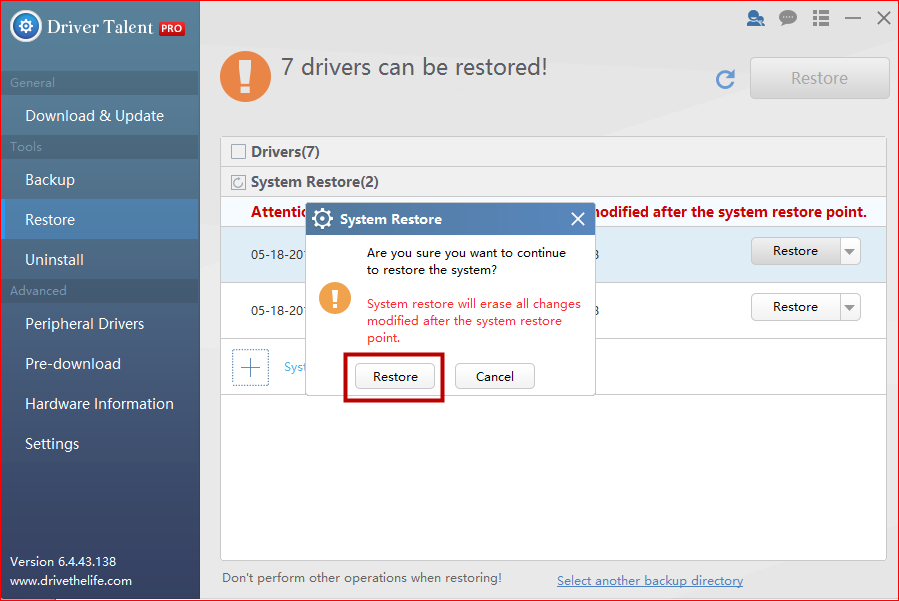
To restore the system, you need only 3 steps:
Step 1. Choose one restore point you've made and click Restore button. (Note: You can also select another backup directory from other situation on PC.)
Step 2. Read the suggestion and click Restore.
Step 3. Reboot the PC.
Note: System restore will erase all the changes modified after the system restore point is created. For example, if you save documents or pictures and install new apps or programs after creating a system restore point, you will keep the documents or pictures but lost the apps or programs after rolling back to the point.
For more information about drivers restore with Driver Talent, please click Top 2 Ways to Restore Driver on Windows 10/8.1/8/7/XP/Vista.
If you have any knowledge of system restore on Windows 10 Fall Creators Update/Creators Update/Anniversary Update, please share it in the comments section below. If you have any other questions on system restore, click the LEFT MENU on this page for more technical support. Any Windows 10-related questions, see Windows 10 section on this site.

|
ExplorerMax |

|
Driver Talent for Network Card | |
| Smart and advanced file explorer tool for Windows platforms | Download & Install Network Drivers without Internet Connection | |||
| 30-day Free Trial | Free Download |


