Windows 10 drivers update or cumulative update often happens on the second Tuesday every month, namely the Patched Tuesday. Since the Windows 10 update in November and December 2017, myriad users have come across various problems, including issues caused by Windows 10 drivers update. The drivers updated by Windows 10 automatically may not be completely compatible with the hardware devices, and then trigger driver problems like "This device cannot start (code 10)", computer not recognizing devices issue, "display driver failed to start" error, etc.
In this Windows 10 guide, you can try the following methods to disable Windows 10 from updating drivers automatically.
1. Disable Auto Windows 10 Drivers Update via Group Policy
Note: This method applies to computers that run Windows 10 Enterprise, Education or Professional edition. If you run Windows 10 Home edition, you can try Way 2 or Way 3 directly.
Here we'll take the display driver as an example.
Step 1. Check Hardware Device Driver Properties
1. Use Windows shortcut keysWin + X and select Device Manager.
2. Expand the Display adapters entry and double-click the display device whose driver update you want to disable.
3. Go to the Details tab. Select Class GUID from the drop-down menu of Property.

4. Right-click the value displays in the box and select Copy.
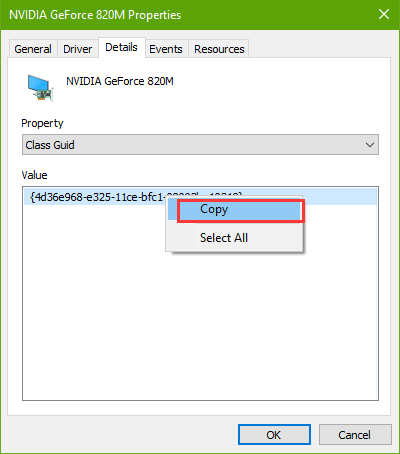
5. Click the OK button.
Read More:Fix Blank/Empty Device Manager on Windows 10, 8.1, 8, 7, Vista, XP
Step 2. Modify the Group Policy
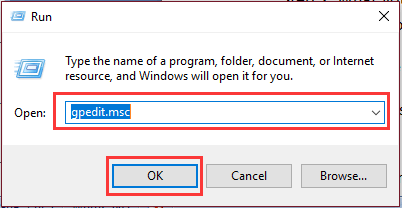
1. Use shortcut key Win + R to launch Run.
2. Enter gpedit.msc and click the OK button.
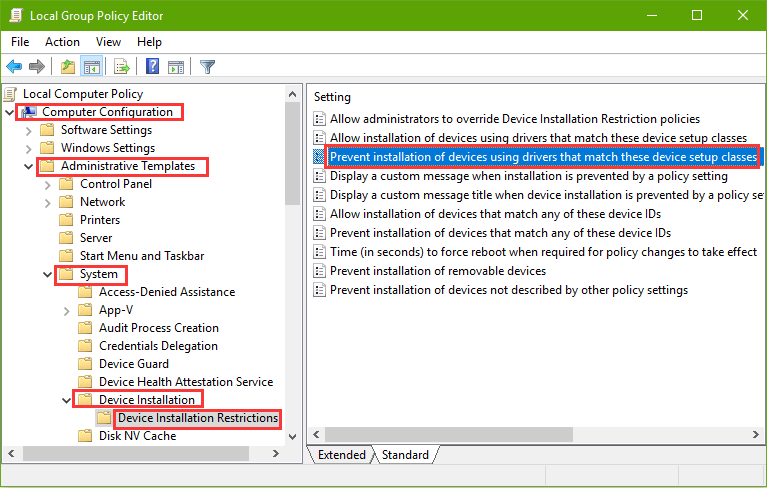
3. In Local Group Policy Editor, follow the path to expand the entries: Computer Configuration >Administrative Templates >System >Device Installation. Highlight the Device Installation Restrictions.
4. On the right side, double-click the Prevent installation of devices that match these device setup classes.
5. Choose the Enabled option and click the Show button.
6. Paste the GUID you've copied in Step 1 to the Value and click the OK button.
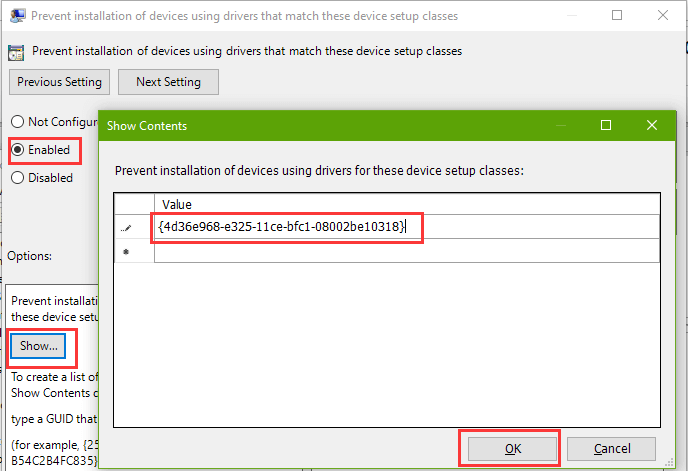
7. Click Apply and OK.
This will help to prevent the exact device driver from automatically updating on Windows 10.
2. Stop Windows 10 from Updating Drivers Automatically by Changing Registry
A computer running Windows Home, Enterprise, Education or Professional edition can prevent Windows 10 from auto drivers update via modifying the Registry.
Note: Registry is an important database that keeps the Windows configurations, settings for apps, and other fatal settings for your PC. To prevent system crashes such as black screen issue, no WiFi connection problem, 100% disk usage error, etc. it's recommended to backup the registry on your computer before the changing.
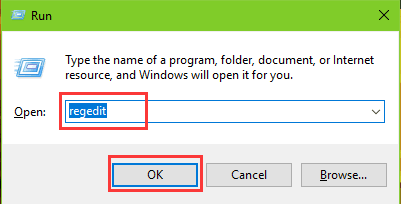
1. Open Run and type into regedit. Hit the Enter key.
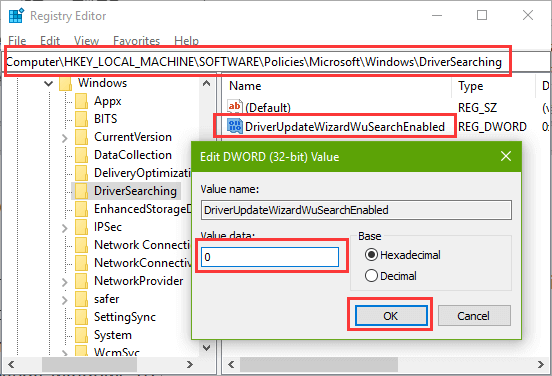
2. Paste the following path to the address bar and press the Enter key: HKEY_LOCAL_MACHINE\SOFTWARE\Policies\Microsoft\Windows\DriverSearching
3. On the right side, double-click DriverUpdateWizardWuSearchEnabled. Change the Value data to 0. Click the OK button.
Then restart the computer. Windows 10 drivers update has been disabled now.
3. Block Auto Drivers Update on Windows 10 through Device installation settings
You can also go to Devices and Printers to disable Windows 10 from updating drivers.
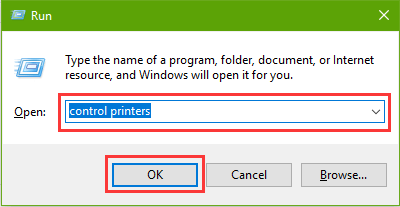
1. Launch Run. Type into control printers and click the OK button.
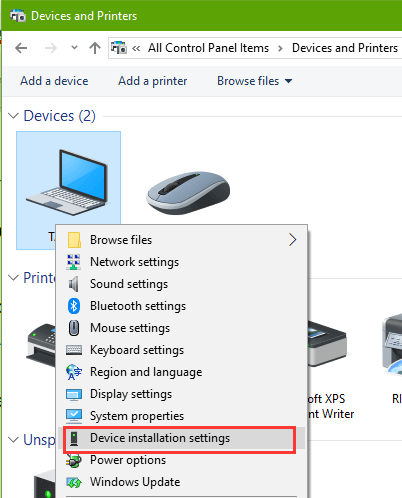
2. In Devices and Printers box, right-click the first icon (your computer icon) and select Devices installation settings.
3. Choose the No option and click the Save changes.
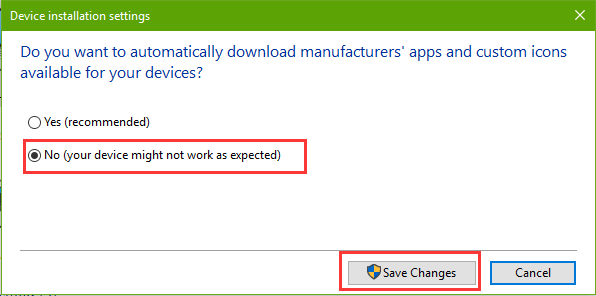
After that, you can prevent Windows 10 from downloading and installing drivers from the regular update.
How to Update Drivers after Disabling Auto Windows 10 Drivers Update
If you need to install some driver updates after disabling the auto Windows 10 drivers update feature, you can go to the manufacturer official sites to manually download the driver files, which provides more features than the basic Microsoft drivers.
Manual driver download and install may be a time-consuming work for you. In this case, we recommend you use some professional driver download and update utilities, like Driver Talent. It offers the official and WHQL Windows drivers and keeps your Windows 10 up-to-date.
Here are 3 steps to update drivers on Windows 10:
1. Click the Scan button to detect faulty drivers on Windows 10.
2. Click the Update button to download and install the best-matched driver updates.
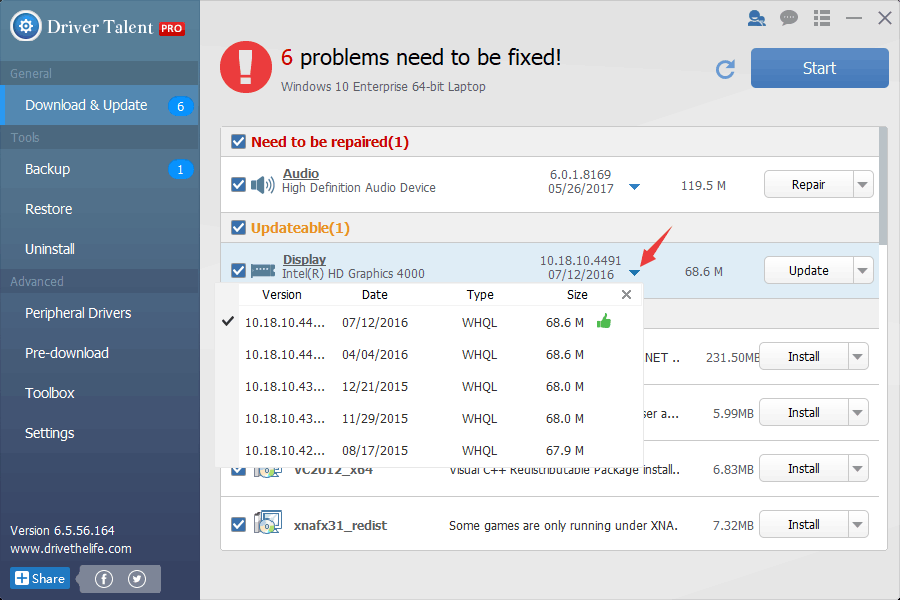
3. Restart the computer to make the changes take effect.
Then you complete the drivers update after you disable auto Windows 10 drivers update.
See Also:How to Disable Automatic Windows 10 Update
If you still have questions on stopping Windows 10 from updating drivers, or if you encounter other system issues after the latest Windows 10 update, you can comment below or click the support menu on the left of this page for help. Any other Windows 10-related issues, see Windows 10 section on this site.


