Numerous users report that the scanner is not working after Windows 10 Creators Update. If you also run into this tricky problem, don’t panic. Here’re a couple of ways for you to follow to fix the scanner not working issue after Windows 10 Creators Update.
1. Fix Corrupted System Files to Fix Scanner Not Working after Windows 10 Creators Update
An efficient way is adjusting the adapter settings to fix the Limited Internet error after Windows 10 Creators Update. There is a strong likelihood that the system turns off your network device to save power automatically. Follow these steps:
Step 1. Open Command Prompt as Administrator
Step 2. Type sfc /scannow and hit Enter
Step 3. You’ll see the message Windows Resource Protection found corrupt files but was unable to fix some of them
Note: If your computer is running in good condition without corrupted system files, the message Windows Resource Protection did not find any integrity violations will appear.
Step 4. Enter Safe Mode
Step 5. In Safe Mode with Command Prompt, type sfc /scannow againand tap Enter
It will take a few minutes to fix the corrupted Windows system files.
2. Check Windows Image Acquisition Service
If the Windows Image Acquisition service is disabled, it will create the scanner not working problem after the Creators Update. You need to start the Windows Image Acquisition service. To do it, follow these steps:
Step 1. Press Windows+R at the same time to bring up the Run dialog
Step 2. Type services.msc and then press Enter
Step 3. Locate Windows Image Acquisition service from the list
Step 4. Right-click on Windows Image Acquisition service and select Properties
Step 5. Change the startup type to Automatic
Step 6. Click Apply and then OK
Step 7. Reboot your computer
3. Update Your Scanner Driver to Fix Scanner Not Working after Windows 10 Creators Update
There’s big chance that the outdated scanner driver leads to the scanner not working bug after Windows 10 Creators Update. If you have no idea how to download drivers by yourself, you shall download and install the most updated scanner driver to solve it. It is recommended to utilize a reliable and automatic driver download and update utility tool like Driver Talent, reviewed as the safest and fastest way to update drivers, which could detect your outdated scanner driver instantly and then automatically download and install the best-matched scanner driver in two minutes.
Click the button below to grab Driver Talent directly.
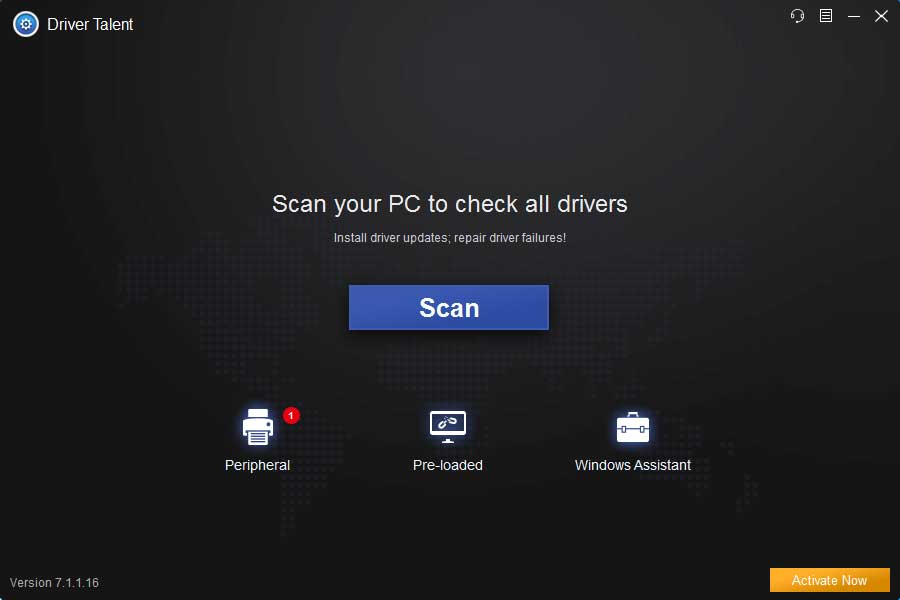
Step 1. Scan Your Computer
Launch Driver Talent. Click “Scan” and it will perform a full scan of your computer for outdated, corrupt, damaged or missing drivers.
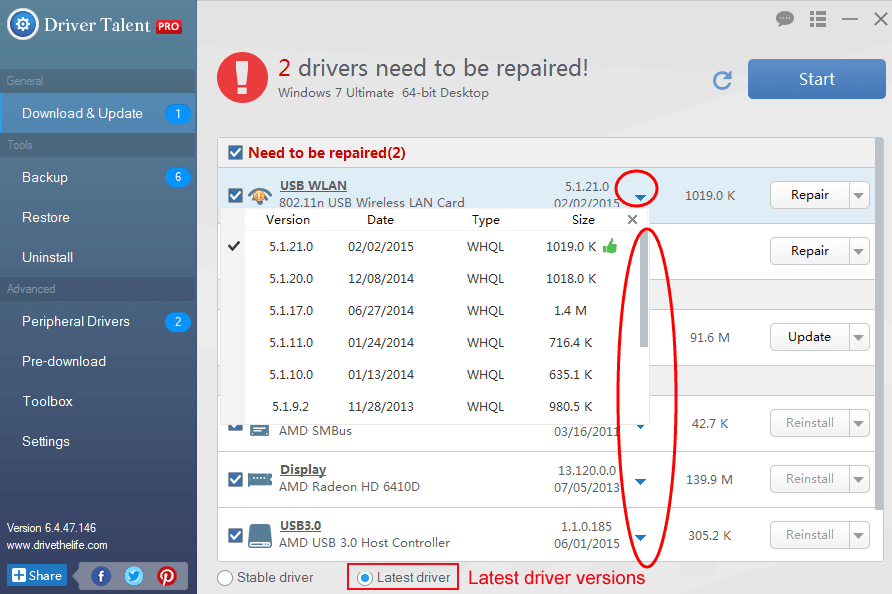
Step 2. Download and Update Scanner Driver
You could one-click “Repair” to fix the detected faulty scanner driver. You’re also allowed to click “Update” to keep your drivers up to date. But it’s not recommended to update what ain’t broken unless needed for new features and advanced performance.
Step 3. Reboot Your Computer
Reboot your computer to ensure that the scanner driver update comes into effect.
See Also:How to Free Download Driver for Windows 10/8.1/8/7/XP/Vista
Note: It is essential to back up you drivers with Driver Talent before installing any new driver update in case of driver crashes.
Apart from driver download and update, Drive Talent is packed with other premium features, such as drivers restore, drivers uninstall, system restore, drivers pre-download for another PC, PC Repair (no sound, no video, no Wi-Fi etc.), hardware detection, VR support check and PC speed up, etc.
If you discover other troubleshooting methods to fix the scanner not working issue after Windows 10 Creators Update, please share with us in the comments section below.


