What if you load Windows 10 on your Dell XPS Ultrabook in a boot time over 30 seconds? Many Ultrabook users suffer a Dell XPS slow boot after they upgraded the system to Window 10 Fall Creators Update/Creators Update/Anniversary Update, which often comes with a long black screen.
Too many startup programs, some Windows 10 features and incompatible graphics driver can result a slow Dell XPS boot time.
So how should you fix Dell XPS startup problem after upgrading to Windows 10 Fall Creators Update/Creators Update/Anniversary Update? There are many ways to solve the slow boot issue, and here we will introduce to you 5 easy methods to shorten Dell XPS boot time.
Method 1: Disable Unnecessary Startup Programs on Dell XPS Device
Too many startup programs can also result a long Dell XPS boot because of an automatically running during the booting. So you need to disable unnecessary startup programs on your Dell XPS device. Follow the easy steps below:
Step 1. Right click Start.
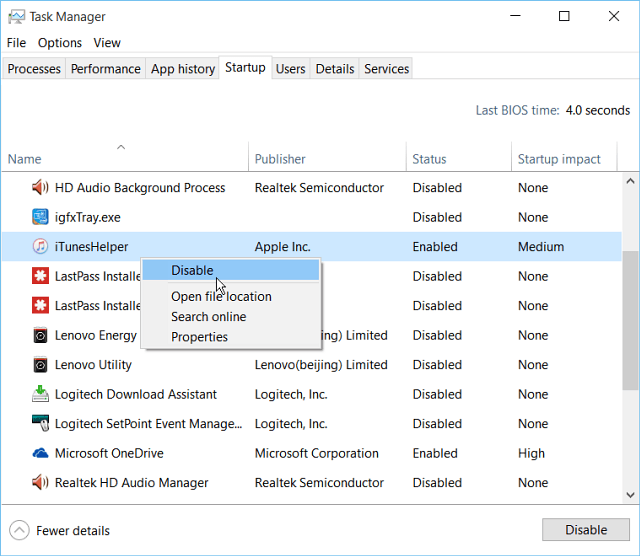
Step 2. Select the Task Manager. (You can also use Ctrl + Shift + Esc to open the window.)
Step 3. Click Startup tab and find a list of startup items.
Step 4. Uncheck the items you do not want to launch at startup.
Step 5. Restart your Dell XPS device to finalize the startup items.
Note: Don't stop the unknown programs that may be important to Windows running, or it may cause PC issues such as unidentified network, 100% disk usage, USB 3.0 crashes, etc. If you cannot determine whether they are necessary for the correct operation, please search online the programs or just ignore them.
Method 2: Fix Dell XPS Startup Problem by Disabling Fast Startup
You could follow the steps below to disable fast startup on your Dell XPS device:
Step 1. Right click the battery icon in the notification area.
Step 2. Select the Power Options. (You could also right click the Start to find it.)
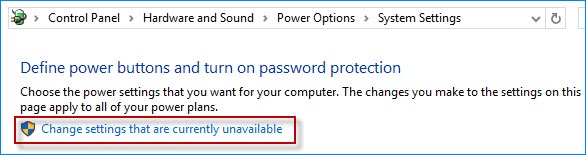
Step 3. Click the link Choose what the power button does in the left column.
Step 4. Click the link Change settings that are currently unavailable.
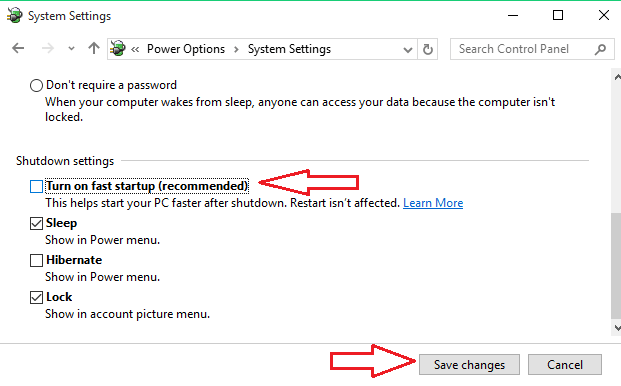
Step 5. Come to the Shutdown Settings list and disable the item Turn on fast startup.
Step 6. Click Save changes.
When you shut down and boot your Dell XPS laptop again, you may find the machine loading Windows 10 rapidly. In fact, you could still enable the item which makes no effect on the booting.
Method 3: Enable Faster Booting Sequence in Windows 10 Fall Creators Update/Creators Update/Anniversary Update
This will help to skip the spinning Windows logo and shorten the boot time for about 3 seconds. Here are the steps:
Step 1. Use Windows shortcut keysWin + R to open Run.
Step 2. Type msconfig.
Step 3. Press the Enter.
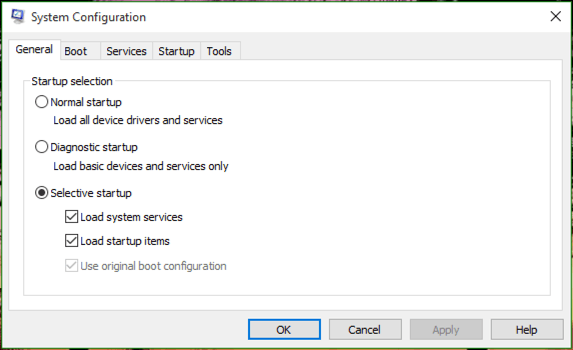
Step 4. Click General tab and choose Selective startup.
Step 5. Enable Load system services and Load startup items.
Step 6. Click Boot tab
Step 7. Change the Timeout to 3 seconds.
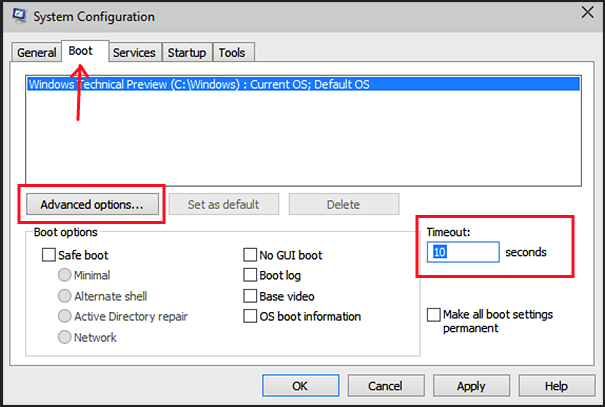
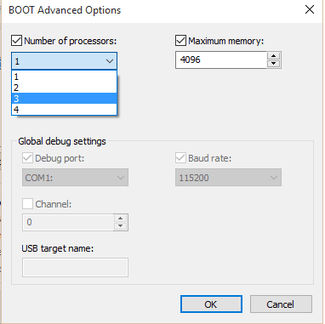
Step 8. Select Advanced options.
Step 9. Change the Number of processors to its maximum, for example, 4.
Step 10. Shutdown PC and boot it again to check if the machine starts faster than before.
Method 4: Use Group Policy Editor in Windows 10
This method will show you how to set fast startup in local group policy editor. Note: Group policy editor is not available in Windows 10 Home Edition.
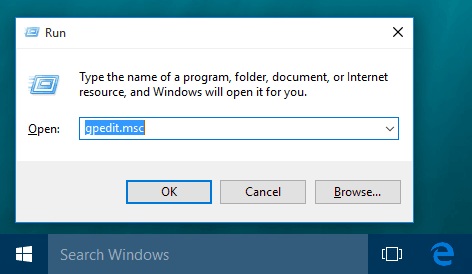
Step 1. Use Win + R and to open the Run.
Step 2. Type gpedit.msc.
Step 3. Press the Enter.
Step 4. Navigate to the Computer Configuration.
Step 5. Find teh Administrative Templates.
Step 6. Expand the System.
Step 7. Choose the Shutdown.
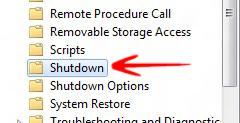
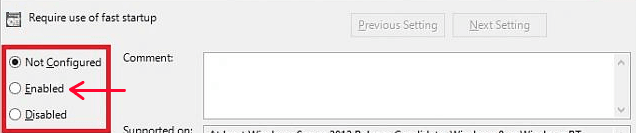
Step 8. Double click Require use of fast startup in the right hand pane
Step 9. Choose the Enable option.
Step 10. Click OK.
Have a try. You will find Dell XPS starts in an amazing speed after you set fast startup in local group policy editor.
Method 5: Repair Graphic Drivers on Your Dell XPS Device
The Fast Startup feature is based on the work-well graphic driver and power management driver. Those drivers incompatible with the feature result the slow boot of the PC.
A graphic driver issues on Dell XPS may be caused by the switch between the integrated graphics card and dedicated graphics card. So if you seldom play 3D games or run graphically intensive programs, you could disable the dedicated graphics card, and then repair the graphic drivers to resolve the Dell XPS startup problem. Following are the solutions:
First, you need to turn off automatic dedicated graphics driver installation in Windows 10. Here are the steps:
Step 1. Right click the Start.
Step 2. Select the System.
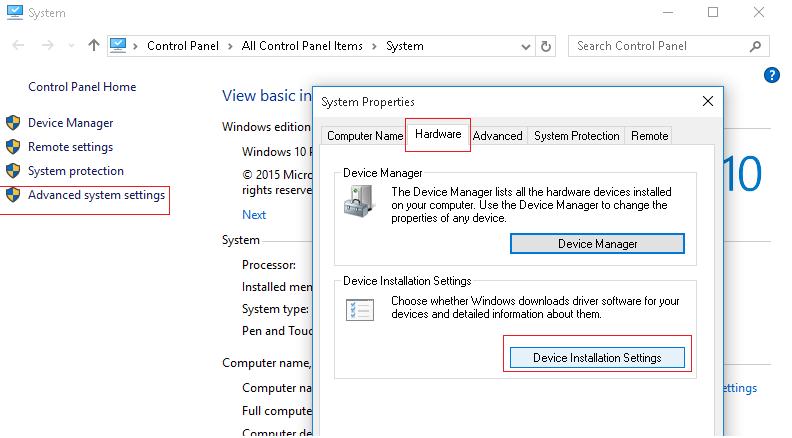
Step 3. Click the link Advanced system settings in the left column.
Step 4. Go to the Hardware tab from the pop-up box.
Step 5. Click the Device installation settings.
Step 6. Choose the No.
Step 7. Click the Save changes.
Step 8. Restart the Dell XPS device.
Then, use Driver Talent to repair the graphic driver issues. Driver Talent is a safe and professional driver manager which can help to find and fix all the incompatible, outdated or broken drivers on your Dell XPS. You could click the button below to download the Driver Talent directly.
Now follow the 3 easy steps below to resolve the issues:
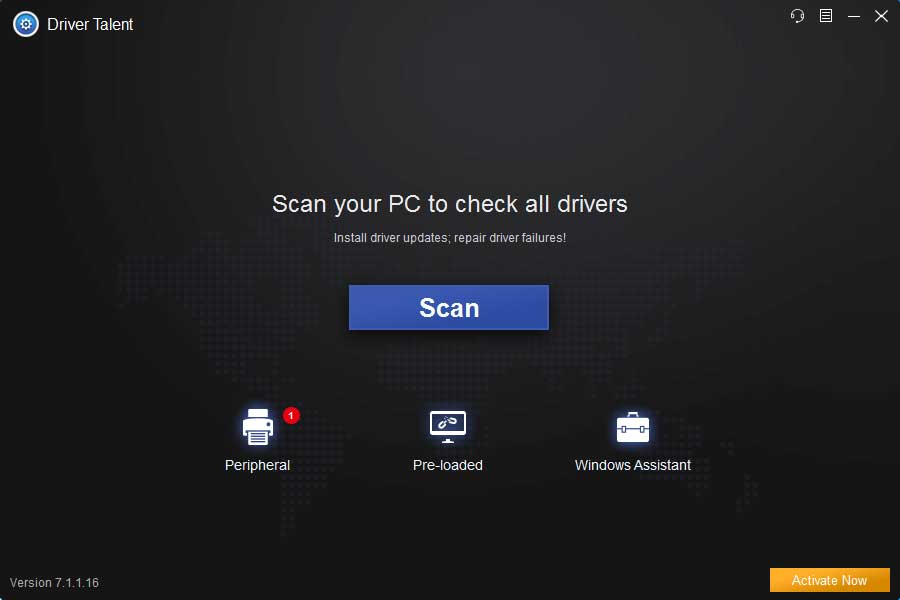
Step 1: Scan Your Dell XPS for Problematic Drivers
Click Scan. Driver Talent will find the incompatible graphics drivers on the Dell XPS device.
Step 2: Uninstall the Dedicated Graphics Driver
Click Uninstall menu and find the dedicated graphics driver, usually Nvidia or AMD, and then click the button Uninstall to remove the driver.
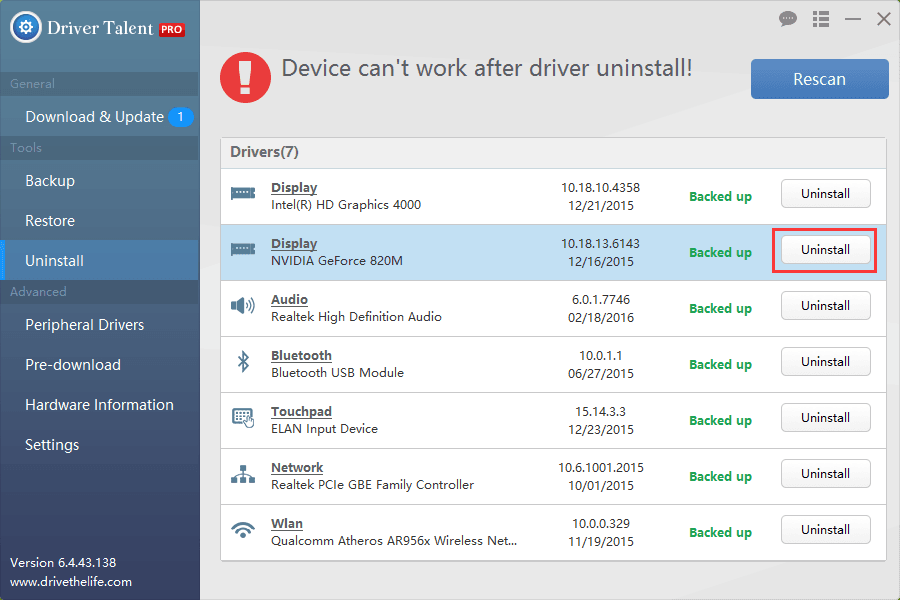
Note: Don’t miss-uninstall the integrated graphics driver, such as Intel(R) HD Graphics.
Step 3: Shutdown and Boot the PC
Dell XPS screen might be blank for a short period. Then Shutdown the machine and boot it again to check if the slow Dell XPS issue is repaired or not.
Note: It is recommended to back up all the drivers or create a system restore point with Driver Talent so that you could restore the drivers instantly if any unexpected driver crashes occur after the operation.
Read More:
Now the issue of Dell XPS slow boot has been solved.
If this article is useful, please share it with others. Please comment in the section below or click the LEFT MENU for more solutions if you still fail to fix the Dell XPS slow boot problem on your Fall Creators Update/Creators Update/Anniversary Update. If you have any other Windows 10-related issues, see Windows 10 Issues and Fix section.
Related Posts:
Fix Random/Auto Reboot after Windows 10 Fall Creators Update
Top 3 Ways to Fix Endless Reboot Loop after Windows 10 Update
How to Fix Windows 10 Startup Issue Caused by Driver Failure
How to Enter Safe Mode to Fix Windows 10 Boot Loop/Blue Screen/Black Screen
Top 4 Fixes for Windows 10 Boot Loop after Fall Creators Update Problem


